
Home >Web Front-end >PS Tutorial >Photoshop打造喷溅水墨效果
Photoshop打造喷溅水墨效果

- WBOYWBOYWBOYWBOYWBOYWBOYWBOYWBOYWBOYWBOYWBOYWBOYWBOriginal
- 2016-05-17 13:18:152059browse
用Photoshop软件如何打造喷溅水墨效果呢?教程很简单,利用笔刷跟剪切蒙版即可,具体请看下方详细介绍:

步骤
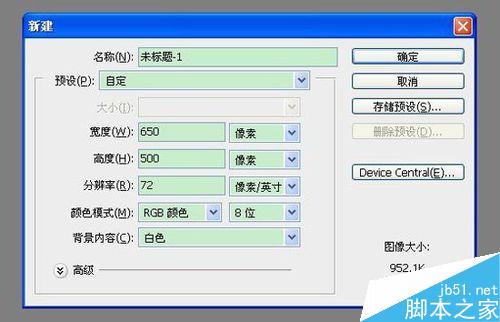
首先打开Photoshop软件,新建650x500像素图层,如下图:
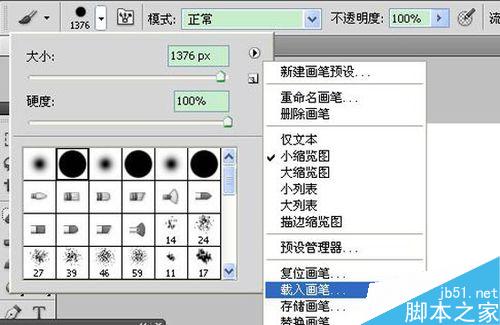
点击工具栏画笔工具,打开后点击下拉三角,找到“载入选区”,载入下载的喷墨笔刷,如下图:
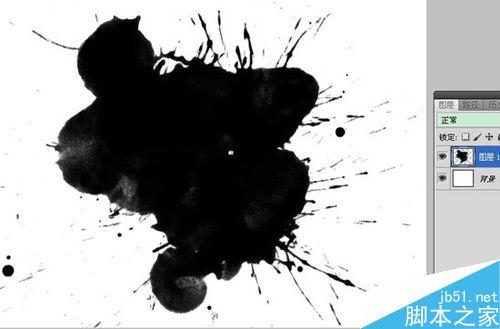
新建图层1,用选择喷墨笔刷,选择颜色黑色,点击两下!
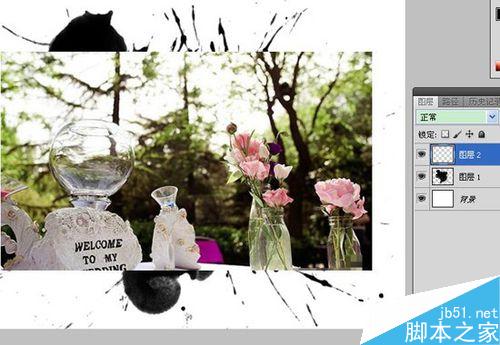
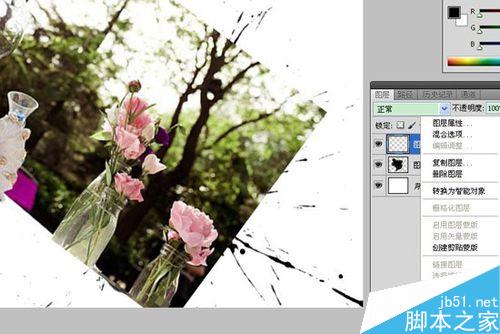
复制拉入需要制作喷墨素材图,然后调整下大小形状,右击创建剪切蒙板,如下图:
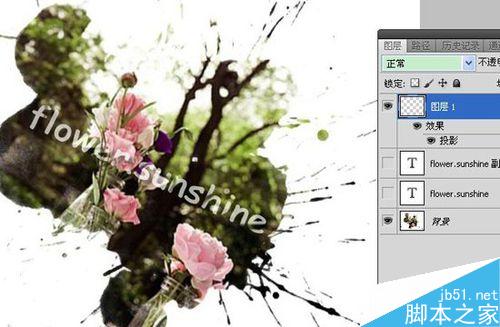
然后输入文字装饰下,调整大小,适当做些文字涂抹,遮挡,如下图:

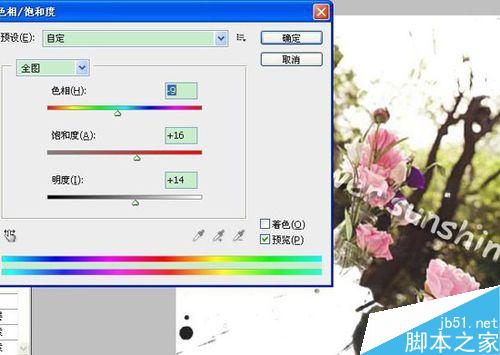
最后为整个图层调整下颜色,点击图像——调整——色相/饱和度,最后效果如下:

以上就是Photoshop打造喷溅水墨效果方法介绍,操作很简单的,大家学会了吗?喜欢的朋友快快来学习吧!
Statement:
The content of this article is voluntarily contributed by netizens, and the copyright belongs to the original author. This site does not assume corresponding legal responsibility. If you find any content suspected of plagiarism or infringement, please contact admin@php.cn
Previous article:ps快速将白色或其他颜色的背景图片变成透明背景Next article:PS制作可爱的大头头像效果