
Home >Web Front-end >JS Tutorial >How to apply swiper in projects
How to apply swiper in projects
- php中世界最好的语言Original
- 2018-06-15 11:15:092057browse
This time I will show you how to apply swiper in the project, and what are the precautions for applying swiper in the project. The following is a practical case, let's take a look.
First create a simple react-native project and create a folder. Then use the command line to enter
react-native init swiper
. After creating the development project, I use vs

to open the console and install the swiper dependency.
Installation: npm i react-native-swiper --save
View: npm view react-native-swiper
Delete: npm rm react-native-swiper --save
Here also Need to update the local dependency library under npm i
Start the app project
ios: react-native run-ios
android: react-native run-android
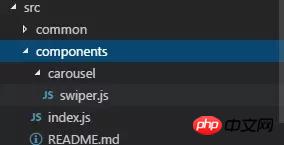
Start coding, create a components folder in src and create a swiper.js file under it, as well as index.js, and add the documentation
import PropTypes from 'prop-types';
import React, { Component } from 'react';
import { StyleSheet, TouchableWithoutFeedback, View } from 'react-native';
import RNSwiper from 'react-native-swiper';
const styles = StyleSheet.create({
activeDotWrapperStyle: {
//圆点样式
},
activeDotStyle: {
//圆点样式
},
dotStyle: {
//圆点样式
}
});
const activeDot = (
<View style={styles.activeDotWrapperStyle}>
<View style={styles.activeDotStyle} />
</View>
);
const dot = <View style={styles.dotStyle} />;
export class Carousel extends Component {
// Define component prop list
static propTypes = {
data: PropTypes.array,
height: PropTypes.number,
onPressItem: PropTypes.func,
renderItem: PropTypes.func.isRequired,
autoplay: PropTypes.bool,
autoplayTimeout: PropTypes.number
};
// Define props default value
static defaultProps = {
data: [],
height: 150,
autoplay: true,
autoplayTimeout: 2.5,
onPressItem: () => {},
renderItem: () => {}
};
// Define inner state
state = {
showSwiper: false
};
constructor(props) {
super(props);
this.handleItemPress = this.handleItemPress.bind(this);
}
componentDidMount() {
setTimeout(() => {
this.setState({ showSwiper: true });
});
}
handleItemPress(item) {
this.props.onPressItem(item);
}
_renderSwiperItem(item, index) {
return (
<TouchableWithoutFeedback key={index} onPress={() => this.handleItemPress(item)}>
<View style={[{ flex: 1 }]}>{this.props.renderItem(item)}</View>
</TouchableWithoutFeedback>
);
}
render() {
return this.props.data.length === 0 || !this.state.showSwiper ? null : (
<RNSwiper
height={this.props.height} //图片高度
activeDot={activeDot}
dot={dot}
style={{ backgroundColor: '#fff' }}
autoplay={this.props.autoplay} //是否自动轮播
autoplayTimeout={this.props.autoplayTimeout} //轮播秒数
>
{this.props.data.map((item, idx) => this._renderSwiperItem(item, idx))} //如果数据是个对象里面的数组加一个循环
</RNSwiper>
);
}
}
This is index.js File
import { Carousel } from './carousel/Carousel';
export { Carousel };
Public component library
This is used to place public components that have nothing to do with the business. Component implementation must consider flexibility and scalability, and cannot contain specific business logic.
The component must be prefixed by the name of the business you do, such as TryCarousel.js. Each component must be placed in a separate directory, and the directory must be all lowercase (separated by dashes), such as carousel/TryCarousel.js.
A basic component structure:
import PropTypes from 'prop-types';
import React, { Component } from 'react';
export class TryCarousel extends Component {
 // Define component prop list
 static propTypes = {};
 // Define props default value
 static defaultProps = {};
 // Define inner state
 state = {};
 constructor(props) {
  super(props);
 }
 // LifeCycle Hooks
 // Prototype Functions
 // Ensure the latest function is render
 render() {}
}
Component list
carousel (carousel component)
Mainly used for general image carousel, able to provide click event response.
Usage:
Props:
| Properties | Description | Type | Default value |
|---|---|---|---|
| Carousel data source | Array | - | |
| Height of Carousel | number | 150 | |
| Triggered when Carousel Item is clicked | fn | - | |
| For specific methods of rendering Item, please refer to FlatList | fn | - | |
| Whether to switch automatically | bool | true | |
| Item automatic switching time interval (unit s) | number | 2.5 |
import { HigoCarousel } from '../../components';
<Carousel
      data={} //接受的数据
      onPressItem={} //点击事件
      height={} //图片高度
      autoplay={} //是否自动播放
      autoplayTimeout={} //过渡时间
      renderItem={item => {
       return <Image source={{ uri: item.imageSource }} style={{ flex: 1 }} />;
      }} //图片
/>
I believe you have mastered the method after reading the case in this article. For more exciting information, please pay attention to other related articles on the php Chinese website! Recommended reading:
How to handle the dynamic parameter transfer of query in vue-router
How to operate nodejs to encrypt the password
The above is the detailed content of How to apply swiper in projects. For more information, please follow other related articles on the PHP Chinese website!
Related articles
See more- An in-depth analysis of the Bootstrap list group component
- Detailed explanation of JavaScript function currying
- Complete example of JS password generation and strength detection (with demo source code download)
- Angularjs integrates WeChat UI (weui)
- How to quickly switch between Traditional Chinese and Simplified Chinese with JavaScript and the trick for websites to support switching between Simplified and Traditional Chinese_javascript skills