Home >Web Front-end >JS Tutorial >Use Vue basics to create additions, deletions, modifications and queries
Use Vue basics to create additions, deletions, modifications and queries
- 亚连Original
- 2018-06-06 10:12:166899browse
This article mainly introduces the example code for creating a simple addition, deletion, modification and query starting from the basics of vue. Friends who need it can refer to it
1. Installationvue-cli cnpm install vue-cli - g --Perform global installation
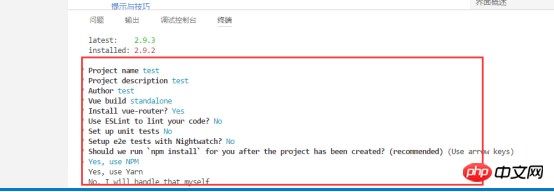
2. Create a webpack basic project; command: vue init webpack myproject;


The following is the directory structure and description of the project
Build is the webpack configuration
build.js // Production environment build code
check-versions.js // Check node&npm and other versions
utils.js // Build configuration utility tool
vue-loader.conf.js // vue loader
webpack.base.conf.js // webpack basic environment configuration
webpack.dev.conf.js // webpack development environment configuration
webpack.prod.conf.js // webpack production environment configuration
config——vue project configuration
dev.env.js // Development environment variables (see the meaning of the word)
index.js //Some configuration variables of the project
prod .env.js // Production environment variables
node_modules——[Dependent package]
src——[Project core file]
App.vue——Root component
Main.js——Entry file
Router——Routing configuration
static//Static files, such as some pictures, json data, etc.
editorconfig/ / Define code format
gitignore// File format that needs to be ignored for git upload
index.html//Homepage
package.json// Basic project information
README.md// Project description
3. Install element-ui command: npm i element-ui -S
Main.js needs to be configured
 import elementui from 'element-ui'
  import 'element-ui/lib/theme-chalk/index.css'
  Vue.use(elementui);
4 . Install axios command: npm i axios -S
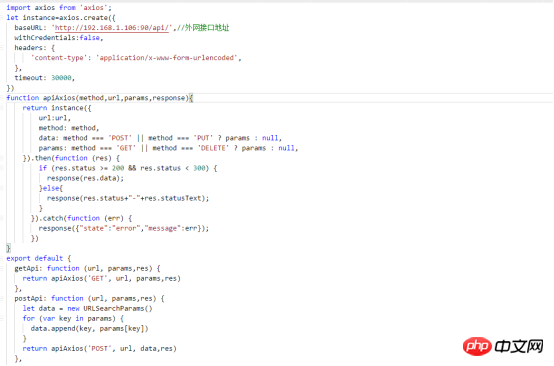
Create a new api.js file to configure the axios access interface. The configuration is as follows

Main.js is required Configuration
import Api from './api';
  Vue.prototype.$api=Api;
5. Create a new page Test/List.vue to perform add, delete, modify and check operations
Create a folder Test, create a new file List.vue, and configure it in the router:
 import List from '@/Test/List'
  {
  path: '/List',
  name: 'List',
  component: List
  }
7. Start access: npm run dev, access address #/List
Add search conditions

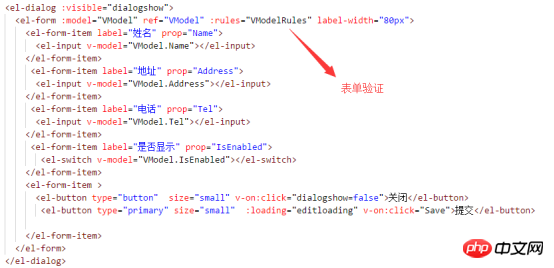
Add table display

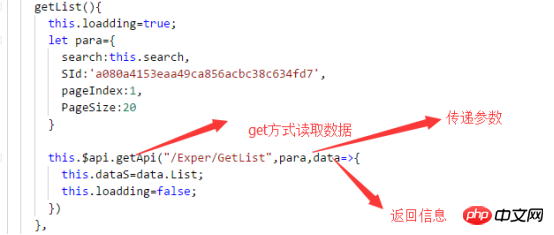
Define the corresponding parameters and methods


Solution to using axios express local request 404 under Vue 2.5.2
Use vue and react to Achieve expansion, collapse and other effects
How to implement webpack packaging optimization in vue
The above is the detailed content of Use Vue basics to create additions, deletions, modifications and queries. For more information, please follow other related articles on the PHP Chinese website!
Related articles
See more- An in-depth analysis of the Bootstrap list group component
- Detailed explanation of JavaScript function currying
- Complete example of JS password generation and strength detection (with demo source code download)
- Angularjs integrates WeChat UI (weui)
- How to quickly switch between Traditional Chinese and Simplified Chinese with JavaScript and the trick for websites to support switching between Simplified and Traditional Chinese_javascript skills

