Home >Web Front-end >JS Tutorial >How to use eventBus in vue to achieve communication between components at the same level
How to use eventBus in vue to achieve communication between components at the same level
- 亚连Original
- 2018-06-02 09:23:361954browse
This article mainly introduces vue's use of eventBus to achieve communication between components at the same level. Friends who need it can refer to it
Create a new vue instance for binding and sending scheduling events
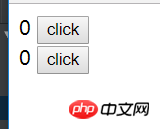
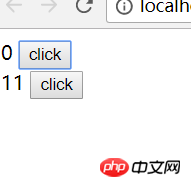
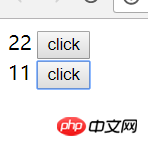
Components at the same level can communicate with each other and pass parameters. Clicking on the first component will modify the label value of the second component, and clicking on the second component will modify the label value of the second component


<!DOCTYPE html>
<html lang="en">
<head>
<meta charset="UTF-8">
<script src="vue.js"></script>
</head>
<body>
<p id="app">
<one></one>
<two></two>
</p>
</body>
<script>
// 使用一个vue实例 作为事件的载体,用于绑定事件和处理发送事件,作为调度中心
let eventBus = new Vue()
let one = {
template: '<p>{{val}} <button @click="click">click</button></p>',
data() {
return {
val: 0
}
},
created() {
//为one绑定事件,如果two_click事件发生了,则执行回调函数
eventBus.$on('two_click',
(val) => {
// 这个this 指的是one的vue实例
this.val = val
}
)
},
methods: {
click() {
// 如果one被点击了,则发送一个one_click的事件,并传递一个参数
eventBus.$emit('one_click', 11)
}
}
}
let two = {
template: '<p>{{val}} <button @click="click">click</button></p>',
data() {
return {
val: 0
}
},
created() {
eventBus.$on('one_click',
(val) => {
this.val = val
})
},
methods: {
click() {
eventBus.$emit('two_click', 22)
}
}
}
new Vue({
el: '#app',
components: {
one,
two
}
})
</script>
</html>The above is what I compiled for everyone. I hope it will be helpful to everyone in the future.
Related articles:
React component project (detailed tutorial)
About Vue component development skills (detailed tutorial)
Detailed explanation of javascript module loader through code examples
The above is the detailed content of How to use eventBus in vue to achieve communication between components at the same level. For more information, please follow other related articles on the PHP Chinese website!
Related articles
See more- An in-depth analysis of the Bootstrap list group component
- Detailed explanation of JavaScript function currying
- Complete example of JS password generation and strength detection (with demo source code download)
- Angularjs integrates WeChat UI (weui)
- How to quickly switch between Traditional Chinese and Simplified Chinese with JavaScript and the trick for websites to support switching between Simplified and Traditional Chinese_javascript skills

