Home >Web Front-end >JS Tutorial >How to use vue to crop images while enlarging, reducing, and rotating them (detailed tutorial)
How to use vue to crop images while enlarging, reducing, and rotating them (detailed tutorial)
- 亚连Original
- 2018-06-02 09:16:065158browse
This article mainly introduces how vue can crop images while enlarging, reducing, and rotating functions. Now I share it with you and give it as a reference.
This article mainly introduces vue to realize cropping pictures while enlarging, reducing, and rotating functions. I would like to share them with you. The details are as follows:
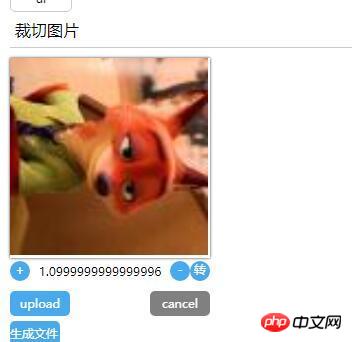
Achievement effect:
Crop the picture within the specified area
Rotate the picture
Enlarge the picture
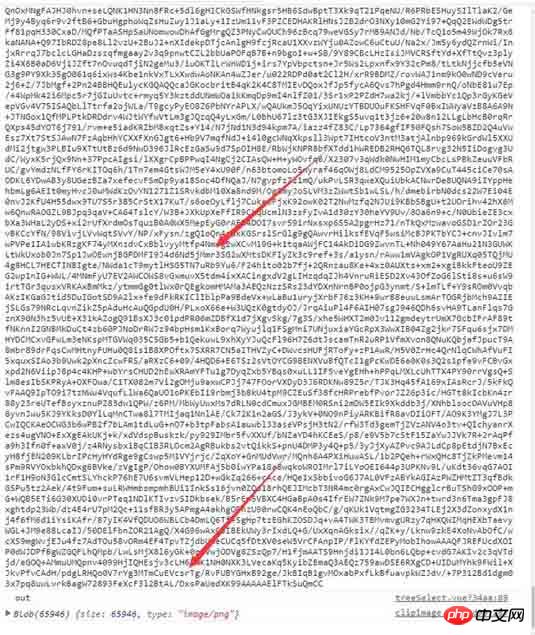
Output bolb format data is provided to the formData object
Rendering


#General principle:
Use the h5 FileReader object to obtain 904906bb44f584d8dd536d0c81c60fbd "File uploaded to the browser", the file format is base64 format, assign base64 to the canvas context.- Mount the mousemove event of the window object ---> Get the mouse movement x, y distance to operate the image in the canvas Position moves.
- Mount the mouseup event of the window object and clear the binding of the mousemove event. (At the same time, the event will be deleted after it is triggered)
Code
dom.jsexport const on = ({el, type, fn}) => {
if (typeof window) {
if (window.addEventListener) {
el.addEventListener(type, fn, false)
} else {
el.attachEvent(`on${type}`, fn)
}
}
}
export const off = ({el, type, fn}) => {
if (typeof window) {
if (window.addEventListener) {
el.removeEventListener(type, fn)
} else {
el.detachEvent(`on${type}`, fn)
}
}
}
export const once = ({el, type, fn}) => {
const hyFn = (event) => {
try {
fn(event)
}
finally {
off({el, type, fn: hyFn})
}
}
on({el, type, fn: hyFn})
}
// 最后一个
export const fbTwice = ({fn, time = 300}) => {
let [cTime, k] = [null, null]
// 获取当前时间
const getTime = () => new Date().getTime()
// 混合函数
const hyFn = () => {
const ags = argments
return () => {
clearTimeout(k)
k = cTime = null
fn(...ags)
}
}
return () => {
if (cTime == null) {
k = setTimeout(hyFn(...arguments), time)
cTime = getTime()
} else {
if ( getTime() - cTime < 0) {
// 清除之前的函数堆 ---- 重新记录
clearTimeout(k)
k = null
cTime = getTime()
k = setTimeout(hyFn(...arguments), time)
}
}}
}
export const contains = function(parentNode, childNode) {
if (parentNode.contains) {
return parentNode != childNode && parentNode.contains(childNode)
} else {
return !!(parentNode.compareDocumentPosition(childNode) & 16)
}
}
export const addClass = function (el, className) {
if (typeof el !== "object") {
console.log('el is not elem')
return null
}
let classList = el['className']
classList = classList === '' ? [] : classList.split(/\s+/)
if (classList.indexOf(className) === -1) {
classList.push(className)
el.className = classList.join(' ')
} else {
console.warn('warn className current')
}
}
export const removeClass = function (el, className) {
let classList = el['className']
classList = classList === '' ? [] : classList.split(/\s+/)
classList = classList.filter(item => {
return item !== className
})
el.className = classList.join(' ')
}
export const delay = ({fn, time}) => {
let oT = null
let k = null
return () => {
// 当前时间
let cT = new Date().getTime()
const fixFn = () => {
k = oT = null
fn()
}
if (k === null) {
oT = cT
k = setTimeout(fixFn, time)
return
}
if (cT - oT < time) {
oT = cT
clearTimeout(k)
k = setTimeout(fixFn, time)
}
}
}
export const Event = function () {
// 类型
this.typeList = {}
}
Event.prototype.on = function ({type, fn}){
if (this.typeList.hasOwnProperty(type)) {
this.typeList[type].push(fn)
} else {
this.typeList[type] = []
this.typeList[type].push(fn)
}
}
Event.prototype.off = function({type, fn}) {
if (this.typeList.hasOwnProperty(type)) {
let list = this.typeList[type]
let index = list.indexOf(fn)
if (index !== -1 ) {
list.splice(index, 1)
}
} else {
console.warn('not has this type')
}
}
Event.prototype.once = function ({type, fn}) {
const fixFn = () => {
fn()
this.off({type, fn: fixFn})
}
this.on({type, fn: fixFn})
}
Event.prototype.trigger = function (type){
if (this.typeList.hasOwnProperty(type)) {
this.typeList[type].forEach(fn => {
fn()
})
}
}
Component template
<template>
<p class="jc-clip-image" :style="{width: `${clip.width}`}">
<canvas ref="ctx"
:width="clip.width"
:height="clip.height"
@mousedown="handleClip($event)"
>
</canvas>
<input type="file" ref="file" @change="readFileMsg($event)">
<p class="clip-scale-btn">
<a class="add" @click="handleScale(false)">+</a>
<a @click="rotate" class="right-rotate">转</a>
<a class="poor" @click="handleScale(true)">-</a>
<span>{{scale}}</span>
</p>
<p class="upload-warp">
<a class="upload-btn" @click="dispatchUpload($event)">upload</a>
<a class="upload-cancel">cancel</a>
</p>
<p class="create-canvas">
<a class="to-send-file" @click="outFile" title="请打开控制台">生成文件</a>
</p>
</p>
</template>
<script>
import {on, off, once} from '../../utils/dom'
export default {
ctx: null,
file: null,
x: 0, // 点击canvas x 鼠标地址
y: 0,// 点击canvas y 鼠标地址
xV: 0, // 鼠标移动 x距离
yV: 0, // 鼠标移动 y距离
nX: 0, // 原始坐标点 图像 x
nY: 0,// 原始坐标点 图像 y
img: null,
props: {
src: {
type: String,
default: null
},
clip: {
type: Object,
default () {
return {width: '200px', height: '200px'}
}
}
},
data () {
return {
isShow: false,
base64: null,
scale: 1.5, //放大比例
deg: 0 //旋转角度
}
},
computed: {
width () {
const {clip} = this
return parseFloat(clip.width.replace('px', ''))
},
height () {
const {clip} = this
return parseFloat(clip.height.replace('px', ''))
}
},
mounted () {
const {$options, $refs, width, height} = this
// 初始化 canvas file nX nY
Object.assign($options, {
ctx: $refs.ctx.getContext('2d'),
file: $refs.file,
nX: -width / 2,
nY: -height / 2
})
},
methods: {
// 旋转操作
rotate () {
const {$options, draw} = this
this.deg = (this.deg + Math.PI /2)% (Math.PI * 2)
draw($options.img, $options.nX + $options.xV, $options.nY + $options.yV, this.scale, this.deg)
},
// 处理放大
handleScale (flag) {
const {$options, draw, deg} = this
flag && this.scale > 0.1 && (this.scale = this.scale - 0.1)
!flag && this.scale < 1.9 && (this.scale = this.scale + 0.1)
$options.img && draw($options.img, $options.nX + $options.xV, $options.nY + $options.yV, this.scale, deg)
},
// 模拟file 点击事件
dispatchUpload (e) {
this.clearState()
const {file} = this.$options
e.preventDefault()
file.click()
},
// 读取 input file 信息
readFileMsg () {
const {file} = this.$options
const {draw, createImage, $options: {nX, nY}, scale, deg} = this
const wFile = file.files[0]
const reader = new FileReader()
reader.onload = (e) => {
const img = createImage(e.target.result, (img) => {
draw(img, nX, nY, scale, deg)
})
file.value = null
}
reader.readAsDataURL(wFile)
},
// 生成 图像
createImage (src, cb) {
const img = new Image()
this.$el.append(img)
img.className = 'base64-hidden'
img.onload = () => {
cb(img)
}
img.src = src
this.$options.img = img
},
// 操作画布画图
draw (img, x = 0, y = 0, scale = 0.5,deg = Math.PI ) {
const {ctx} = this.$options
let {width, height} = this
// 图片尺寸
let imgW = img.offsetWidth
let imgH = img.offsetHeight
ctx.save()
ctx.clearRect( 0, 0, width, height)
ctx.translate( width / 2, height / 2, img)
ctx.rotate(deg)
ctx.drawImage(img, x, y, imgW * scale, imgH * scale)
ctx.restore()
},
// ... 事件绑定
handleClip (e) {
const {handleMove, $options, deg} = this
if (!$options.img) {
return
}
Object.assign(this.$options, {
x: e.screenX,
y: e.screenY
})
on({
el: window,
type: 'mousemove',
fn: handleMove
})
once({
el: window,
type: 'mouseup',
fn: (e) =>{
console.log('down')
switch (deg) {
case 0: {
Object.assign($options, {
nX: $options.nX + $options.xV,
nY: $options.nY + $options.yV,
xV: 0,
yV: 0
})
break;
}
case Math.PI / 2: {
Object.assign($options, {
nX: $options.nY + $options.yV,
nY: $options.nX - $options.xV,
xV: 0,
yV: 0
})
break;
}
case Math.PI: {
Object.assign($options, {
nX: $options.nX - $options.xV,
nY: $options.nY - $options.yV,
xV: 0,
yV: 0
})
break;
}
default: {
// $options.nY - $options.yV, $options.nX + $options.xV
Object.assign($options, {
nX: $options.nY - $options.yV,
nY: $options.nX + $options.xV,
xV: 0,
yV: 0
})
}
}
off({
el: window,
type: 'mousemove',
fn: handleMove
})
}
})
},
// ... 处理鼠标移动
handleMove (e){
e.preventDefault()
e.stopPropagation()
const {$options, draw, scale, deg} = this
Object.assign($options, {
xV: e.screenX - $options.x,
yV: e.screenY - $options.y
})
switch (deg) {
case 0: {
draw($options.img, $options.nX + $options.xV, $options.nY + $options.yV, scale, deg)
break;
}
case Math.PI / 2: {
draw($options.img, $options.nY + $options.yV, $options.nX - $options.xV, scale, deg)
break;
}
case Math.PI: {
draw($options.img, $options.nX - $options.xV, $options.nY - $options.yV, scale, deg)
break;
}
default: {
draw($options.img, $options.nY - $options.yV, $options.nX + $options.xV, scale, deg)
break;
}
}
},
// 清除状态
clearState () {
const {$options, width, height} = this
if ($options.img) {
this.$el.removeChild($options.img)
Object.assign($options, {
x: 0,
y: 0,
xV: 0,
yV: 0,
nX: -width / 2,
nY: -height / 2,
img: null,
})
}
},
// 输出文件
outFile () {
const {$refs: {ctx}} = this
console.log(ctx.toDataURL())
ctx.toBlob((blob) => {console.log(blob)})
}
}
}
</script>
<style>
@component-namespace jc {
@component clip-image{
position: relative;
width: 100%;
canvas {
position: relative;
width: 100%;
height: 100%;
cursor: pointer;
box-shadow: 0 0 3px #333;
}
input {
display: none;
}
.base64-hidden {
position: absolute;
top: 0;
left: 0;
display: block;
width: 100%;
height: auto;
z-index: -999;
opacity: 0;
}
.clip-scale-btn {
position: relative;
@utils-clearfix;
margin-bottom: 5px;
text-align: center;
a {
float: left;
width: 20px;
height: 20px;
border-radius: 50%;
color: #fff;
background: #49a9ee;
text-align: center;
cursor: pointer;
}
&>.poor, &>.right-rotate {
float: right;
}
&>span{
position: absolute;
z-index: -9;
top: 0;
left: 0;
display: block;
position: relative;
width: 100%;
text-align: center;
height: 20px;
line-height: 20px;
}
}
.upload-warp {
@utils-clearfix;
.upload-btn,.upload-cancel {
float: left;
display:inline-block;
width: 60px;
height: 25px;
line-height: 25px;
color: #fff;
border-radius: 5px;
background: #49a9ee;
box-shadow: 0 0 0 #333;
text-align: center;
top: 0;
left: 0;
right: 0;
bottom: 0;
margin: auto;
cursor: pointer;
margin-top: 5px;
}
.upload-cancel{
background: gray;
float: right;
}
}
.to-send-file {
margin-top: 5px;
display: block;
width: 50px;
height: 25px;
line-height: 25px;
color: #fff;
border-radius: 5px;
background: #49a9ee;
cursor: pointer;
}
}
The above is what I compiled for everyone. I hope it will be helpful to everyone in the future. Related articles:
How to implement image scrolling using vue?
js implements the method of operating binary data
Use the swiper component in vue2.0 to implement carousel (detailed tutorial)
The above is the detailed content of How to use vue to crop images while enlarging, reducing, and rotating them (detailed tutorial). For more information, please follow other related articles on the PHP Chinese website!
Related articles
See more- An in-depth analysis of the Bootstrap list group component
- Detailed explanation of JavaScript function currying
- Complete example of JS password generation and strength detection (with demo source code download)
- Angularjs integrates WeChat UI (weui)
- How to quickly switch between Traditional Chinese and Simplified Chinese with JavaScript and the trick for websites to support switching between Simplified and Traditional Chinese_javascript skills

