Home >Web Front-end >JS Tutorial >Example of a simple JS method to obtain and modify the content of the input text box
Example of a simple JS method to obtain and modify the content of the input text box
- 亚连Original
- 2018-05-26 10:05:542369browse
This article mainly introduces the method of JS to simply obtain and modify the content of the input text box, and analyzes JavaScript's related operation techniques for obtaining and assigning page elements in the form of examples. Friends in need can refer to it
The example in this article describes how to simply obtain and modify the content of the input text box using JS. Share it with everyone for your reference, the details are as follows:
1 Introduction
To get the text box and modify its content, you can use getElementById( ) method to achieve.
getElementById()The method can get the HTML tag by the specified id and return it.
Syntax:
sElement=document.getElementById(id)
sElement: Used to receive an object returned by this method.
id: Used to set the id value that needs to be obtained from the HTML tag.
Second Application
Get the text box and modify its content
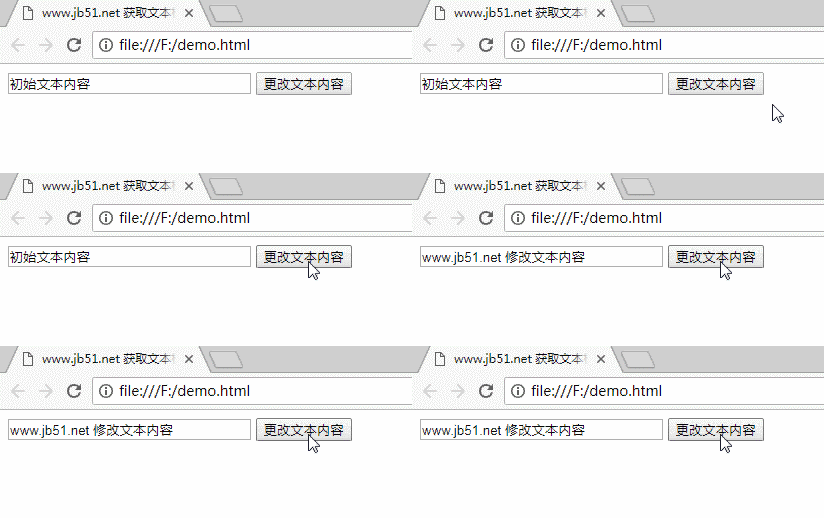
It will be displayed in the text box after the page is loaded "Initial text content", the content in the text box will be changed when the button is clicked.
Three codes
<html xmlns="http://www.w3.org/1999/xhtml">
<head>
<meta http-equiv="Content-Type" content="text/html; charset=utf-8" />
<title>www.jb51.net 获取文本框并修改其内容</title>
</head>
<body>
<script language="javascript">
 <!--
 function c1()
 {
 var t=document.getElementById("txt");
 t.value="www.jb51.net 修改文本内容"
 }
 -->
</script>
<input type="text" id="txt" value="初始文本内容" size="30"/>
<input type="button" value="更改文本内容" name="btn" onclick="c1();" />
</body>
</html>
Four running results

The above is what I compiled for everyone. I hope it will be helpful to everyone in the future.
Related articles:
Server-side configuration to implement AJAX cross-domain requests
Ajax get request cache processing solution
Zero-based learning of AJAX to create automatic verification forms
The above is the detailed content of Example of a simple JS method to obtain and modify the content of the input text box. For more information, please follow other related articles on the PHP Chinese website!
Related articles
See more- An in-depth analysis of the Bootstrap list group component
- Detailed explanation of JavaScript function currying
- Complete example of JS password generation and strength detection (with demo source code download)
- Angularjs integrates WeChat UI (weui)
- How to quickly switch between Traditional Chinese and Simplified Chinese with JavaScript and the trick for websites to support switching between Simplified and Traditional Chinese_javascript skills

