Home >Web Front-end >JS Tutorial >Detailed explanation of the steps to configure different interface addresses in vue axios production environment and release environment
Detailed explanation of the steps to configure different interface addresses in vue axios production environment and release environment
- php中世界最好的语言Original
- 2018-05-23 10:53:525416browse
This time I will bring you a detailed explanation of the steps for configuring different interface addresses between the vue axios production environment and the release environment. What are the precautions for configuring different interfaces between the vue axios production environment and the release environment? The following is a practical case. Let’s take a look.
This project is a project built by vue-cliFramework, which introduces axios for data requests. Configure different interface addresses, (first make sure axios has been integrated. If you have questions about integrating axios, you can refer to my vue-cli introduction to axios) The operations are as follows
1. Set different interface addresses
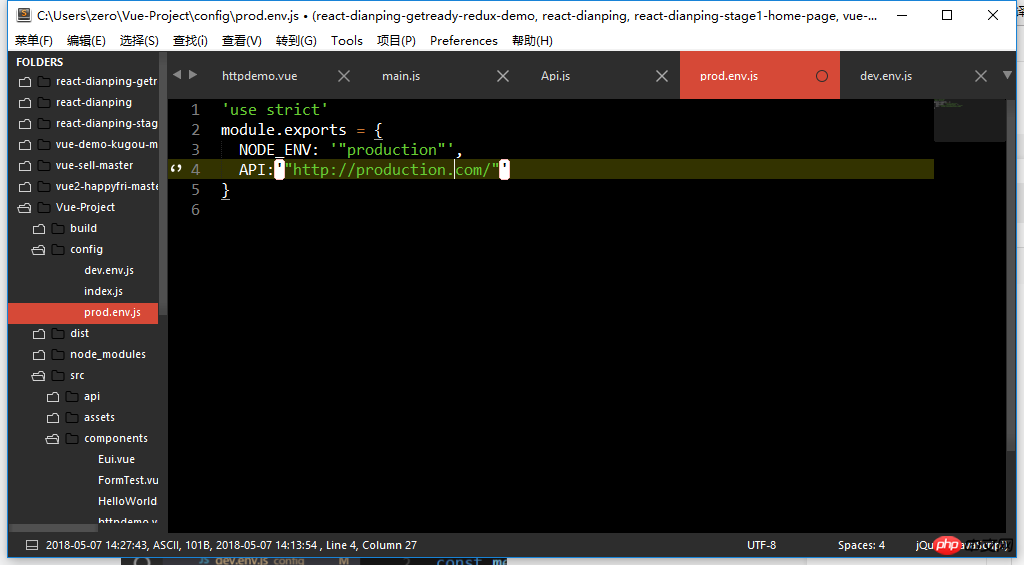
Find the following file
/config/dev.env.js
/config/prod.env After .js
, add the interface address domain name configuration. The added file content is as follows


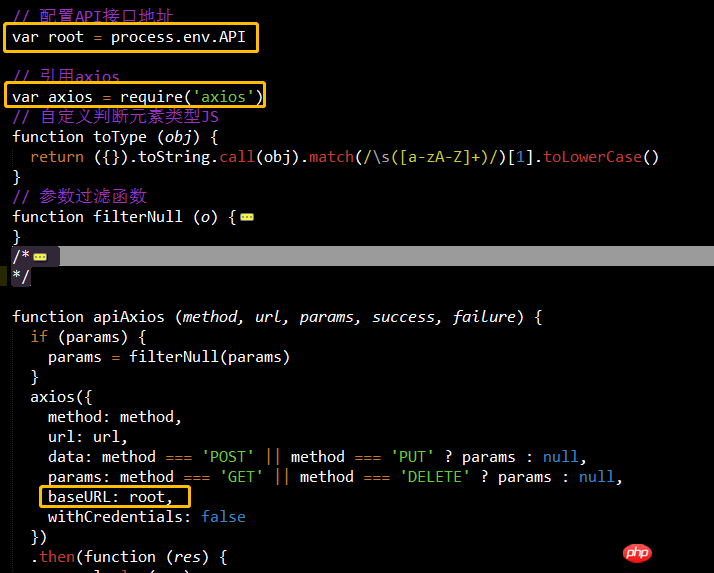
# #2. In the axios file you re-encapsulated (api/api.js), splice the configured interface address as baseURL into the interface path

// 配置API接口地址
var root = process.env.API
// 引用axios
var axios = require('axios')
// 自定义判断元素类型JS
function toType (obj) {
 return ({}).toString.call(obj).match(/\s([a-zA-Z]+)/)[1].toLowerCase()
}
// 参数过滤函数
function filterNull (o) {
 for (var key in o) {
 if (o[key] === null) {
  delete o[key]
 }
 if (toType(o[key]) === 'string') {
  o[key] = o[key].trim()
 } else if (toType(o[key]) === 'object') {
  o[key] = filterNull(o[key])
 } else if (toType(o[key]) === 'array') {
  o[key] = filterNull(o[key])
 }
 }
 return o
}
function apiAxios (method, url, params, success, failure) {
 if (params) {
 params = filterNull(params)
 }
 axios({
 method: method,
 url: url,
 data: method === 'POST' ? params : null,
 params: method === 'GET' ? params : null,
 baseURL: root,
 withCredentials: false
 })
 .then(function (res) {
 console.log(res);
 return;
 if (res.data.success === true) {
  if (success) {
  success(res.data)
  }
 } else {
  if (failure) {
  failure(res.data)
  } else {
  window.alert('error: ' + JSON.stringify(res.data))
  }
 }
 })
 .catch(function (err) {
 let res = err.response
 if (err) {
  window.alert('api error, HTTP CODE: ' + res.status)
  return
 }
 })
}
// 返回在vue模板中的调用接口
export default {
 get: function (url, params, success, failure) {
 return apiAxios('GET', url, params, success, failure)
 },
 post: function (url, params, success, failure) {
 return apiAxios('POST', url, params, success, failure)
 }
}
3. Modify main.js, Introduce your own repackaged axios file (api/api.js). The modified file is as shown below

4. Call it on the page and test whether it takes effect. After the development environment is adjusted, check whether the official environment also takes effect after building.
Directly call the ajax requestexport default {
created(){
this.$http.post('Web/test',null, res => {
console.log(res)
})
}
} I believe you have mastered the method after reading the case in this article. For more exciting information, please pay attention to other related articles on the php Chinese website! Recommended reading:
Detailed explanation of the steps for JS to call the local camera function
JS steps to implement json object array sorting by object properties Detailed explanation
The above is the detailed content of Detailed explanation of the steps to configure different interface addresses in vue axios production environment and release environment. For more information, please follow other related articles on the PHP Chinese website!
Related articles
See more- An in-depth analysis of the Bootstrap list group component
- Detailed explanation of JavaScript function currying
- Complete example of JS password generation and strength detection (with demo source code download)
- Angularjs integrates WeChat UI (weui)
- How to quickly switch between Traditional Chinese and Simplified Chinese with JavaScript and the trick for websites to support switching between Simplified and Traditional Chinese_javascript skills

