Home >Web Front-end >JS Tutorial >Angular CLI blueprint generation code
Angular CLI blueprint generation code
- php中世界最好的语言Original
- 2018-05-03 14:35:361513browse
This time I will bring you the Angular CLI blueprint generation code. What are the precautions for the Angular CLI blueprint generation code? The following is a practical case, let's take a look.
This article mainly talks about generating Components, Directive, Service, class, interface, enum, etc.
ng generate
The format of this command is ng generate
You can also use the --dry-run parameter to list the generated file, rather than actually generating it.
For example:
ng generate component person, will generate a person.component.ts.
ng generate service sales-data A sales-data.service.ts will be generated.
ng generate class user-model will generate a user-model.ts which contains the UserModel class.
Components.
ng generate xxx xxx command is still a bit long, here angular cli has built-in aliases for the command, for example:
ng generate component person this command,
inside generate can be replaced by the letter g, and the component in
can be replaced by the letter c.
So these two commands are equal:
ng generate component person
ng g c person
You can go here to view the component related Commands and aliases:
https://github.com/angular/angular-cli/wiki/generate-component
Possibly commonly used command parameters are:
--flat indicates whether there is no need to create a folder
--inline-template (-it) whether the template should be placed in the ts file
--inline-style (-is) Whether the style should be placed in the ts file.
--spec Whether it is necessary to create a spec file (Test file)
--view-encapsulation (-ve) View Encapsulation strategy (simply understood as the scope strategy of the style file).
--change-detection (-cd) Change detection strategy.
--prefix Set the prefix of this component
-- dry-run (-d), prints out the generated file list instead of directly generating it.
Look at the following two pairs of commands with the same effect, it is more convenient to use aliases:
ng generate component person
ng generate component person --inline-template --inline-style
ng g c person
ng g c person -it -is
Let’s try these commands:
Build the project: ng new my-app Wait for npm install to complete before proceeding.
After establishing the project, enter the directory and execute the command :
ng g c person -d

This command will generate the above 4 files and updateapp.module.ts.
Next, remove the -d parameter and generate the file:
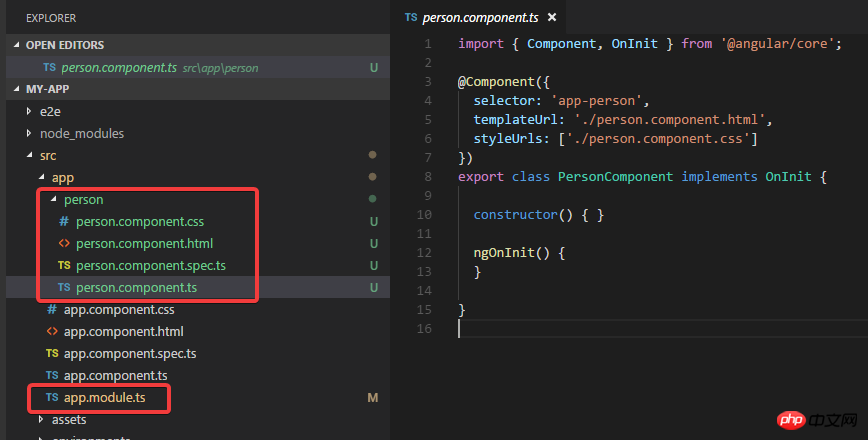
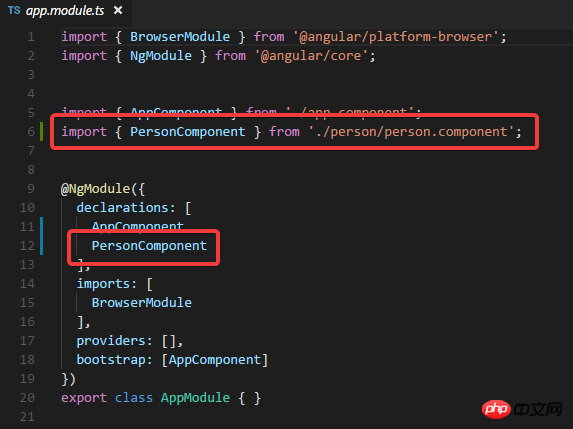
You can see that the file is generated in the project. And updated app.module.ts, made a component declaration in it.
Try to generate another component again, using some parameters View Encapsulation and Change Detection Strategy:
ng g c student -ve Emulated -cd OnPush
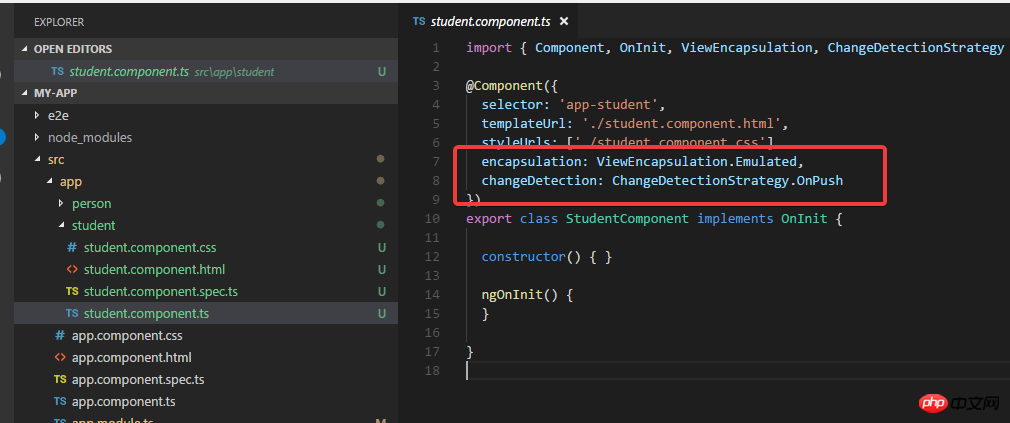
You can see that the parameters have taken effect.
Through the source code management page, you can see what updates these two commands have made to app.module:
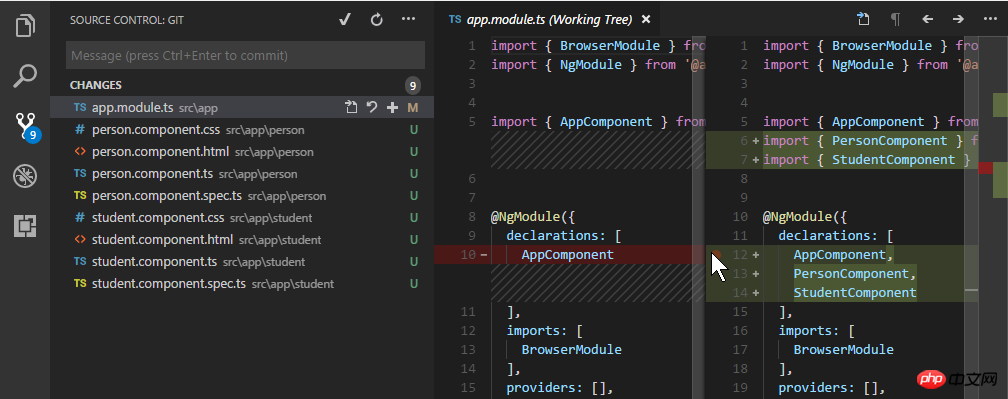
Declare the two generated components respectively.
Then I commit..
Directive.
ng g d filter-box -d

This is the file report, the actual generation below:
ng g d filter-box
通过vscode的源码管理, 可以看到变化:

directive生成了两个文件和component一样, 也在app.module进行了声明.
看一下目录结构:
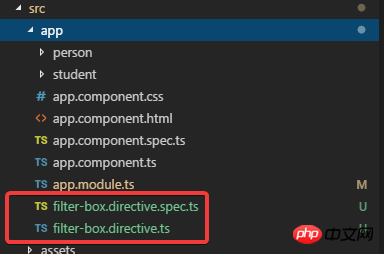
生成的directive的结构是没有目录, 也就是flat的.
如果不想生成flat样式的, 想让其拥有自己的文件夹, 那么就是用--flat参数:
ng g d filter-box2 --flat false

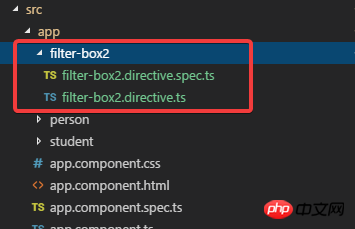
这样就有自己的文件夹了.
commit一下.
Service.
ng g s order-data -d

可以看到 这个命令会生成flat结构的service.
然后把-d去掉, 真实生成文件:
ng g s order-data

可以从源码管理看到, 只生成了两个文件, 并没有在app.module里面注册:
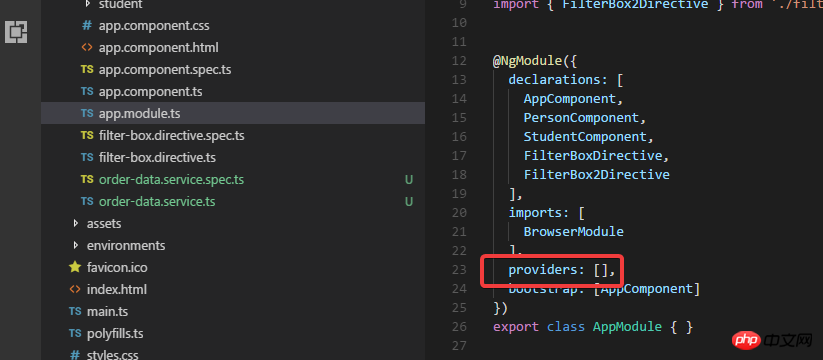
当然可以在这里写代码把刚才生成的service注册进去.
但是正确的做法是使用 -m 参数来指定需要注册的module:
ng g s order-data2 -m app


这次生成的order-data2 service就会在app.module.ts里面进行注册了.
然后再commit一下.
Model/Interface/Enum/Pipe.
model:
ng g cl models/user
这个命令会创建models文件夹, 然后在里面创建user这个model:

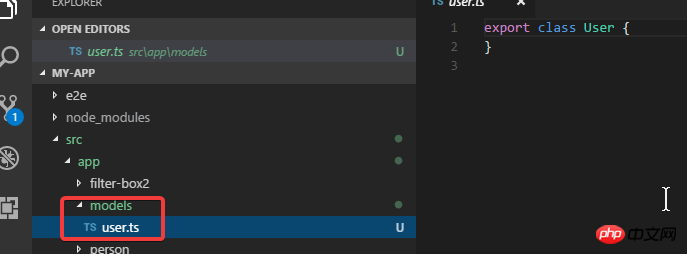
interface:
ng g i models/animal
enum:
ng g e models/gender
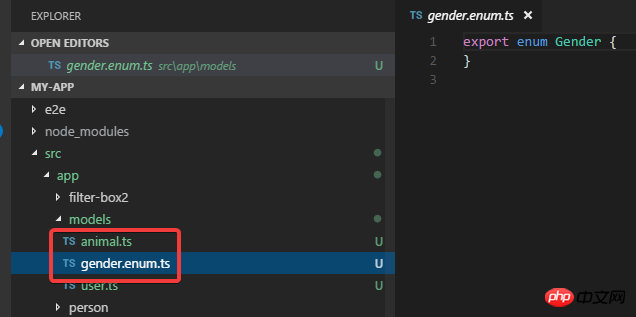
commit一下.
Pipe.
ng g p camel-case

除了生成两个文件之外, 这个命令默认也会更新app.module.
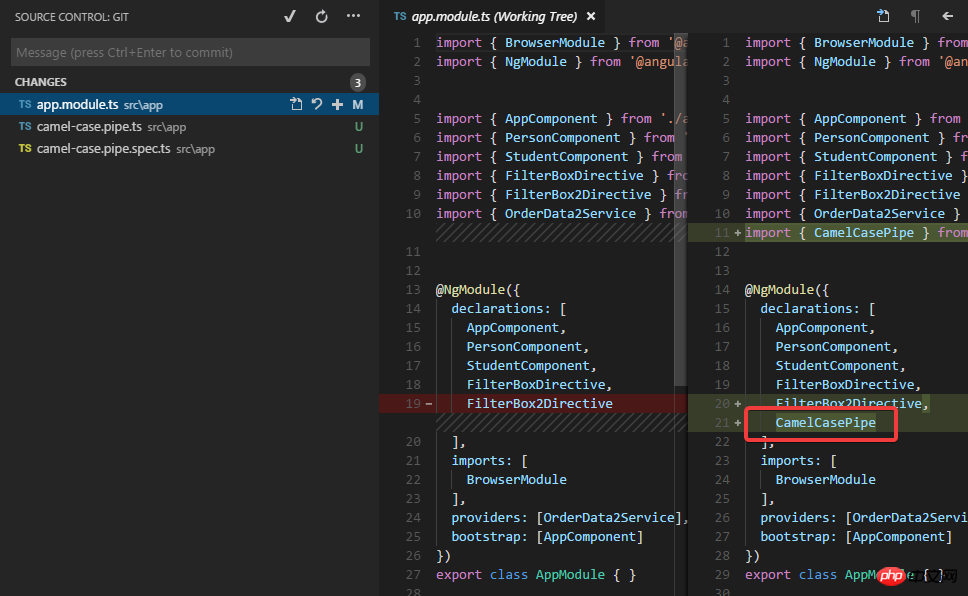
Module.
ng g m login


可以看到module默认是自带文件夹的.
然后我试试添加一个component, 目的是要在login module进行声明:

可以看到我要创建的welcome component默认是在app.module里面进行声明的, 这时候如果想要在login module进行声明, 就要使用 -m 参数:

去掉-d执行生成命令后:

You can see the declaration of the welcome component in the login module this time.
I believe you have mastered the method after reading the case in this article. For more exciting information, please pay attention to php Chinese Other related articles online!
Recommended reading:
Detailed explanation of unit testing and E2E testing steps with Angular CLI
##JS implements mouse-triggered floating layer effect
The above is the detailed content of Angular CLI blueprint generation code. For more information, please follow other related articles on the PHP Chinese website!
Related articles
See more- An in-depth analysis of the Bootstrap list group component
- Detailed explanation of JavaScript function currying
- Complete example of JS password generation and strength detection (with demo source code download)
- Angularjs integrates WeChat UI (weui)
- How to quickly switch between Traditional Chinese and Simplified Chinese with JavaScript and the trick for websites to support switching between Simplified and Traditional Chinese_javascript skills

