
Home >Web Front-end >JS Tutorial >Detailed explanation of steps to build ReactApp with webpack
Detailed explanation of steps to build ReactApp with webpack
- php中世界最好的语言Original
- 2018-04-28 15:32:311548browse
This time I will bring you a detailed explanation of the steps to build ReactApp with webpack. What are the precautions for building ReactApp with webpack? Here are practical cases, let’s take a look.
npm install -g create-react-app
create-react-app my-app
cd my-app
npm start
Using Taobao NPM image
Using React and Webpack requires installing a lot of dependency packages. Without an agent, the speed will be very slow and very slow. It is easy to make mistakes, so it is recommended to use Taobao's npm image to install, the speed is very ideal. It only takes two steps to install the npm package using Taobao mirror: Install cnpmnpm install -g cnpm --registry=https://registry.npm.taobao.orgUse cnpm to install the packageJust replace npm Become cnpm to get high-speed downloads.
cnpm install [name]All the commands for installing dependent packages given below are installed using cnpm. You can also use npm.
Start the first React
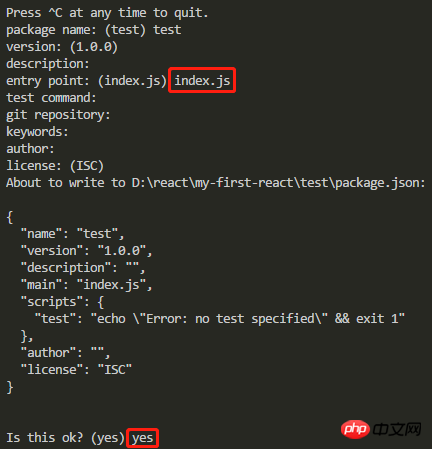
Initialize a jsonnpm initEnter some information after executing the above command A json file can be created. This file can also be created manually. The entry point needs to be filled in index.js, the rest is optional.
cnpm install react react-dom --save
Install the compilation tool babel
Copy code The code is as follows :
cnpm install babel-core babel-loader babel-preset-react babel-preset-es2015 --save-devInstall packaging tool wepback
It is best to install both the global and current folder, so that you can package it in a fancy way.cnpm install webpack webpack-cli --save-dev cnpm install webpack-dev-server --save-dev cnpm install webpack webpack-cli -g cnpm install webpack-dev-server -g
Configuration webpack
For convenience, all the following files are built in the same folder. Create new webpack.config.js and add the following contentconst path =require('path');
module.exports = {
entry: path.resolve(dirname, 'index.js'),
output: {
path: path.resolve(dirname, ''),
filename: "bundle.js"
},
mode: 'development',
module: {
rules: [
{
test: /\.js$/,
exclude: /node_modules/,
loader: "babel-loader",
options: {
presets: ["es2015","react"]
}
}
]
}
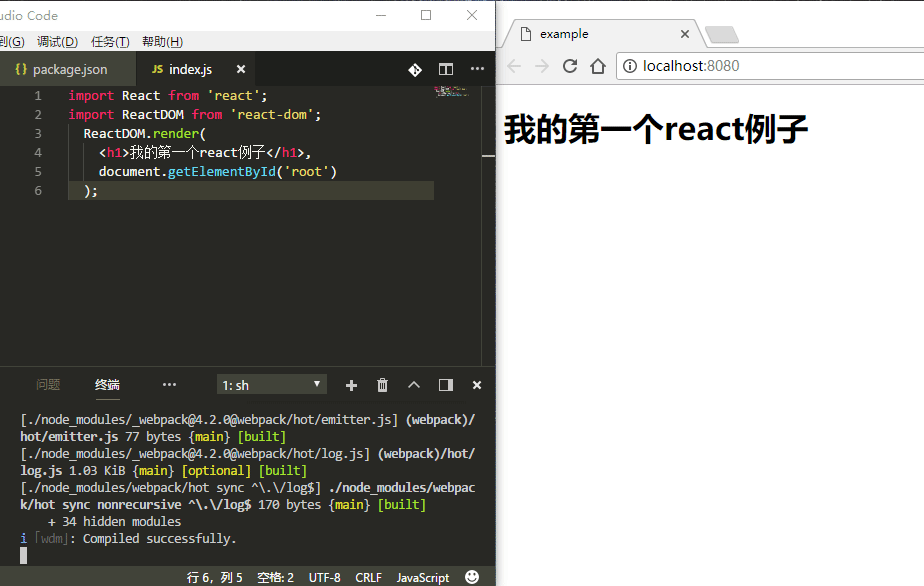
};In webpack4, there will be a warning if the mode attribute is not specified. Create test fileNew index.js file
import React from 'react';
import ReactDOM from 'react-dom';
 ReactDOM.render(
 <h1>我的第一个react例子</h1>,
 document.getElementById('root')
 );
New index.html file
<!DOCTYPE html>
 <html>
 <head>
 <meta charset="UTF-8" />
 <title>example</title>
 </head>
 <body>
 <p id="root"></p>
 <script src="bundle.js"></script>
 </body>
 </html>
Start
Finally execute webpack to package index.js and generate a browser-executable bundle.js file. At this point, the index.html file is ready to be executed in the browser. Attach my package.json file and directly execute cnpm install to install all dependencies.{
"name": "myapp",
"version": "1.0.0",
"description": "",
"main": "index.js",
"scripts": {
"start": "webpack",
"start:dev": "webpack-dev-server"
},
"author": "",
"license": "ISC",
"devDependencies": {
"babel-core": "^6.26.0",
"babel-loader": "^7.1.4",
"babel-preset-es2015": "^6.24.1",
"babel-preset-react": "^6.24.1",
"webpack": "^4.2.0",
"webpack-cli": "^2.0.12",
"webpack-dev-server": "^3.1.1"
},
"dependencies": {
"react": "^16.2.0",
"react-dom": "^16.2.0"
}
}
Hot start
If index.js changes, you need to compile and package it again to update the bundle.js file, which is very inefficient. webpack provides a command to compile and package in real time.webpack --watchAfter executing this command, the index.js file can be dynamically compiled and packaged, which is very convenient. However, the above hot start is still very troublesome, and you have to refresh the browser manually. There is something very awesome here. Directly execute webpack-dev-server to automatically refresh the browser
How to remove duplicate data when merging multiple arrays
What steps are needed to determine the type and size of uploaded images
What steps are needed to configure vue to request local json data
The above is the detailed content of Detailed explanation of steps to build ReactApp with webpack. For more information, please follow other related articles on the PHP Chinese website!
Related articles
See more- An in-depth analysis of the Bootstrap list group component
- Detailed explanation of JavaScript function currying
- Complete example of JS password generation and strength detection (with demo source code download)
- Angularjs integrates WeChat UI (weui)
- How to quickly switch between Traditional Chinese and Simplified Chinese with JavaScript and the trick for websites to support switching between Simplified and Traditional Chinese_javascript skills