
 Web Front-endJS TutorialPractical development of JavaScript using DeviceOne (1) Configuration and start_javascript skills
At the end of September 2015, DeviceOne Release was released. At this point, DeviceOne has basically completed support for multiple terminals. Based on DeviceOne you can:
HTML5, Android, iOS, Windows multi-terminal code is written once and reused everywhere;
Simple deployment in real time.
Localized UI
In the next time, I will introduce DeviceOne through a series of articles. This article introduces environment configuration and how to set up a simple project. (Note: This article is applicable to iOS, Android and Windows development.)
Currently, development using DeviceOne can be carried out on Windows or Mac systems.
The following is an introduction to setting up the DeviceOne environment. Whether it is application development or component development, you need to set up a development environment. It only takes 3 minutes to complete.
1. Hardware environment
One PC or MAC computer for development
A mobile device is used for debugging and testing, either a mobile phone or a pad (android, ios, and windowsphone are all acceptable). You can also try an emulator for Android.
2. Software environment
Operating system (supported by MAC or Windows)
Windows: 7 or above operating system.
MAC: 10.9 or above
Mobile:
Android: 4.0 or above operating system
IOS: 7.0 or above operating system
WinPhone: 8.1 or above operating system
JDK: version 1.7 and above
3. Network environment
External network environment: Many functions require an external network to operate, and App development and debugging can be performed offline.
4. Register a DeviceOne developer account
To use DeviceOne to develop applications, you first need to register a developer account on www.deviceone.net. The registered address is Register
5. Download the designer (IDE)
Users need to download and use the designer (IDE) provided by DeviceOne to develop mobile applications. The designer provides a WYSIWYG approach to build UI, and a code editor to write standard javascript or lua logic script code. Use the real-time debugging function provided by the designer to interact with real mobile devices to debug the application, and finally publish the final application through the packaging function provided by the designer.
The designer currently contains 2 major versions, one is based on Eclipse RCP, and the other is a self-developed version that only supports Windows. We recommend everyone to use the Eclipse-based version.
The download address is http://docs.deviceone.net/ Platform—>Download Center

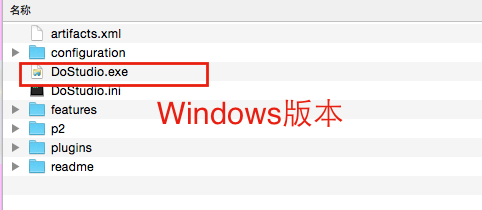
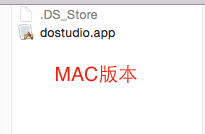
Install the designer and directly find the zip file you just downloaded. Unzip it to your appropriate location. This designer is an installation-free green version. For the Windows version, go directly to the decompressed file path to find DoStudio.exe and double-click to open it. After decompressing the Mac version, double-click dostuio.app to start it. You may encounter some problems during the startup process. You can refer to the new version design for installation and startup problems
After the development environment was set up, we began to try to develop the first DeviceOne mobile application. The following is a step-by-step introduction to the construction method of the Hello DeviceOne application
1. Create a new application
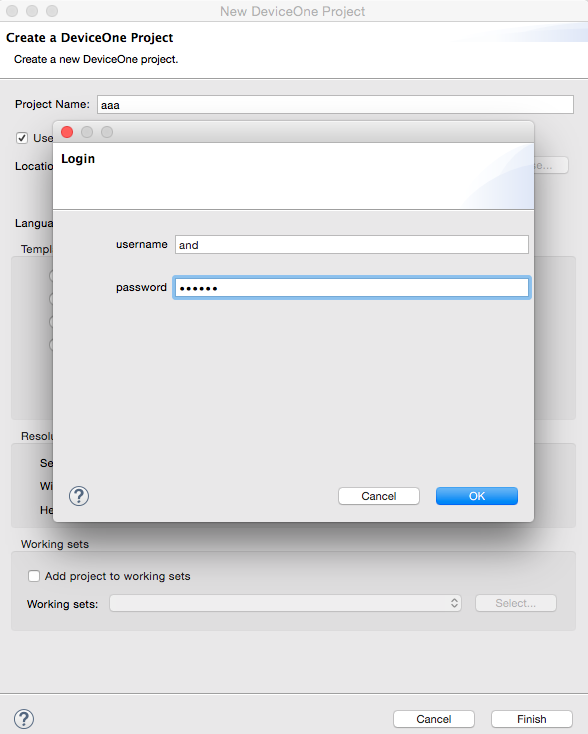
First open the designer and click New Project. To create a new project, you need to be connected to the Internet. Enter the user password verification code and log in. But after creation, it supports offline development and debugging.

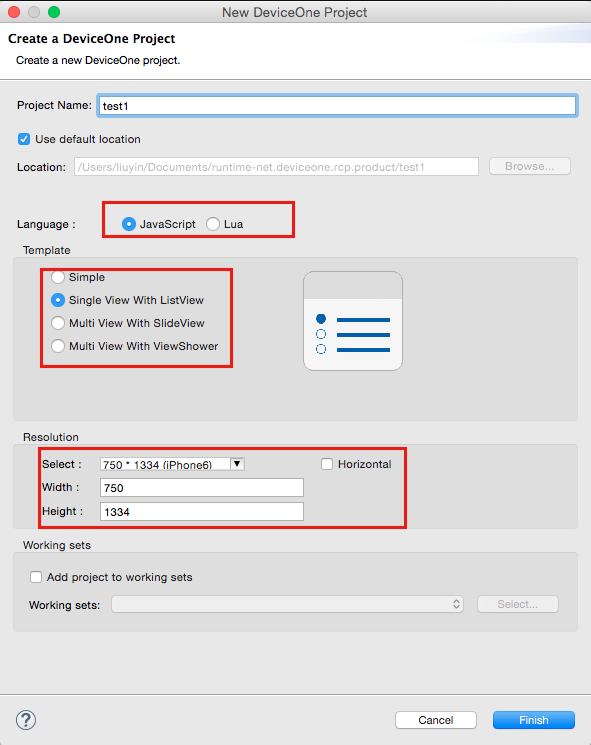
Fill in the name of the new project in the pop-up dialog box and select the front-end scripting language you want to use to write the program. Currently, you can choose JavaScript and Lua. You can also configure a basic project template, including an empty page template and a listview. Templates, etc., you can also configure the screen resolution. After configuring everything, click the OK button and a project will be automatically generated
We can see the main page of the designer as shown below. We can see all the codes in the tree of the project navigation area on the left side of the designer. app.js is the entrance to the entire program, similar to the main function of other development languages. . For more file structure introduction, please refer to the "DeviceOne Application Structure" document. For detailed instructions on the designer, please refer to the "Designer Usage Guide" document.

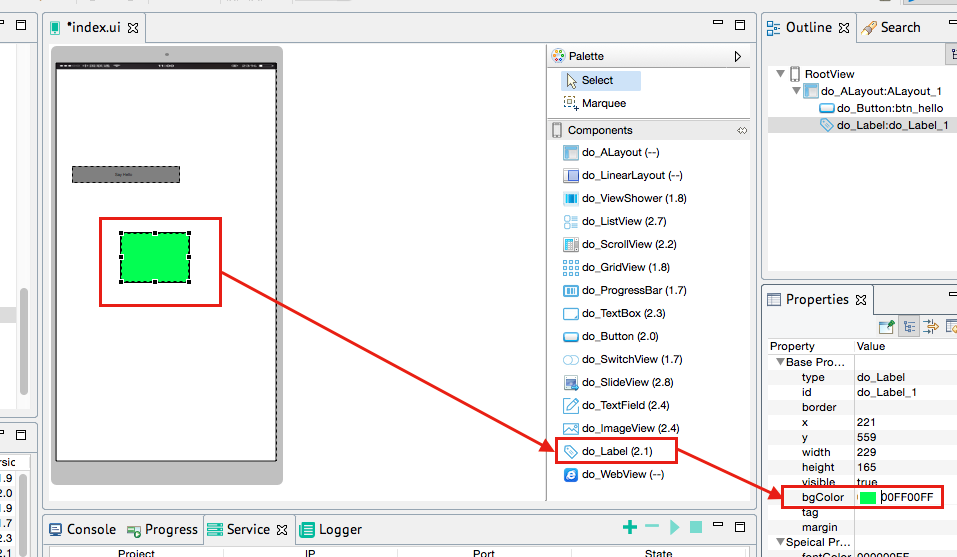
We can try dragging a Label component in the "Control List" to the "View Design" corresponding to the index.ui file, and set the background color of the Label to green. View design allows WYSIWYG dragging and setting of basic and proprietary properties of an interface element.
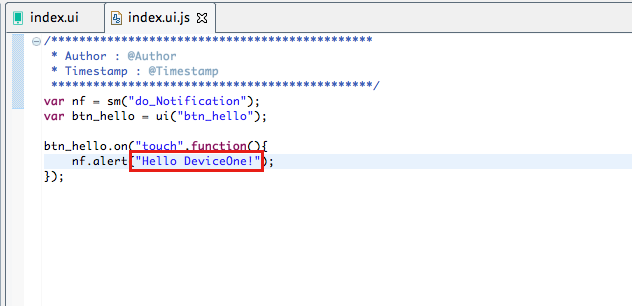
Let’s modify the index.ui.js source code again and change Hello World to Hello DeviceOne. The logic of application running can be modified in the js file.
The above is the entire content of the actual development of JavaScript using DeviceOne (1) configuration and start introduced in this article. I hope you like it. The next article will introduce to you JavaScript development using DeviceOne (2) Generating debugging installation package , please continue to pay attention, friends who like it can click directly to learn more.

 JavaScript in Action: Real-World Examples and ProjectsApr 19, 2025 am 12:13 AM
JavaScript's application in the real world includes front-end and back-end development. 1) Display front-end applications by building a TODO list application, involving DOM operations and event processing. 2) Build RESTfulAPI through Node.js and Express to demonstrate back-end applications.
 JavaScript and the Web: Core Functionality and Use CasesApr 18, 2025 am 12:19 AM
The main uses of JavaScript in web development include client interaction, form verification and asynchronous communication. 1) Dynamic content update and user interaction through DOM operations; 2) Client verification is carried out before the user submits data to improve the user experience; 3) Refreshless communication with the server is achieved through AJAX technology.
 Understanding the JavaScript Engine: Implementation DetailsApr 17, 2025 am 12:05 AM
Understanding how JavaScript engine works internally is important to developers because it helps write more efficient code and understand performance bottlenecks and optimization strategies. 1) The engine's workflow includes three stages: parsing, compiling and execution; 2) During the execution process, the engine will perform dynamic optimization, such as inline cache and hidden classes; 3) Best practices include avoiding global variables, optimizing loops, using const and lets, and avoiding excessive use of closures.
 Python vs. JavaScript: The Learning Curve and Ease of UseApr 16, 2025 am 12:12 AM
Python is more suitable for beginners, with a smooth learning curve and concise syntax; JavaScript is suitable for front-end development, with a steep learning curve and flexible syntax. 1. Python syntax is intuitive and suitable for data science and back-end development. 2. JavaScript is flexible and widely used in front-end and server-side programming.
 Python vs. JavaScript: Community, Libraries, and ResourcesApr 15, 2025 am 12:16 AM
Python and JavaScript have their own advantages and disadvantages in terms of community, libraries and resources. 1) The Python community is friendly and suitable for beginners, but the front-end development resources are not as rich as JavaScript. 2) Python is powerful in data science and machine learning libraries, while JavaScript is better in front-end development libraries and frameworks. 3) Both have rich learning resources, but Python is suitable for starting with official documents, while JavaScript is better with MDNWebDocs. The choice should be based on project needs and personal interests.
 From C/C to JavaScript: How It All WorksApr 14, 2025 am 12:05 AM
The shift from C/C to JavaScript requires adapting to dynamic typing, garbage collection and asynchronous programming. 1) C/C is a statically typed language that requires manual memory management, while JavaScript is dynamically typed and garbage collection is automatically processed. 2) C/C needs to be compiled into machine code, while JavaScript is an interpreted language. 3) JavaScript introduces concepts such as closures, prototype chains and Promise, which enhances flexibility and asynchronous programming capabilities.
 JavaScript Engines: Comparing ImplementationsApr 13, 2025 am 12:05 AM
Different JavaScript engines have different effects when parsing and executing JavaScript code, because the implementation principles and optimization strategies of each engine differ. 1. Lexical analysis: convert source code into lexical unit. 2. Grammar analysis: Generate an abstract syntax tree. 3. Optimization and compilation: Generate machine code through the JIT compiler. 4. Execute: Run the machine code. V8 engine optimizes through instant compilation and hidden class, SpiderMonkey uses a type inference system, resulting in different performance performance on the same code.
 Beyond the Browser: JavaScript in the Real WorldApr 12, 2025 am 12:06 AM
JavaScript's applications in the real world include server-side programming, mobile application development and Internet of Things control: 1. Server-side programming is realized through Node.js, suitable for high concurrent request processing. 2. Mobile application development is carried out through ReactNative and supports cross-platform deployment. 3. Used for IoT device control through Johnny-Five library, suitable for hardware interaction.


Hot AI Tools

Undresser.AI Undress
AI-powered app for creating realistic nude photos

AI Clothes Remover
Online AI tool for removing clothes from photos.

Undress AI Tool
Undress images for free

Clothoff.io
AI clothes remover

Video Face Swap
Swap faces in any video effortlessly with our completely free AI face swap tool!

Hot Article
Hot Tools

SublimeText3 Chinese version
Chinese version, very easy to use

VSCode Windows 64-bit Download
A free and powerful IDE editor launched by Microsoft

EditPlus Chinese cracked version
Small size, syntax highlighting, does not support code prompt function

WebStorm Mac version
Useful JavaScript development tools

MinGW - Minimalist GNU for Windows
This project is in the process of being migrated to osdn.net/projects/mingw, you can continue to follow us there. MinGW: A native Windows port of the GNU Compiler Collection (GCC), freely distributable import libraries and header files for building native Windows applications; includes extensions to the MSVC runtime to support C99 functionality. All MinGW software can run on 64-bit Windows platforms.

