
Home >Web Front-end >JS Tutorial >Detailed explanation of the steps to implement server-side rendering with Nuxt.js (with code)
Detailed explanation of the steps to implement server-side rendering with Nuxt.js (with code)
- php中世界最好的语言Original
- 2018-04-20 10:08:073931browse
This time I will bring you a detailed explanation of the steps to implement server-side rendering with Nuxt.js (with code). What are the precautions for Nuxt.js to implement server-side rendering? . Here are practical cases. Let’s take a look. take a look.
Use Vue directly to build a front-end single-page application. The page source code only has a few simple lines of HTML, which is not conducive to the SEO of the website. At this time, server-side rendering is required. This article mainly introduces the detailed explanation of Vue based on Nuxt.js implements server-side rendering (SSR), which has certain reference value. Interested friends can refer to
Directly use Vue to build a front-end single-page application. The page source code only has a few simple lines of HTML. , which is not conducive to the SEO of the website. At this time, server-side rendering is required
On October 25, 2016, the team behind zeit.co released a React server-side rendering application framework Next.js
A few hours later, a server-side rendering application framework based on Vue.js came into being, which is similar to Next.js. This is Nuxt.js
1. Fast Template
On the premise that vue-cli has been installed, you can quickly create a nuxt project template
vue init nuxt-community/starter-template MyProject
where MyProject is the name of the project folder and can be customized
Through npm install (it seems to be smoother with yarn install) After installing the dependencies, you can directly npm run dev in the development environmentStart the project
The default startup address is http://localhost:3000/, you can add the following configuration in package.json to modify the host port number
 "config": {
  "nuxt": {
   "host": "0.0.0.0",
   "port": "7788"
  }
 },
Execute after development is completed npm run build packages the code, and finally npm start starts the service
2. Important directories
The generated project directory is as follows
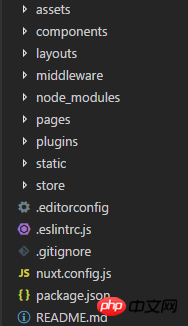
Most folder namesare reserved by nuxt by default and cannot be modified
There are three directories that are critical for price comparison:
1. components component directory
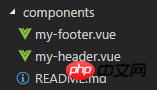
is generally used to store non-page level components, such as header, footer and other public components
The components in this directory have the methods and characteristics of regular vue components and will not be extended by nuxt.js
2. layouts layout directory
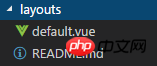
You can modify default.vue in this directory to modify the default layout
<template>
 <p>
  <my-header></my-header>
  <nuxt/>
  <my-footer></my-footer>
 </p>
</template>
Among them,
In addition, you can also add error.vue in the directoryas an error page. For specific writing methods, please refer to the official documentation
3. pages page directory

# is used to store page-level components. nuxt will generate based on the page structure in this directory. Routing
For example, the page structure in the picture above will generate such routing configuration:
router: {
 routes: [
  {
   name: 'index',
   path: '/',
   component: 'pages/index.vue'
  },
  {
   name: 'about',
   path: '/about',
   component: 'pages/about.vue'
  },
  {
   name: 'classroom',
   path: '/classroom',
   component: 'pages/classroom.vue',
   children: [
    {
     path: 'student',
     component: 'pages/classroom/student.vue',
     name: 'student'
    },
    { //定义带参数的动态路由,需要创建对应的以下划线作为前缀的 Vue 文件或目录
     path: ':id',
     component: 'pages/classroom/_id.vue',
     name: 'classroom-id'
    }
   ]
  }
 ]
}
In addition, the vue components in this directory also have some special functions provided by Nuxt.js Features
Among them, the asyncData method is more commonly used and supports asynchronous data processing.
This method will be called before each loading of the page component, and then obtain The data is returned to the current component
asyncData ({ params, error }) {
  return axios.get(`api/posts/${params.id}`)
  .then((res) => {
   return { name: res.data.name}
  })
  .catch((e) => {
   error({ statusCode: 404, message: 'not found' })
  })
 }
The first parameter of the asyncData method is the contextObject context, the specific properties can be viewed here
Since the asyncData method is before the component is initialized is called, so there is no way to reference the instance object of the component
through this within the method.三、使用插件
如果项目中还需要引入其他的第三方插件,可以直接在页面中引入,这样在打包的时候,会将插件打包到页面对应的 js 里面
但要是别的页面也引入了同样的插件,就会重复打包。如果没有需要分页打包的需求,这时候可以配置 plugins
以 element-ui 为例,在安装了 element-ui 之后,在 plugins 目录下创建 elementUI.js
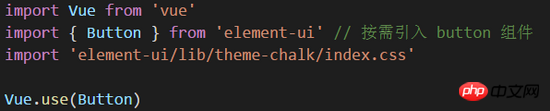
然后在根目录的 nuxt.config.js 中添加配置项 build.vendor 和 plugins
 build: {
  vendor: ['~/plugins/elementUI.js']
 },
 plugins: [
  {src: '~/plugins/elementUI.js'},
 ]
这里的 plugins 属性用来配置 vue.js 插件,也就是 可以用 Vue.user() 方法 的插件
默认只需要 src 属性,另外还可以配置 ssr: false,让该文件只在客户端被打包引入
如果是像 axios 这种第三方 (不能 use) 插件,只需要在 plugins 目录下创建 axios.js
// axios.js
import Vue from 'vue'
import axios from 'axios'
const service = axios.create({
 baseURL: '/api'
})
Vue.prototype.$ajax = axios
export default service
然后在 build.vendor 中添加配置 (不需要配置 plugins)
build: {
 vendor: ['~/plugins/axios.js']
}
这样在打包的时候,就会把 axios 打包到 vendor.js 中
四、Vuex 状态树
如果在 store 目录下创建了 index.js,nuxt.js 会根据该目录下的文件创建 Vuex 状态树
// store/index.js
import Vue from 'vue'
import Vuex from 'vuex'
import Axios from '~/plugins/axios.js';
Vue.use(Vuex)
const store = () => new Vuex.Store({
 state: {
  author: 'WiseWrong',
  info: ''
 },
 mutations: {
  setInfo (state, val) {
   state.info = val
  }
 },
 actions: {
  loadAboutMeInfo ({commit, state}) {
   return Axios.get(`/about`)
    .then(res => {
     console.log('ajax is success')
     console.log(res.data.info)
     commit('setInfo', res.data.info)
    })
    .catch(err => {
     console.log('error')
    })
  }
 }
})
export default store
Nuxt.js 内置引用了 vuex 模块,不需要额外安装
上面的代码中,我在 actions 中写了一个 loadAboutMeInfo() 方法,用来请求 /api/about 接口
然后在 about.vue 页面中调用
// about.vue
<template>
 <section class="container">
  <p>
   <img src="~/assets/about.png" alt="">
  </p>
  <h1>{{$store.state.info}}</h1>
 </section>
</template>
<script>
export default {
 fetch({ store }) {
  return store.dispatch('loadAboutMeInfo')
 },
 name: 'about',
 data () {
  return {}
 }
}
</script>
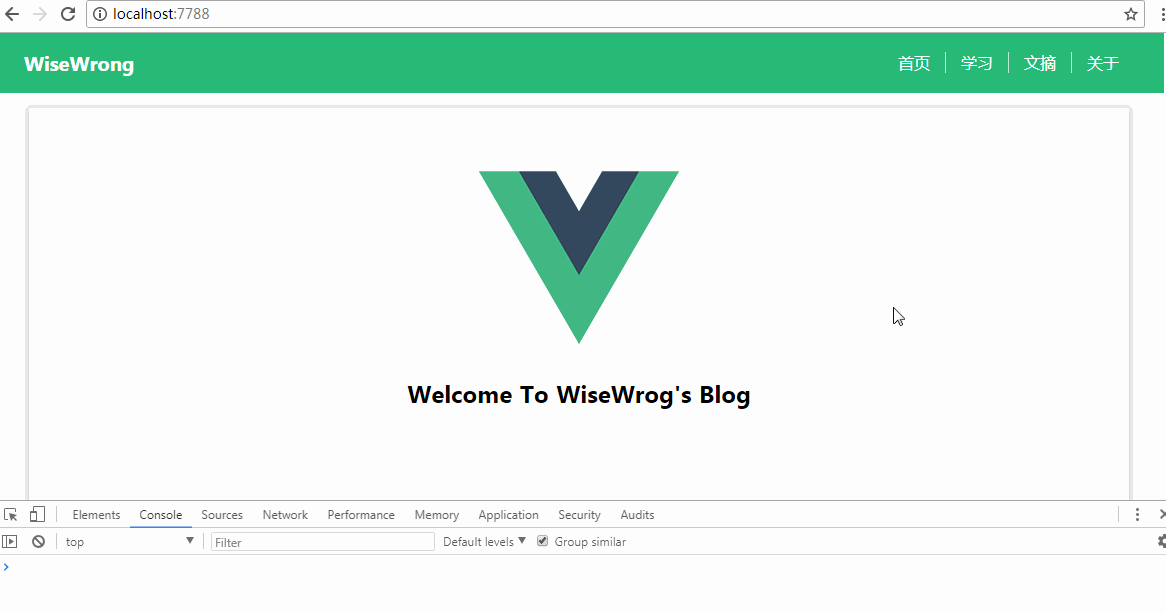
成果演示:
相信看了本文案例你已经掌握了方法,更多精彩请关注php中文网其它相关文章!
推荐阅读:
The above is the detailed content of Detailed explanation of the steps to implement server-side rendering with Nuxt.js (with code). For more information, please follow other related articles on the PHP Chinese website!
Related articles
See more- An in-depth analysis of the Bootstrap list group component
- Detailed explanation of JavaScript function currying
- Complete example of JS password generation and strength detection (with demo source code download)
- Angularjs integrates WeChat UI (weui)
- How to quickly switch between Traditional Chinese and Simplified Chinese with JavaScript and the trick for websites to support switching between Simplified and Traditional Chinese_javascript skills