Command |
Description |
##php artisan key:generate |
Generate App Key |
| php artisan make:controller
|
Generate controller |
| php artisan make:model
|
Generate model |
php artisan make:policy |
Generate authorization policy |
| ##php artisan make:seeder
|
Generate Seeder file
|
| php artisan migrate
| ##Perform migration
|
php artisan migrate:rollback
| rollback migration
|
php artisan migrate:refresh
| Reset database
|
php artisan db:seed
| populate database
|
##php artisan tinker
|
Enter tinker environment |
|
php artisan route:list |
##View route list |
在开发过程中,应该尽量使用 artisan 命令,这样不仅可以提高开发效率,还可以减少bug。
在后续的实验中,我们也会多次使用 artisan 命令。
四、路由
我们学习 Laravel 基础功能之一:路由。
(一) 什么是路由呢?
在浏览器中输入http://www.php.cn/我们可以访问PHP中文网网站的首页,如果我们输入http://www.php.cn/php-weizijiaocheng-396022.html呢?我们会来到PHP中文网的文章页面。
这就是路由了,即路由系统会对用户输入的 URL 地址 进行解析,然后分配不同的工作,有点像路由器。
路由不仅可以美化 URL,还可以便于用户记忆等。
那么 Laravel 是怎么处理 url 的呢?
首先,我们打开项目代码,找到路由设置文件,文件位置:app/Http/routes.php。
我们可以看到,当前 routes.php 文件中只有如下几行代码,这几行代码都实现了哪些功能呢?
<span style="font-size: 14px;">Route::get('/', function(){<br></span>
<span style="font-size: 14px;"> return view('welcome');<br></span>
<span style="font-size: 14px;">});<br></span>
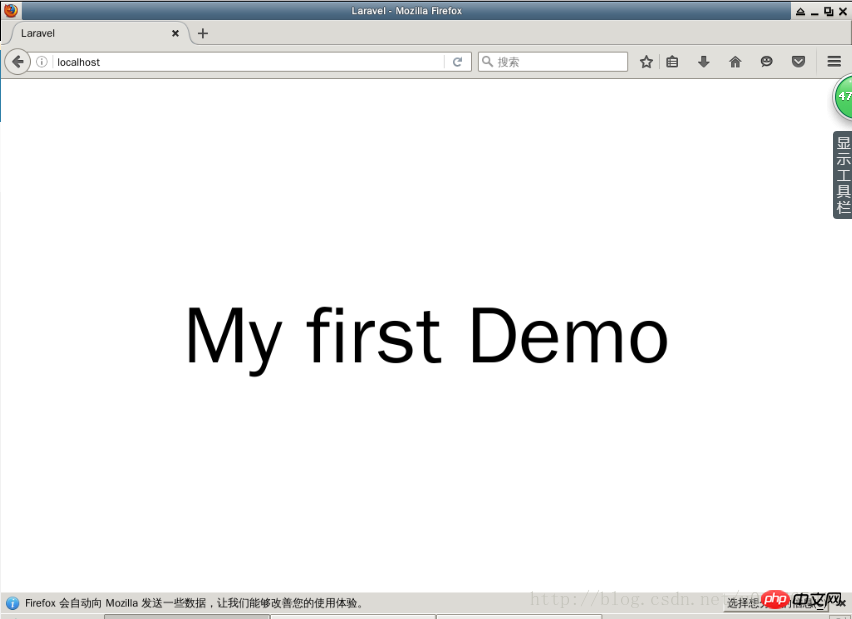
这几行代码表示,当我们输入的 url为 网址 + ‘/’,也就是localhost/ 时,为我们返回 欢迎页,也就是之前我们写 Hello World 的页面。
注意:在输入网址的时候,localhost和 localhost/是一样的。
我们可以尝试将这段代码修改一下:
<span style="font-size: 14px;">Route::get('welcome', function(){<br></span>
<span style="font-size: 14px;"> return view('welcome');<br></span>
<span style="font-size: 14px;">});<br></span>
然后我们打开浏览器,再输入localhost,我们会发现,报错了!
这个错误的大概意思是,没有找到处理该 url 的办法,因为我们没有定义 '/' 这条路由。
现在我们输入 localhost/welcome 并刷新页面,我们看到了熟悉的页面原来的征程welcome界面
通过上面的尝试,你是否对路由有了一个简单的认识?
下面我们来系统的学习一下 Laravel 的路由。
(二) 基本路由
网站的大多数路由都定义在 app/Http/routes.php 文件中,该文件将会被 App\Providers\RouteServiceProvider 类加载。最基本的 Laravel 路由仅接受 URI 和一个闭包,下面我们再定义两条路由。
app/Http/routes.php
<span style="font-size: 14px;"><?php<br/></span>
<span style="font-size: 14px;">/*<br/></span>
<span style="font-size: 14px;">|--------------------------------------------------------------------------<br/></span>
<span style="font-size: 14px;">| Application Routes<br/></span>
<span style="font-size: 14px;">|--------------------------------------------------------------------------<br/></span>
<span style="font-size: 14px;">|<br/></span>
<span style="font-size: 14px;">| Here is where you can register all of the routes for an application.<br/></span>
<span style="font-size: 14px;">| It's a breeze. Simply tell Laravel the URIs it should respond to<br/></span>
<span style="font-size: 14px;">| and give it the controller to call when that URI is requested.<br/></span>
<span style="font-size: 14px;">|<br/></span>
<span style="font-size: 14px;">*/<br/></span>
<span style="font-size: 14px;"> <br/></span>
<span style="font-size: 14px;">Route::get('welcome', function(){<br/></span><span style="font-size: 14px;"> return view('welcome');<br/></span>
<span style="font-size: 14px;">});<br/></span>
<span style="font-size: 14px;"> <br/></span>
<span style="font-size: 14px;">Route::get('/', function(){<br/></span><span style="font-size: 14px;"> return'Index Page';<br/></span>
<span style="font-size: 14px;">});<br/></span>
<span style="font-size: 14px;"> <br/></span>
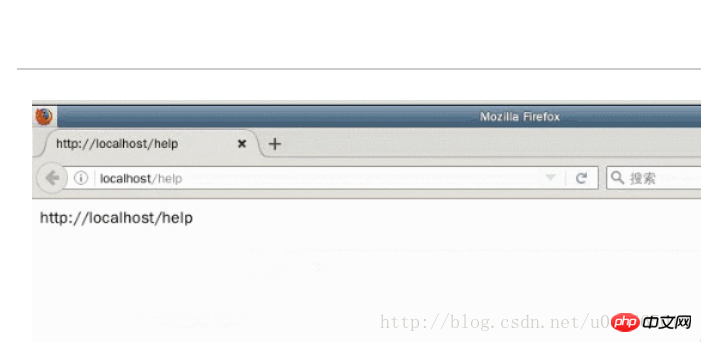
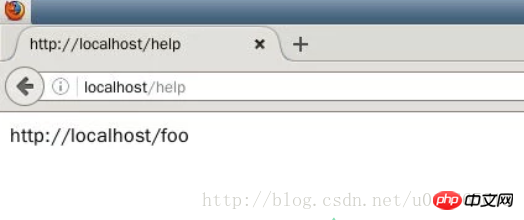
<span style="font-size: 14px;">Route::get('/help', function(){<br/></span><span style="font-size: 14px;"> return'Help Page';<br/></span>
<span style="font-size: 14px;">});<br/></span>
然后我们分别访问 localhost 和 localhost/help 可以看到返回了对应的信息:
(三) 路由动作
我们知道,一个url请求可能有多种类型,除了常用的GET,还可能有 POST、PUT、DELETE 等类型的请求。
对应的处理方法如下:
<span style="font-size: 14px;">Route::post('/foo', function(){<br/></span><span style="font-size: 14px;"> //该路由将匹配 post方法的 '/foo' url<br/></span>
<span style="font-size: 14px;">});<br/></span>
<span style="font-size: 14px;"> <br/></span>
<span style="font-size: 14px;">Route::put('/foo', function(){<br/></span><span style="font-size: 14px;"> //该路由将匹配 put方法的 '/foo' url<br/></span>
<span style="font-size: 14px;">});<br/></span>
除此之外,还可以用 match 来同时处理多种类型的请求:
<span style="font-size: 14px;">Route::match(['get', 'post'],'/foo', function(){<br/></span><span style="font-size: 14px;"> // 该路由将匹配 get 和 post 方法的 'foo' url<br/></span>
<span style="font-size: 14px;">});<br/></span>
甚至,还可以使用 any 来同时处理所有类型的请求:
<span style="font-size: 14px;">Route::any('/foo', function(){<br/></span><span style="font-size: 14px;"> // 该路由将匹配所有类型的 'foo' url<br/></span>
<span style="font-size: 14px;">});<br/></span>
(四) 路由参数
1.基础的路由参数
有时候你可能需要从 URL 中获取一些参数,比如姓名、年龄等。
下面打开 routes.php,加入一个带参路由。
app/Http/routes.php
<span style="font-size: 14px;"><?php<br/></span>
<span style="font-size: 14px;">Route::get('name/{name}', function($name){<br/></span><span style="font-size: 14px;"> return'I`m '.$name;<br/></span>
<span style="font-size: 14px;">});<br/></span>
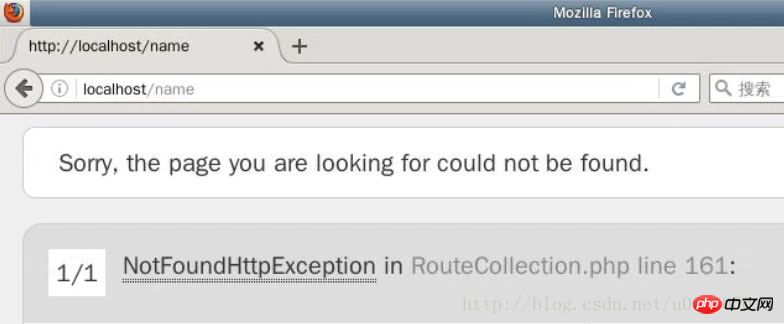
然后我们如果访问 localhost/name/Tom 我们可以看到网页返回了对应的信息:
如果试图访问 localhost/name 将会出现错误:
我们也可以定义多个参数:
app/Http/routes.php
<span style="font-size: 14px;"><?php<br/></span>
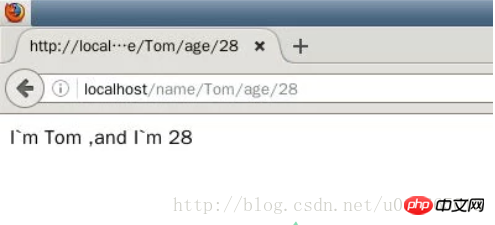
<span style="font-size: 14px;">Route::get('name/{name}/age/{age}', function($name, $age){<br/></span><span style="font-size: 14px;"> return'I`m '.$name.' ,and I`m '.$age;<br/></span>
<span style="font-size: 14px;">});<br/></span>
然后我们如果访问 localhost/name/Tom/age/28 我们可以看到网页返回了对应的信息:
2.可选的路由参数
有时你需要指定可选的路由参数,可以通过在参数后面加上 ?来实现。
app/Http/routes.php
<span style="font-size: 14px;"><?php<br/></span>
<span style="font-size: 14px;">Route::get('hello/{name?}', function($name = null){<br/></span><span style="font-size: 14px;"> return'Hello! '.$name;<br/></span>
<span style="font-size: 14px;">});<br/></span>
这时你访问 localhost/hello 将不会报错,只是参数是空值。
你可以为该可选参数设定一个默认值,当 url 未传参时,将显示默认值。
app/Http/routes.php
<span style="font-size: 14px;"><?php<br/></span>
<span style="font-size: 14px;">Route::get('hello/{name?}', function($name = 'Tom'){<br/></span><span style="font-size: 14px;"> return'Hello! '.$name;<br/></span>
<span style="font-size: 14px;">});<br/></span>
这时访问 localhost/hello 将返回默认的信息,如下图:
如果访问localhost/hello/John 将会显示参数,如下图:
(五) 命名路由
所谓命名路由,就是给路由起个名字,这样我们就可以通过这个名字获取到该条路由的相关信息,也更利于后期维护。
建议在开发过程中给每个路由命名,使用下面两种方式都可以为一个路由命名。
<span style="font-size: 14px;">Route::get('foo', ['as' => 'foo', function(){<br></span>
<span style="font-size: 14px;"> //方法一<br></span>
<span style="font-size: 14px;">}]);<br></span>
<span style="font-size: 14px;"> <br></span>
<span style="font-size: 14px;">Route::get('foo', function(){<br></span>
<span style="font-size: 14px;"> //方法二<br></span>
<span style="font-size: 14px;">})->name('foo');<br></span>
(六) 路由群组
路由群组允许你共用路由属性,例如:中间件、命名空间等,你可以利用路由群组统一为多个路由设置共同属性,而不需在每个路由上都设置一次。共用属性被指定为数组格式,当作Route::group方法的第一个参数。
下面通过几个常用样例来熟悉这些特性。
1.为路由群组添加共用的中间件
至于什么是中间件,在后面的实验中会专门的学习。
<span style="font-size: 14px;">Route::group(['middleware' => 'auth'], function(){<br></span>
<span style="font-size: 14px;"> Route::get('/', function() {<br></span>
<span style="font-size: 14px;"> // 该路由将使用 Auth 中间件<br></span>
<span style="font-size: 14px;"> });<br></span>
<span style="font-size: 14px;"> <br></span>
<span style="font-size: 14px;"> Route::get('name', function(){<br></span>
<span style="font-size: 14px;"> // 该路由也将使用 Auth 中间件<br></span>
<span style="font-size: 14px;"> });<br></span>
<span style="font-size: 14px;">});<br></span>
2.为路由群组添加共用的命名空间
什么是命名空间?从广义上来说,命名空间是一种封装事物的方法。在很多地方都可以见到这种抽象概念。例如,在操作系统中目录用来将相关文件分组,对于目录中的文件来说,它就扮演了命名空间的角色。具体举个例子,文件 foo.txt 可以同时在目录/home/greg 和 /home/other 中存在,但在同一个目录中不能存在两个 foo.txt 文件。另外,在目录 /home/greg 外访问 foo.txt 文件时,我们必须将目录名以及目录分隔符放在文件名之前得到
/home/greg/foo.txt。这个原理应用到程序设计领域就是命名空间的概念。
你可以简单的把命名空间理解为,当前文件所在的位置。
<span style="font-size: 14px;">Route::group(['namespace' => 'Admin'], function()<br></span>
<span style="font-size: 14px;">{<br></span>
<span style="font-size: 14px;"> // 控制器在「App\Http\Controllers\Admin」命名空间<br></span>
<span style="font-size: 14px;"> <br></span>
<span style="font-size: 14px;"> Route::group(['namespace' => 'User'], function()<br></span>
<span style="font-size: 14px;"> {<br></span>
<span style="font-size: 14px;"> // 控制器在「App\Http\Controllers\Admin\User」命名空间<br></span>
<span style="font-size: 14px;"> });<br></span>
<span style="font-size: 14px;">});<br></span>
3.为路由群组添加共用的前缀
你可能有一系列路由都具有一个相同的前缀,比如:
<span style="font-size: 14px;">Route::get('user/name', function(){<br></span>
<span style="font-size: 14px;"> //<br></span>
<span style="font-size: 14px;">});<br></span>
<span style="font-size: 14px;">Route::get('user/age', function(){<br></span>
<span style="font-size: 14px;"> //<br></span>
<span style="font-size: 14px;">});<br></span>
<span style="font-size: 14px;">Route::get('user/introduction', function(){<br></span>
<span style="font-size: 14px;"> //<br></span>
<span style="font-size: 14px;">});<br></span>
这时你就可以用路由群组来简化代码:
<span style="font-size: 14px;">Route::group(['prefix' => 'user'], function(){<br></span>
<span style="font-size: 14px;"> Route::get('name', function() {<br></span>
<span style="font-size: 14px;"> //<br></span>
<span style="font-size: 14px;"> });<br></span>
<span style="font-size: 14px;"> Route::get('age', function() {<br></span>
<span style="font-size: 14px;"> //<br></span>
<span style="font-size: 14px;"> });<br></span>
<span style="font-size: 14px;"> Route::get('introduction', function() {<br></span>
<span style="font-size: 14px;"> //<br></span>
<span style="font-size: 14px;"> });<br></span>
<span style="font-size: 14px;">});<br></span>
路由群组也可以添加参数:
<span style="font-size: 14px;">Route::group(['prefix' => 'user/{id}'], function(){<br></span>
<span style="font-size: 14px;"> Route::get('name', function($id) {<br></span>
<span style="font-size: 14px;"> // 符合 'user/{id}/name' URL <br></span>
<span style="font-size: 14px;"> });<br></span>
<span style="font-size: 14px;"> Route::get('age', function($id) {<br></span>
<span style="font-size: 14px;"> // 符合 'user/{id}/age' URL <br></span>
<span style="font-size: 14px;"> });<br></span>
<span style="font-size: 14px;">});<br></span>
(七) 查看路由
我们可以使用url('foo')函数来生成完整的 URL,例如,我们这样修改一下代码:
app/Http/routes.php
<span style="font-size: 14px;"> <br></span>
<span style="font-size: 14px;"><?php<br/></span>
<span style="font-size: 14px;">Route::get('/help', function(){<br/></span><span style="font-size: 14px;"> return url('/help');<br/></span>
<span style="font-size: 14px;">});<br/></span>
然后,访问localhost/help,我们可以看到返回了完整的 URL 信息:
我们还可以使用命名路由函数route('foo')来生成完整的 URL 信息。
app/Http/routes.php
<span style="font-size: 14px;"><?php<br/></span>
<span style="font-size: 14px;">Route::get('/help', function(){<br/></span><span style="font-size: 14px;"> return route('foo');<br/></span>
<span style="font-size: 14px;">});<br/></span>
<span style="font-size: 14px;"> <br/></span>
<span style="font-size: 14px;">Route::get('/foo', function(){<br/></span><span style="font-size: 14px;"> //<br/></span>
<span style="font-size: 14px;">})->name('foo');<br></span>
然后,访问 localhost/help,我们可以看到返回了 foo 路由的完整 URL 信息:
(八) 正则表达式限制路由
你可以使用 where 方法来限制参数的格式。where 方法接受参数的名称和正则表达式。
app/Http/routes.php
<span style="font-size: 14px;"><?php<br/></span>
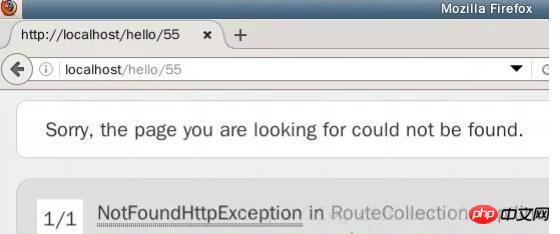
<span style="font-size: 14px;">Route::get('hello/{name?}', function($name = 'Tom'){<br/></span><span style="font-size: 14px;"> return'Hello! '.$name;<br/></span>
<span style="font-size: 14px;">})->where('name','[A-Za-z]+');<br></span>
然后如果访问 localhost/hello/John 这样的 url 就会正确显示。
如果访问 localhost/hello/55 这样的 url 将会报错,如下图:
同样,也可对多个参数都设置正则验证:
app/Http/routes.php
<span style="font-size: 14px;"><?php<br/></span>
<span style="font-size: 14px;">Route::get('name/{name}/age/{age}', function($name, $age){<br/></span><span style="font-size: 14px;"> return'I`m '.$name.' ,and I`m '.$age;<br/></span>
<span style="font-size: 14px;">})->where(['name' => '[A-Za-z]+', 'age' => '[0-9]+']);<br></span>
如果你想对所有的路由参数都加上某种限制,需要在RouteServiceProvider 的 boot 方法里定义这些限制。
<span style="font-size: 14px;">/**<br></span>
<span style="font-size: 14px;"> * 定义你的路由模型绑定,模式过滤器等。<br></span>
<span style="font-size: 14px;"> *<br></span>
<span style="font-size: 14px;"> * @param \Illuminate\Routing\Router $router<br></span>
<span style="font-size: 14px;"> * @return void<br></span>
<span style="font-size: 14px;"> */<br></span>
<span style="font-size: 14px;">publicfunctionboot(Router $router)<br></span>
<span style="font-size: 14px;">{<br></span>
<span style="font-size: 14px;"> $router->pattern('id', '[0-9]+');<br></span>
<span style="font-size: 14px;"> <br></span>
<span style="font-size: 14px;"> parent::boot($router);<br></span>
<span style="font-size: 14px;">}<br></span>
五、控制器
本次实验我们学习控制器(Controller)。
(一) 准备工作
首先,我们先创建一个路由,顺便再练习一下上次试验的内容,打开routes.php文件。
app/Http/routes.php
<span style="font-size: 14px;"><?php<br/></span>
<span style="font-size: 14px;">Route::get('/', function(){<br/></span><span style="font-size: 14px;"> return view('welcome');<br/></span>
<span style="font-size: 14px;">});<br/></span>
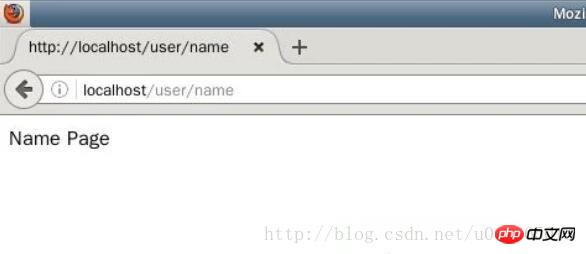
<span style="font-size: 14px;">Route::get('user/name', function(){<br/></span><span style="font-size: 14px;"> return'Name Page';<br/></span>
<span style="font-size: 14px;">});<br/></span>
当我们访问网站地址 localhost/user/name 时,会返回
'NamePage':
但是我们知道,实际的网站功能不可能这么单调,我们需要更多的返回信息和操作,显然把大量的处理代码写在这里是不合适的,这时候就要用到Controller。
现在我们对上面的代码进行更改:
<span style="font-size: 14px;"><?php<br/></span>
<span style="font-size: 14px;">Route::get('/', function(){<br/></span><span style="font-size: 14px;"> return view('welcome');<br/></span>
<span style="font-size: 14px;">});<br/></span>
<span style="font-size: 14px;">Route::get('/user/name', 'UserController@name');<br/></span>
这段代码的意思就是,当用户访问 'localhost/user/name' 这个 URL 的时候,调用 UserController 这个控制器的 name 方法来处理请求。也就是说,将原来的闭包函数放到了一个单独的文件中。
我们可以将有共同特征的路由处理函数放到一个共同的控制器中,例如下面这种方式:
<span style="font-size: 14px;">Route::get('/user/name', 'UserController@name');<br/></span>
<span style="font-size: 14px;">Route::get('/user/age', 'UserController@age');<br/></span>
<span style="font-size: 14px;">Route::get('/user/introduction', 'UserController@introduction');<br/></span>
三条不同的路由的处理函数放在了同一个控制器(用户控制器)的三个不同的方法内。
下面我们通过几个简单的例子来体会一下 Controller是怎么工作的。
(二) 基础控制器
控制器一般存放在 app/Http/Controllers 目录下,下面是一个基础控制器的例子,先来简单感受一下控制器文件的结构:
<span style="font-size: 14px;"><?php<br/></span>
<span style="font-size: 14px;">namespaceApp\Http\Controllers;<br/></span>
<span style="font-size: 14px;">useApp\User;<br/></span>
<span style="font-size: 14px;">useApp\Http\Controllers\Controller;<br/></span>
<span style="font-size: 14px;">classUserControllerextendsController<br/></span>
<span style="font-size: 14px;">{<br/></span><span style="font-size: 14px;"> /**<br/></span>
<span style="font-size: 14px;"> * 显示指定用户的个人数据。<br/></span>
<span style="font-size: 14px;"> *<br/></span>
<span style="font-size: 14px;"> * @param int $id<br/></span>
<span style="font-size: 14px;"> * @return Response<br/></span>
<span style="font-size: 14px;"> */<br/></span>
<span style="font-size: 14px;"> publicfunctionshow($id)<br/></span>
<span style="font-size: 14px;"> {<br/></span><span style="font-size: 14px;"> return view('user.profile', ['user' => User::findOrFail($id)]);<br></span>
<span style="font-size: 14px;"> }<br></span>
<span style="font-size: 14px;">}<br></span>
所有 Laravel 控制器都应继承基础控制器类,它包含在Laravel 的默认安装中。该基础类提供了一些便捷的方法,例如 middleware 方法(middleware 是中间件 后边会讲解),该方法可以用来将中间件附加在控制器行为上。
然后你就可以通过一个路由把请求引入到这个控制器文件来,像下面这样:
<span style="font-size: 14px;">Route::get('user/{id}', 'UserController@show');<br></span>
现在,当请求和此特定路由的 URI 相匹配时,UserController 类的 show 方法就会被运行。当然,路由的参数也会被传递至该方法。
现在,让我们动手实践来感受一下控制器。
首先用 artisan 命令创建一个新的控制器,打开命令行,进入代码根目录:
<span style="font-size: 14px;">cd ~/Code/myweb<br></span>
然后运行 artisan命令生成控制器:
<span style="font-size: 14px;">phpartisanmake:controllerUserController<br></span>
然后转到 app/Http/Controllers目录下,可以看到刚刚创建的 UserController.php。打开这个文件:
<span style="font-size: 14px;"><?php<br></span>
<span style="font-size: 14px;"> <br></span>
<span style="font-size: 14px;">namespaceApp\Http\Controllers;<br></span>
<span style="font-size: 14px;"> <br></span>
<span style="font-size: 14px;">useIlluminate\Http\Request;<br></span>
<span style="font-size: 14px;"> <br></span>
<span style="font-size: 14px;">useApp\Http\Requests;<br></span>
<span style="font-size: 14px;">useApp\Http\Controllers\Controller;<br></span>
<span style="font-size: 14px;"> <br></span>
<span style="font-size: 14px;">classUserControllerextendsController<br></span>
<span style="font-size: 14px;">{<br></span>
<span style="font-size: 14px;"> /**<br></span>
<span style="font-size: 14px;"> * Display a listing of the resource.<br></span>
<span style="font-size: 14px;"> *<br></span>
<span style="font-size: 14px;"> * @return \Illuminate\Http\Response<br></span>
<span style="font-size: 14px;"> */<br></span>
<span style="font-size: 14px;"> publicfunctionindex()<br></span>
<span style="font-size: 14px;"> {<br></span>
<span style="font-size: 14px;"> //<br></span>
<span style="font-size: 14px;"> }<br></span>
<span style="font-size: 14px;"> <br></span>
<span style="font-size: 14px;"> /**<br></span>
<span style="font-size: 14px;"> * Show the form for creating a new resource.<br></span>
<span style="font-size: 14px;"> *<br></span>
<span style="font-size: 14px;"> * @return \Illuminate\Http\Response<br></span>
<span style="font-size: 14px;"> */<br></span>
<span style="font-size: 14px;"> publicfunctioncreate()<br></span>
<span style="font-size: 14px;"> {<br></span>
<span style="font-size: 14px;"> //<br></span>
<span style="font-size: 14px;"> }<br></span>
<span style="font-size: 14px;"> <br></span>
<span style="font-size: 14px;"> /**<br></span>
<span style="font-size: 14px;"> * Store a newly created resource in storage.<br></span>
<span style="font-size: 14px;"> *<br></span>
<span style="font-size: 14px;"> * @param \Illuminate\Http\Request $request<br></span>
<span style="font-size: 14px;"> * @return \Illuminate\Http\Response<br></span>
<span style="font-size: 14px;"> */<br></span>
<span style="font-size: 14px;"> publicfunctionstore(Request $request)<br></span>
<span style="font-size: 14px;"> {<br></span>
<span style="font-size: 14px;"> //<br></span>
<span style="font-size: 14px;"> }<br></span>
<span style="font-size: 14px;"> <br></span>
<span style="font-size: 14px;"> /**<br></span>
<span style="font-size: 14px;"> * Display the specified resource.<br></span>
<span style="font-size: 14px;"> *<br></span>
<span style="font-size: 14px;"> * @param int $id<br></span>
<span style="font-size: 14px;"> * @return \Illuminate\Http\Response<br></span>
<span style="font-size: 14px;"> */<br></span>
<span style="font-size: 14px;"> publicfunctionshow($id)<br></span>
<span style="font-size: 14px;"> {<br></span>
<span style="font-size: 14px;"> //<br></span>
<span style="font-size: 14px;"> }<br></span>
<span style="font-size: 14px;"> <br></span>
<span style="font-size: 14px;"> /**<br></span>
<span style="font-size: 14px;"> * Show the form for editing the specified resource.<br></span>
<span style="font-size: 14px;"> *<br></span>
<span style="font-size: 14px;"> * @param int $id<br></span>
<span style="font-size: 14px;"> * @return \Illuminate\Http\Response<br></span>
<span style="font-size: 14px;"> */<br></span>
<span style="font-size: 14px;"> publicfunctionedit($id)<br></span>
<span style="font-size: 14px;"> {<br></span>
<span style="font-size: 14px;"> //<br></span>
<span style="font-size: 14px;"> }<br></span>
<span style="font-size: 14px;"> <br></span>
<span style="font-size: 14px;"> /**<br></span>
<span style="font-size: 14px;"> * Update the specified resource in storage.<br></span>
<span style="font-size: 14px;"> *<br></span>
<span style="font-size: 14px;"> * @param \Illuminate\Http\Request $request<br></span>
<span style="font-size: 14px;"> * @param int $id<br></span>
<span style="font-size: 14px;"> * @return \Illuminate\Http\Response<br></span>
<span style="font-size: 14px;"> */<br></span>
<span style="font-size: 14px;"> publicfunctionupdate(Request $request, $id)<br></span>
<span style="font-size: 14px;"> {<br></span>
<span style="font-size: 14px;"> //<br></span>
<span style="font-size: 14px;"> }<br></span>
<span style="font-size: 14px;"> <br></span>
<span style="font-size: 14px;"> /**<br></span>
<span style="font-size: 14px;"> * Remove the specified resource from storage.<br></span>
<span style="font-size: 14px;"> *<br></span>
<span style="font-size: 14px;"> * @param int $id<br></span>
<span style="font-size: 14px;"> * @return \Illuminate\Http\Response<br></span>
<span style="font-size: 14px;"> */<br></span>
<span style="font-size: 14px;"> publicfunctiondestroy($id)<br></span>
<span style="font-size: 14px;"> {<br></span>
<span style="font-size: 14px;"> //<br></span>
<span style="font-size: 14px;"> }<br></span>
<span style="font-size: 14px;">}<br></span>
我们可以看到,Laravel 为我们生成了一些默认的代码,仔细观察可以发现是 7 个空方法,分别是
index()、create()、store()、show()、edit、update、destroy
其中index()通常用来显示引导页/首页,其他的六个通常用来对数据的创建/读取/更新/删除操作,简称 CRUD (Create Retrieve Update Delete)。
现在我们先删除这些空操作,然后创建一个新方法:
<span style="font-size: 14px;"><?php<br></span>
<span style="font-size: 14px;"> <br></span>
<span style="font-size: 14px;">namespaceApp\Http\Controllers;<br></span>
<span style="font-size: 14px;"> <br></span>
<span style="font-size: 14px;">useIlluminate\Http\Request;<br></span>
<span style="font-size: 14px;"> <br></span>
<span style="font-size: 14px;">useApp\Http\Requests;<br></span>
<span style="font-size: 14px;">useApp\Http\Controllers\Controller;<br></span>
<span style="font-size: 14px;"> <br></span>
<span style="font-size: 14px;">classUserControllerextendsController<br></span>
<span style="font-size: 14px;">{<br></span>
<span style="font-size: 14px;"> publicfunctionname(){<br></span>
<span style="font-size: 14px;"> return'Name Page';<br></span>
<span style="font-size: 14px;"> }<br></span>
<span style="font-size: 14px;">}<br></span>
对应之前创建过的路由:
<span style="font-size: 14px;">Route::get('/user/name', 'UserController@name');<br></span>
现在我们可以访问一下localhost/user/name看下效果:
可以看到,实现了跟以前一样的效果,但是我们应用了 Controller ,一个很简单的例子。
(三) 控制器的命名空间
可能你会注意到控制器文件中有这么一行代码:
<span style="font-size: 14px;">namespaceApp\Http\Controllers;<br></span>
这行代码就是说明了此控制器的命名空间。
这个目录也是控制器的默认目录,所以我们在 routes.php 文件中引入的时候可以直接使用:
<span style="font-size: 14px;">Route::get('/user/name', 'UserController@name');<br></span>
有一点非常重要,那就是我们在定义控制器路由时,不需要指定完整的控制器命名空间。我们只需要定义「根」命名空间 App\Http\Controllers 之后的部分类名称即可。默认 RouteServiceProvider 会使用路由群组,把 routes.php 文件里所有路由规则都配置了根控制器命名空间。
现在假如你在 App\Http\Controller 目录下新建了一个 User 文件夹来存放 UserControllser.php。
你的 routes.php 文件中就需要这么写:
<span style="font-size: 14px;">Route::get('/user/name', 'User\UserController@name');<br></span>
相应的,控制器中的命名空间也要改变:
<span style="font-size: 14px;">namespaceApp\Http\Controllers\User;<br></span>
现在让我们来删掉刚才的控制器,重新生成一个新的控制器,打开命令行:
<span style="font-size: 14px;">rm app/Http/Controllers/UserController.php<br></span>
然后重新生成一个 UserController ,这次我们单独创建一个 User 文件夹来存放这个 Controller 。
<span style="font-size: 14px;">php artisan make:controller User/UserController<br></span>
然后打开工程文件,我们可以看到,在 app\http\Controllers 文件夹下新建了一个 User 文件夹,里边有我们刚刚创建的 UserController.php 文件,打开这个文件:
<span style="font-size: 14px;"><?php<br></span>
<span style="font-size: 14px;"> <br></span>
<span style="font-size: 14px;">namespaceApp\Http\Controllers\User;<br></span>
<span style="font-size: 14px;"> <br></span>
<span style="font-size: 14px;">useIlluminate\Http\Request;<br></span>
<span style="font-size: 14px;"> <br></span>
<span style="font-size: 14px;">useApp\Http\Requests;<br></span>
<span style="font-size: 14px;">useApp\Http\Controllers\Controller;<br></span>
<span style="font-size: 14px;"> <br></span>
<span style="font-size: 14px;">classUserControllerextendsController<br></span>
<span style="font-size: 14px;">{<br></span>
<span style="font-size: 14px;"> /**<br></span>
<span style="font-size: 14px;"> * Display a listing of the resource.<br></span>
<span style="font-size: 14px;"> *<br></span>
<span style="font-size: 14px;"> * @return \Illuminate\Http\Response<br></span>
<span style="font-size: 14px;"> */<br></span>
<span style="font-size: 14px;"> publicfunctionindex()<br></span>
<span style="font-size: 14px;"> {<br></span>
<span style="font-size: 14px;"> //<br></span>
<span style="font-size: 14px;"> }<br></span>
<span style="font-size: 14px;"> <br></span>
<span style="font-size: 14px;"> .<br></span>
<span style="font-size: 14px;"> .<br></span>
<span style="font-size: 14px;"> .<br></span>
<span style="font-size: 14px;">}<br></span>
注意看命名空间,可以看到,默认生成的命名空间就是App\Http\Controller\User 这就是 artisan 命令为我们做的。
修改为我们自己的方法:
<span style="font-size: 14px;"><?php<br></span>
<span style="font-size: 14px;"> <br></span>
<span style="font-size: 14px;">namespaceApp\Http\Controllers\User;<br></span>
<span style="font-size: 14px;"> <br></span>
<span style="font-size: 14px;">useIlluminate\Http\Request;<br></span>
<span style="font-size: 14px;"> <br></span>
<span style="font-size: 14px;">useApp\Http\Requests;<br></span>
<span style="font-size: 14px;">useApp\Http\Controllers\Controller;<br></span>
<span style="font-size: 14px;"> <br></span>
<span style="font-size: 14px;">classUserControllerextendsController<br></span>
<span style="font-size: 14px;">{<br></span>
<span style="font-size: 14px;"> publicfunctionname(){<br></span>
<span style="font-size: 14px;"> return'Name Page';<br></span>
<span style="font-size: 14px;"> }<br></span>
<span style="font-size: 14px;">}<br></span>
然后对应更改 routes.php 文件:
<span style="font-size: 14px;">Route::get('/user/name', 'User\UserController@name');<br></span>
然后访问 localhost/user/name 可以看到实现了正确的跳转!
(四) 控制器的依赖注入
细心的你肯定发现,控制器中还有几行神奇的代码:
<span style="font-size: 14px;">use Illuminate\Http\Request;<br></span>
<span style="font-size: 14px;"> <br></span>
<span style="font-size: 14px;">use App\Http\Requests;<br></span>
<span style="font-size: 14px;">use App\Http\Controllers\Controller;<br></span>
这几行代码说明了该控制器的依赖注入,简单来说,依赖注入就是将该控制器用到的依赖添加进来。
比如,所有的 Controller 都依赖 基础 Controller.php ,所以需要:
<span style="font-size: 14px;">use App\Http\Controllers\Controller;<br></span>
比如,当我们处理请求的时候,我们引入 Request 类,才可以使用很多 Laravel 提供的方法:
<span style="font-size: 14px;">use Illuminate\Http\Request;<br></span>
在后边的实验中你会慢慢体会到依赖注入的强大之处。
相关推荐:
.net转php laraval框架学习系列,.netlaraval_PHP教程