
Home >Web Front-end >JS Tutorial >Three.js uses dat.GUI to simplify the testing process
Three.js uses dat.GUI to simplify the testing process

- 小云云Original
- 2018-02-01 09:45:442688browse
dat.gui can easily add control bars to the scene and adjust parameters at any time. This article mainly introduces to you the thoughts on how Three.js uses dat.GUI to simplify the test process. In fact, the most trouble-free part of using this plug-in is that debugging can easily adjust the relevant values, thus affecting the final drawing results. The things implemented by dat.GUI are also very simple and easy to understand. Not much to say below, let’s take a look at the detailed introduction.
After we instantiate the dat.GUI object, some adjustable parameters will be displayed in the upper right corner, such as:
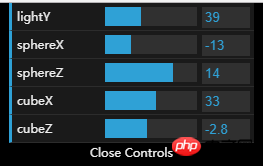
This is today’s case production The five properties that can be adjusted come out. And it is very simple to implement, and most of it requires us to do it, except that the console above was not written by us.
Introduction method
First, you need to introduce the library file into the page:
<script src="examples/js/libs/dat.gui.min.js"></script>
Then, you can declare an object, which includes all the modifications that need to be made. Attributes, such as:
gui = {
 lightY:30, //灯光y轴的位置
 sphereX:0, //球的x轴的位置
 sphereZ:0, //球的z轴的位置
 cubeX:25, //立方体的x轴位置
 cubeZ:-5 //立方体的z轴的位置
};
This is the attribute related to the case written by me, which can be compared with the above picture.
Next step, you need to convert the dat.GUI object, and then call the attribute-related add (object, attribute, minimum value, maximum value) method for the relevant attributes that need to be controlled, and add the attribute control:
var datGui = new dat.GUI();
  //将设置属性添加到gui当中,gui.add(对象,属性,最小值,最大值)
  datGui.add(gui,"lightY",0,100);
  datGui.add(gui,"sphereX",-30,30);
  datGui.add(gui,"sphereZ",-30,30);
  datGui.add(gui,"cubeX",0,60);
  datGui.add(gui,"cubeZ",-30,30);
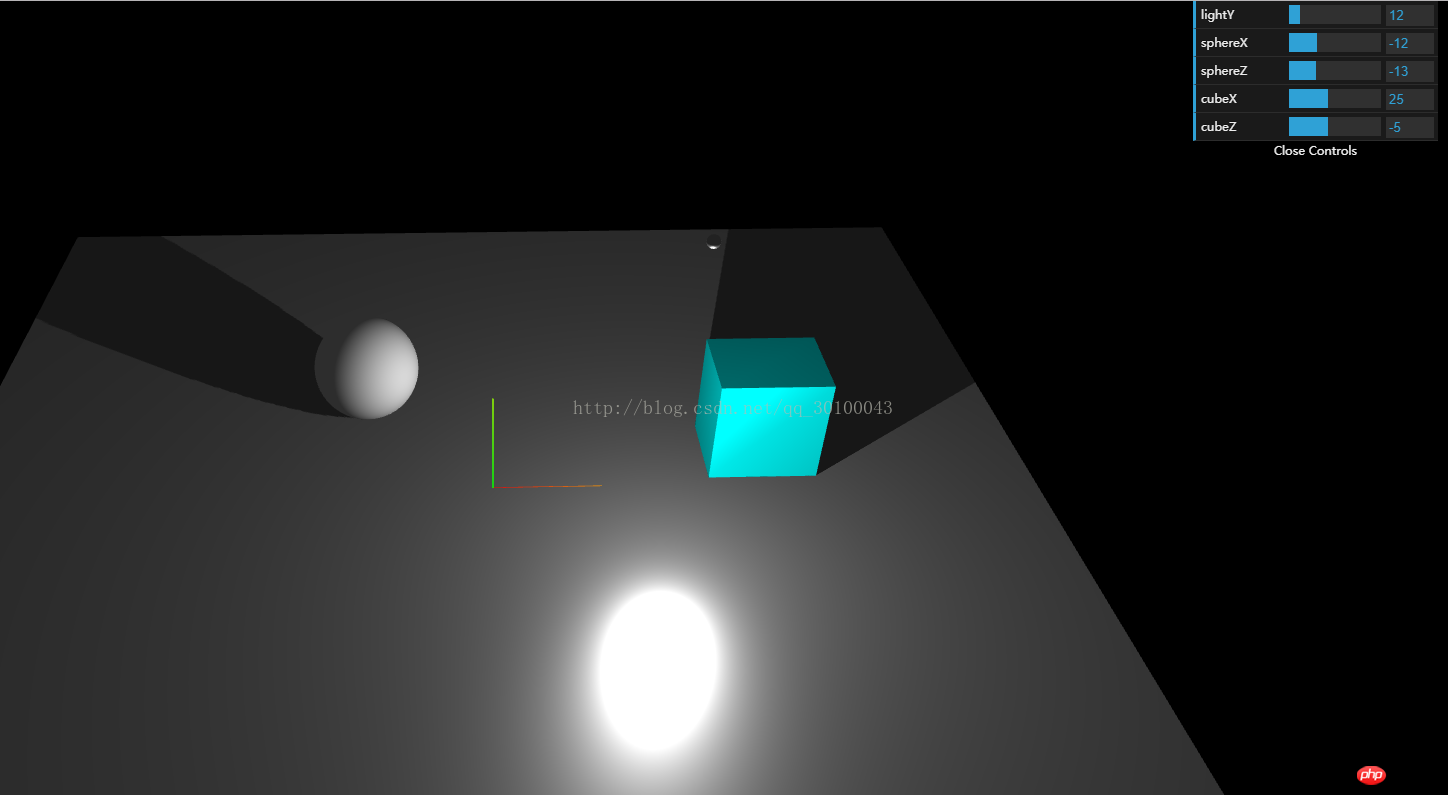
At this step, the dat.GUI object can control these values. What we need to do is to modify the relevant values in the animate function of each rendering, so that this can be achieved It worked.
//更新相关位置
light.position.y = gui.lightY;
sphere.position.x = gui.sphereX;
sphere.position.z = gui.sphereZ;
cube.position.x = gui.cubeX;
cube.position.z = gui.cubeZ;
The effect is achieved here.
Commonly used methods
gui.addFolder()
This method is to add a column and return a column object with the function of a drop-down menu. If in the current column To add a function button below, you need to write it in the following way
var lightFolder = gui.addFolder('Light');

lightFolder.add(param, 'width', 0.1, 100).onChange(function (val) {

 rectLight.width = val;

});
gui.add()
This method is a commonly used adding method. You can add an ordinary button and pass in at least two values. Three or four values are the setting range
Add the setting attributes to the gui, gui.add(object, attribute, minimum value, maximum value)
If inside the object The class is a function. If you need to trigger a click event, just pass in two values. When clicked, the relevant event can be triggered.
gui.add(controls, 'addCube');
gui.addColor()
The button added by this method is a standard color selector, for example:
gui.addColor(param, 'color')
.onChange()
This method is a callback function that can be triggered, in the value When a change occurs, the current function will be triggered, such as
gui.addColor(param, 'color').onChange(function (val) {

 rectLight.color.setHex(val);

});
.listen()
If you just want to display the current value and monitor the current changes, just write:
gui.add(obj, 'key').listen();
Effect Case
Attached below are all my codes:
Title <script src="examples/js/libs/dat.gui.min.js"></script> <script> var renderer; function initRender() { renderer = new THREE.WebGLRenderer({antialias:true}); renderer.setSize(window.innerWidth, window.innerHeight); //告诉渲染器需要阴影效果 renderer.shadowMap.enabled = true; renderer.shadowMap.type = THREE.PCFSoftShadowMap; // 默认的是,没有设置的这个清晰 THREE.PCFShadowMap document.body.appendChild(renderer.domElement); } var camera; function initCamera() { camera = new THREE.PerspectiveCamera(45, window.innerWidth/window.innerHeight, 0.1, 1000); camera.position.set(0, 40, 100); camera.lookAt(new THREE.Vector3(0,0,0)); } var scene; function initScene() { scene = new THREE.Scene(); } //初始化dat.GUI简化试验流程 var gui; function initGui() { //声明一个保存需求修改的相关数据的对象 gui = { lightY:30, //灯光y轴的位置 sphereX:0, //球的x轴的位置 sphereZ:0, //球的z轴的位置 cubeX:25, //立方体的x轴位置 cubeZ:-5 //立方体的z轴的位置 }; var datGui = new dat.GUI(); //将设置属性添加到gui当中,gui.add(对象,属性,最小值,最大值) datGui.add(gui,"lightY",0,100); datGui.add(gui,"sphereX",-30,30); datGui.add(gui,"sphereZ",-30,30); datGui.add(gui,"cubeX",0,60); datGui.add(gui,"cubeZ",-30,30); } var light; function initLight() { scene.add(new THREE.AmbientLight(0x444444)); light = new THREE.PointLight(0xffffff); light.position.set(15,30,10); //告诉平行光需要开启阴影投射 light.castShadow = true; scene.add(light); } var sphere,cube; function initModel() { //上面的球 var sphereGeometry = new THREE.SphereGeometry(5,200,200); var sphereMaterial = new THREE.MeshLambertMaterial({color:0xaaaaaa}); sphere = new THREE.Mesh(sphereGeometry, sphereMaterial); sphere.position.y = 5; //告诉球需要投射阴影 sphere.castShadow = true; scene.add(sphere); //光源的球 var spGeometry = new THREE.SphereGeometry(0.5,20,20); var spMaterial = new THREE.MeshPhysicalMaterial({color:0xffffff}); var sp = new THREE.Mesh(spGeometry,spMaterial); sp.position.set(15,30,10); scene.add(sp); //辅助工具 var helper = new THREE.AxisHelper(10); scene.add(helper); //立方体 var cubeGeometry = new THREE.CubeGeometry(10,10,8); var cubeMaterial = new THREE.MeshLambertMaterial({color:0x00ffff}); cube = new THREE.Mesh(cubeGeometry, cubeMaterial); cube.position.x = 25; cube.position.y = 5; cube.position.z = -5; //告诉立方体需要投射阴影 cube.castShadow = true; scene.add(cube); //底部平面 var planeGeometry = new THREE.PlaneGeometry(100,100); var planeMaterial = new THREE.MeshStandardMaterial({color:0xaaaaaa}); var plane = new THREE.Mesh(planeGeometry, planeMaterial); plane.rotation.x = - 0.5 * Math.PI; plane.position.y = -0; //告诉底部平面需要接收阴影 plane.receiveShadow = true; scene.add(plane); } //初始化性能插件 var stats; function initStats() { stats = new Stats(); document.body.appendChild(stats.dom); } //用户交互插件 鼠标左键按住旋转,右键按住平移,滚轮缩放 var controls; function initControls() { controls = new THREE.OrbitControls( camera, renderer.domElement ); // 如果使用animate方法时,将此函数删除 //controls.addEventListener( 'change', render ); // 使动画循环使用时阻尼或自转 意思是否有惯性 controls.enableDamping = true; //动态阻尼系数 就是鼠标拖拽旋转灵敏度 //controls.dampingFactor = 0.25; //是否可以缩放 controls.enableZoom = true; //是否自动旋转 controls.autoRotate = false; //设置相机距离原点的最远距离 controls.minDistance = 100; //设置相机距离原点的最远距离 controls.maxDistance = 200; //是否开启右键拖拽 controls.enablePan = true; } function render() { renderer.render( scene, camera ); } //窗口变动触发的函数 function onWindowResize() { camera.aspect = window.innerWidth / window.innerHeight; camera.updateProjectionMatrix(); render(); renderer.setSize( window.innerWidth, window.innerHeight ); } function animate() { //更新控制器 render(); //更新性能插件 stats.update(); //更新相关位置 light.position.y = gui.lightY; sphere.position.x = gui.sphereX; sphere.position.z = gui.sphereZ; cube.position.x = gui.cubeX; cube.position.z = gui.cubeZ; controls.update(); requestAnimationFrame(animate); } function draw() { initGui(); initRender(); initScene(); initCamera(); initLight(); initModel(); initControls(); initStats(); animate(); window.onresize = onWindowResize; } </script>
Related recommendations:
## Three.js introductory example tutorial
Three.js Detailed explanation of creating scene instances
Detailed explanation of how to run three.js locally
The above is the detailed content of Three.js uses dat.GUI to simplify the testing process. For more information, please follow other related articles on the PHP Chinese website!
Related articles
See more- An in-depth analysis of the Bootstrap list group component
- Detailed explanation of JavaScript function currying
- Complete example of JS password generation and strength detection (with demo source code download)
- Angularjs integrates WeChat UI (weui)
- How to quickly switch between Traditional Chinese and Simplified Chinese with JavaScript and the trick for websites to support switching between Simplified and Traditional Chinese_javascript skills