Home >Web Front-end >JS Tutorial >ionic3 and Angular4 implement interface requests and local json file reading examples
ionic3 and Angular4 implement interface requests and local json file reading examples
- 小云云Original
- 2018-01-30 09:12:542481browse
This article mainly introduces ionic3+Angular4 implementation interface request and local json file reading examples. It has certain reference value. Interested friends can refer to it. I hope it can help everyone.
1 Preparation
First of all, you must have the development environment of ionic3+Angular4, so I won’t go into details here. When the environment is ready, create a blank project with a template of your choice.
Second implementation process
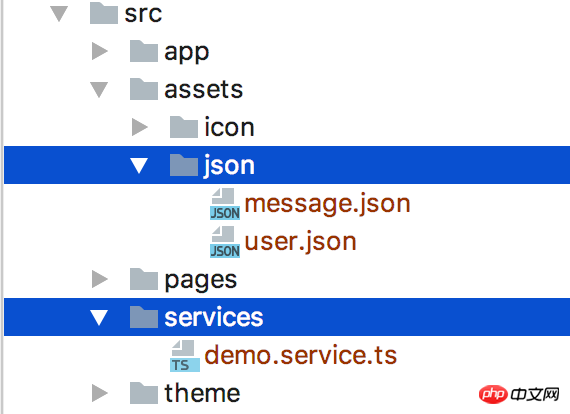
1 Create a new json file and service
service remember to quote it in app.module.ts

json and service
2 json file format
The format is similar to this and is determined according to actual needs.
[
 {
  "id":"1",
  "name":"xiehan",
  "age":"24",
  "message":"测试json文件读取"
 },
 {
  "id":"2",
  "name":"xiehan",
  "age":"24",
  "message":"测试json文件读取"
 },
 {
  "id":"3",
  "name":"xiehan",
  "age":"24",
  "message":"测试json文件读取"
 },
 {
  "id":"4",
  "name":"xiehan",
  "age":"24",
  "message":"测试json文件读取"
 }
]
3 service
import {Injectable} from '@angular/core';
import {Observable} from 'rxjs/Observable';
import {Http, Response} from '@angular/http';
import "rxjs/add/operator/map";


@Injectable()
export class DemoService {

 constructor(private httpService: Http){
 }
 // 网络接口请求
 getHomeInfo(): Observable<Response> {
  return this.httpService.request('http://jsonplaceholder.typicode.com/users')
 }

 // 本地json文件请求
 getRequestContact(){
  return this.httpService.get("assets/json/message.json")
 }
}
4 Data display
1 Network interface request
//home.ts
import {ChangeDetectorRef, Component} from '@angular/core';
import { NavController } from 'ionic-angular';
import {DemoService} from "../../services/demo.service";

@Component({
 selector: 'page-home',
 templateUrl: 'home.html'
})
export class HomePage {
 // 接收数据用
 listData: Object;
 // 依赖注入
 constructor(public navCtrl: NavController,
       private ref: ChangeDetectorRef,
       private demoService: DemoService,) {
 }

 ionViewDidLoad() {
  // 网络请求
  this.getHomeInfo();
 }

 getHomeInfo(){
  this.demoService.getHomeInfo()
   .subscribe(res => {
    this.listData = res.json();
    // 数据格式请看log
    console.log("listData------->",this.listData);
    this.ref.detectChanges();
   }, error => {
    console.log(error);
   });
 }
}


//home.html
<ion-header>
 <ion-navbar>
  <ion-title>首页</ion-title>
 </ion-navbar>
</ion-header>

<ion-content padding>
 <ion-list *ngFor="let item of listData">
  <ion-item>
  <!--?是Angular特定语法,相当于判断数据是否存在,有则显示无则不显示-->
   {{item?.name}}
  </ion-item>
 </ion-list>
</ion-content>
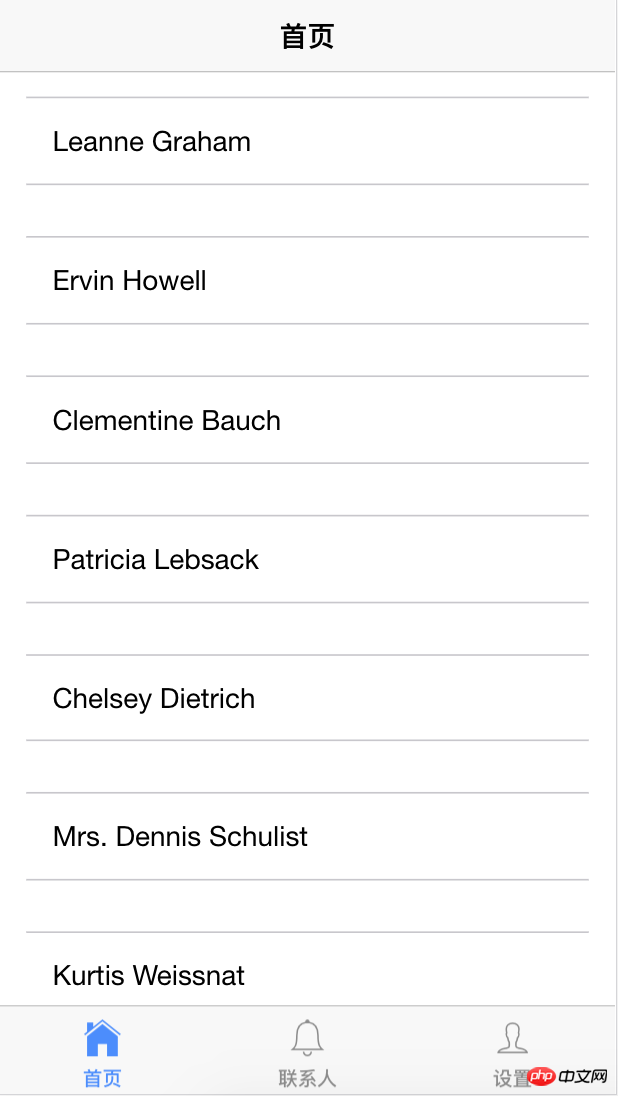
Rendering

2 Local json file request
The getRequestContact() method has been written in the service to read the local json file.
//contact.ts
import {ChangeDetectorRef, Component} from '@angular/core';
import { NavController } from 'ionic-angular';
import {DemoService} from "../../services/demo.service";

@Component({
 selector: 'page-contact',
 templateUrl: 'contact.html'
})
export class ContactPage {

 contactInfo=[];

 constructor(public navCtrl: NavController,
       private demoService: DemoService,
       private ref: ChangeDetectorRef,) {

 }

 ionViewDidLoad() {
  // 网络请求
  this.getRequestContact();
 }

 getRequestContact(){
  this.demoService.getRequestContact()
   .subscribe(res => {
    this.contactInfo = res.json();
    console.log("contactInfo------->",this.contactInfo);
    this.ref.detectChanges();
   }, error => {
    console.log(error);
   });
 }
}

// contact.html
<ion-header>
 <ion-navbar>
  <ion-title>
   联系人
  </ion-title>
 </ion-navbar>
</ion-header>

<ion-content>
 <ion-list>
  <ion-item *ngFor="let item of contactInfo">
   <p style="display: flex;flex-direction: column;">
    <span>姓名:{{item?.name}}</span>
    <span>年龄:{{item?.age}}</span>
    <span>信息:{{item?.message}}</span>
   </p>
  </ion-item>
 </ion-list>
</ion-content>
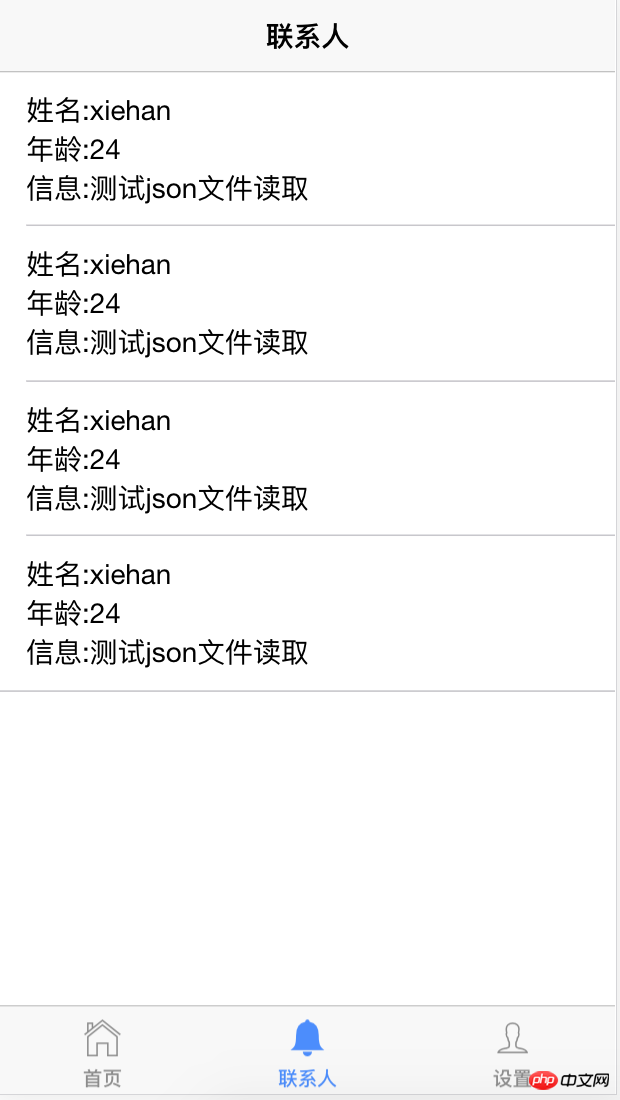
Rendering

2.service should be referenced in app.module.ts;
Angular4 implements mouse hover 3D tilt effect example sharing
Angular4 self-made city and county secondary linkage component detailed explanation
Preparation and preparation of the project in Angular4 Environment setup operation
The above is the detailed content of ionic3 and Angular4 implement interface requests and local json file reading examples. For more information, please follow other related articles on the PHP Chinese website!
Related articles
See more- An in-depth analysis of the Bootstrap list group component
- Detailed explanation of JavaScript function currying
- Complete example of JS password generation and strength detection (with demo source code download)
- Angularjs integrates WeChat UI (weui)
- How to quickly switch between Traditional Chinese and Simplified Chinese with JavaScript and the trick for websites to support switching between Simplified and Traditional Chinese_javascript skills

