
Home >Web Front-end >JS Tutorial >Nodejs sample code for image preview and upload
Nodejs sample code for image preview and upload

- 黄舟Original
- 2017-10-01 07:42:512125browse
This article mainly introduces the sample code for nodejs image preview and upload. The editor thinks it is quite good. Now I will share it with you and give it as a reference. Let’s follow the editor and take a look.
This article introduces the sample code for nodejs image preview and upload, and shares it with everyone. The details are as follows:
The effect is as follows:
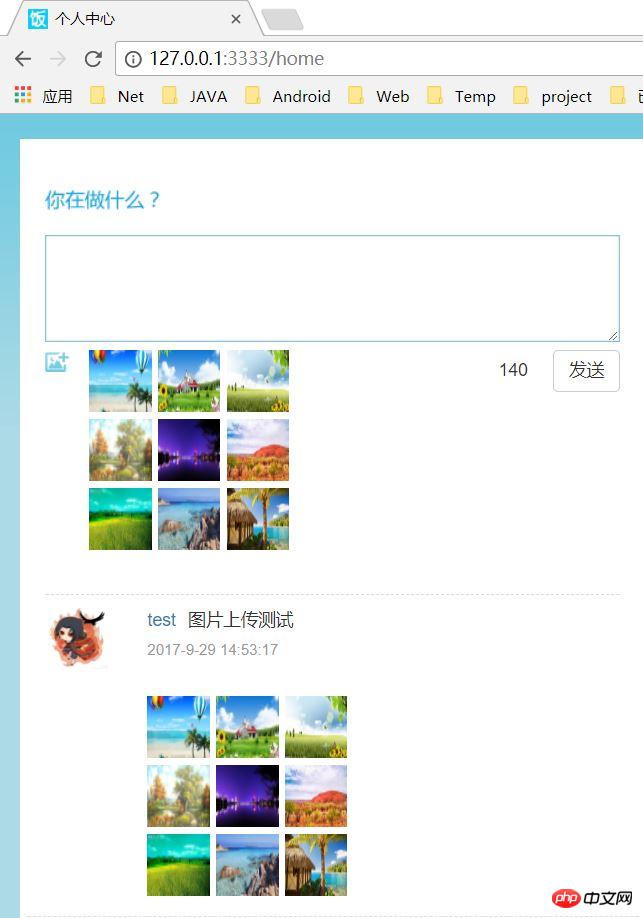
Preface
Generally, you need to temporarily preview the image locally before uploading it.
The front-end image preview uses the readAsDataURL method of FileReader
nodejs image upload uses the middleware Multer
Local Image Preview
The FileReader object allows a web application to asynchronously read the contents of a file (or raw data buffer) stored on the user's computer, using a File or Blob object to specify the file to read or data.
The readAsDataURL method is used to read the contents of the specified Blob or file. When the read operation is completed, readyState is completed and loadend is triggered. At that point, the result attribute contains the data as a URL representing the file, as a base64-encoded string.
Single image preview
html part
<input type="file" onchange="previewFile()"><br>
<img src="" height="200" alt="Image preview...">
javascript part
function previewFile() {
 var preview = document.querySelector('img');
 var file  = document.querySelector('input[type=file]').files[0];
 var reader = new FileReader();

 reader.addEventListener("load", function () {
  preview.src = reader.result;
 }, false);

 if (file) {
  reader.readAsDataURL(file);
 }
}
Multiple picture preview
html part
<input id="browse" type="file" onchange="previewFiles()" multiple>
<p id="preview"></p>
javascript part
function previewFiles() {

 var preview = document.querySelector('#preview');
 var files  = document.querySelector('input[type=file]').files;

 function readAndPreview(file) {

  // 支持的图片类型(可自定义)
  if ( /\.(jpe?g|png|gif)$/i.test(file.name) ) {
   var reader = new FileReader();

   reader.addEventListener("load", function () {
    var image = new Image();
    image.height = 100;
    image.title = file.name;
    image.src = this.result;
    preview.appendChild( image );
   }, false);

   reader.readAsDataURL(file);
  }

 }
 //files 就是input选中的文件,你也可以对上传图片个数进行限制 (files.length)
 if (files) {
  [].forEach.call(files, readAndPreview);
 }

}
Used in the project
Front-end part
html
<input id="txtUploadFile" type="file">
<input id="txtUploadFileList" type="file" accept="image/jpeg,image/png,image/gif" multiple class="upload-file">
<p id="preview"></p>
<input id="btnSend" type="button" value="发送" class="btn btn-default">
javascript
js The method part is broken down and it is a bit long to put it in one code block (please check the context when reading)
 $(function(){
    var upload={
      txtUploadFile:$('#txtUploadFile'), //上传单个文件
      txtUploadFileList:$('#txtUploadFileList'), //上传多个文件
      btnSend:$('#btnSend'), //上传文件
      preview:$('#preview'),//图片预览盒子
      //预览图片加载
      previewImgLoad:function(fileList){
        for(var i=0;i<fileList.length;i++){
          var tempFile=fileList[i];
          var reader = new FileReader();
          reader.readAsDataURL(tempFile);
          reader.onload=function (e) {
            var image = new Image();
            image.height = 100;
            image.title = tempFile.name;
            image.src = e.target.result;
            upload.preview.append(image);
          }
        }
      }
    }
  });
/*
上传单个文件
这里是input改变时后直接上传(用于修改用户头像)
你也可以在点击上传按钮后再上传,下面的多图上传会给出案例
*/
upload.txtUploadFile.change(function(){
var formData = new FormData();
formData.append('avatar',upload.txtUploadFile[0].files[0]);
$.ajax({
url: '/upload/file',
type: 'post',
cache: false,
data: formData,
processData: false,
contentType: false,
success:function(res){
console.log('upload success');
},
error:function(){
console.log('upload faild');
}
});
}); //加载预览图片
upload.txtUploadFileList.change(function(){
var fileList=this.files;
upload.previewImgLoad(fileList);
});//上传多张图片
upload.btnSend.click(function(){
var files = upload.txtUploadFileList.prop('files');
if(files.length==0){
//没有选择文件直接返回
return;
}
var formData=new FormData();
for(var i=0;i<files.length;i++){
formData.append('photos',files[i]);
}
$.ajax({
url: '/upload/filesList',
type: 'post',
cache: false,
data: formData,
processData: false,
contentType: false,
success:function(res){
console.log('upload success');
//到这里图片已经上传成功了.你可根据返回结果处理其他的业务逻辑
if(res.status==1){
// todo something
}
},
error:function(){
console.log('upload faild');
}
});
});nodejs part
nodejs uses Multer Middleware, this middleware is mainly used to upload files
Install Multer
npm install --save multer
Multer is used in nodejs
var express = require('express');
var multer = require('multer');
var app = express();

//磁盘存储引擎(说白了就是指定上传的文件存储到哪,当然你也可以对文件重命名等等)
var storage=multer.diskStorage({
  destination: function (req, file, cb) {
    //我这里是存储在public下的uploads目录
    cb(null, 'public/uploads/')
  },
  filename: function (req, file, cb) {
    cb(null, file.fieldname + '-' + Date.now()+"_" + file.originalname)
  }
});
Single picture upload
//如果图片上传成功会返回图片的存储路径
app.post('/upload/file', upload.single('avatar'), function(req, res) {
  if (!req.file) {
    console.log("no file received");
    return res.send({
      status: 0,
      filePath:''
    });
  } else {
    console.log('file received');
    res.send({
      status:1,
      filePath: '/uploads/' + path.basename(req.file.path)
    });
  }
});
Multiple picture upload
// 如果图片上传成功会返回图片的存储路径(数组)
app.post('/upload/filesList', upload.array('photos',9), function(req, res) {
if (req.files==undefined) {
console.log("no files received");
return res.send({
status: 0,
filePath:''
});
} else {
var filesPathArr=[];
for(var i=0;i<req.files.length;i++){
filesPathArr.push('/uploads/' + path.basename(req.files[i].path));
}
res.send({
status:1,
filesPath: filesPathArr
});
}
});The above is the detailed content of Nodejs sample code for image preview and upload. For more information, please follow other related articles on the PHP Chinese website!
Related articles
See more- An in-depth analysis of the Bootstrap list group component
- Detailed explanation of JavaScript function currying
- Complete example of JS password generation and strength detection (with demo source code download)
- Angularjs integrates WeChat UI (weui)
- How to quickly switch between Traditional Chinese and Simplified Chinese with JavaScript and the trick for websites to support switching between Simplified and Traditional Chinese_javascript skills