
Home >Web Front-end >JS Tutorial >Detailed explanation of React Native open source time and date picker component
Detailed explanation of React Native open source time and date picker component
- 巴扎黑Original
- 2017-09-15 09:12:103081browse
This article mainly introduces the detailed explanation of the React Native open source time and date picker component (react-native-datetime), which has certain reference value. Those who are interested can learn more about
Project Introduction
This component encapsulates a time and date picker and is adapted to both Android and iOS platforms. This component is developed based on @remobile/react-native-datetime-picker
Configuration and installation
npm install react-native-datetime --save
1.1. iOS environment configuration
After completing the above steps, directly Just write js code in the frontend
1.2. Android environment configuration
Configure as follows in the android/setting.gradle file
...
include ':react-native-datetime'
project(':react-native-datetime').projectDir = new File(rootProject.projectDir, '../node_modules/react-native-datetime/android')
Configure the following in the android/app/build.gradle file
...
dependencies {
  ...
  compile project(':react-native-datetime')
}
Register the module in MainActivity.java
①.React Native>=0.18 starts
##
import com.keyee.datetime.*; // <--- import

public class MainActivity extends ReactActivity {
 ......

 /**
  * A list of packages used by the app. If the app uses additional views
  * or modules besides the default ones, add more packages here.
  */
  @Override
  protected List<ReactPackage> getPackages() {
   return Arrays.<ReactPackage>asList(
    new RCTDateTimePickerPackage(this), // <------ add here
    new MainReactPackage());
  }
}
①.React Native<=0.17 version
import com.keyee.datetime.*; // <--- import
public class MainActivity extends Activity implements DefaultHardwareBackBtnHandler {
......
@Override
protected void onCreate(Bundle savedInstanceState) {
super.onCreate(savedInstanceState);
mReactRootView = new ReactRootView(this);
mReactInstanceManager = ReactInstanceManager.builder()
.setApplication(getApplication())
.setBundleAssetName("index.android.bundle")
.setJSMainModuleName("index.android")
.addPackage(new MainReactPackage())
.addPackage(new RCTDateTimePickerPackage(this)) // <------ add here
.setUseDeveloperSupport(BuildConfig.DEBUG)
.setInitialLifecycleState(LifecycleState.RESUMED)
.build();
mReactRootView.startReactApplication(mReactInstanceManager, "ExampleRN", null);
setContentView(mReactRootView);
}
......
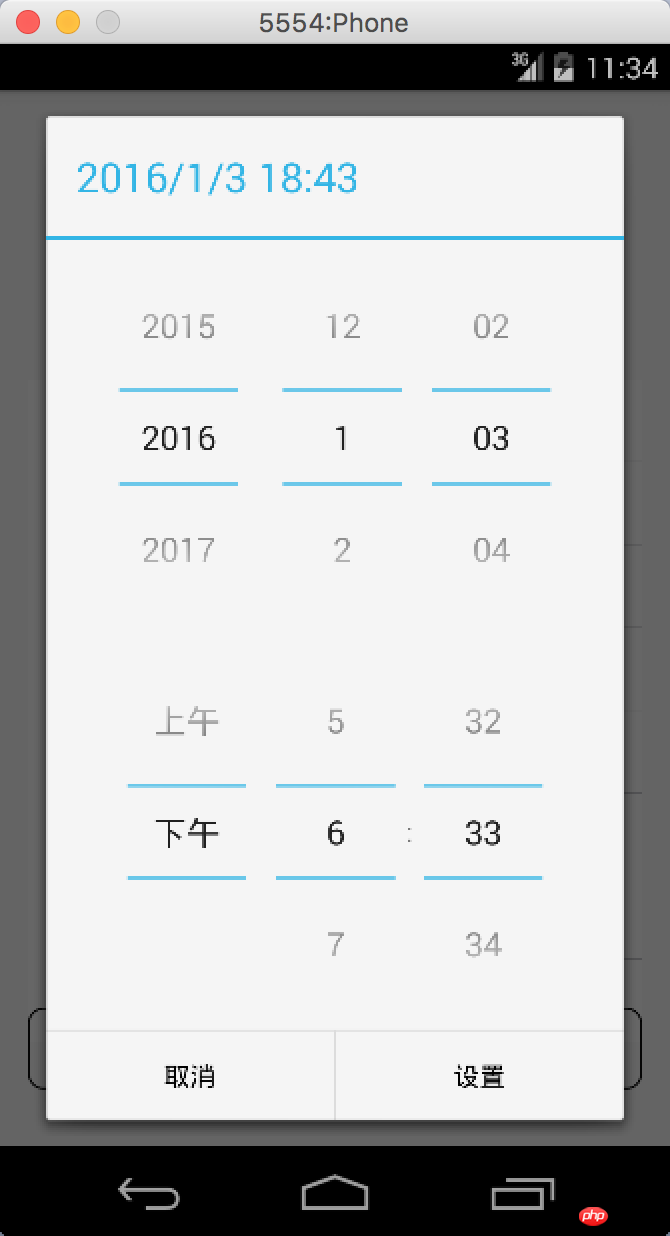
}Running screenshot
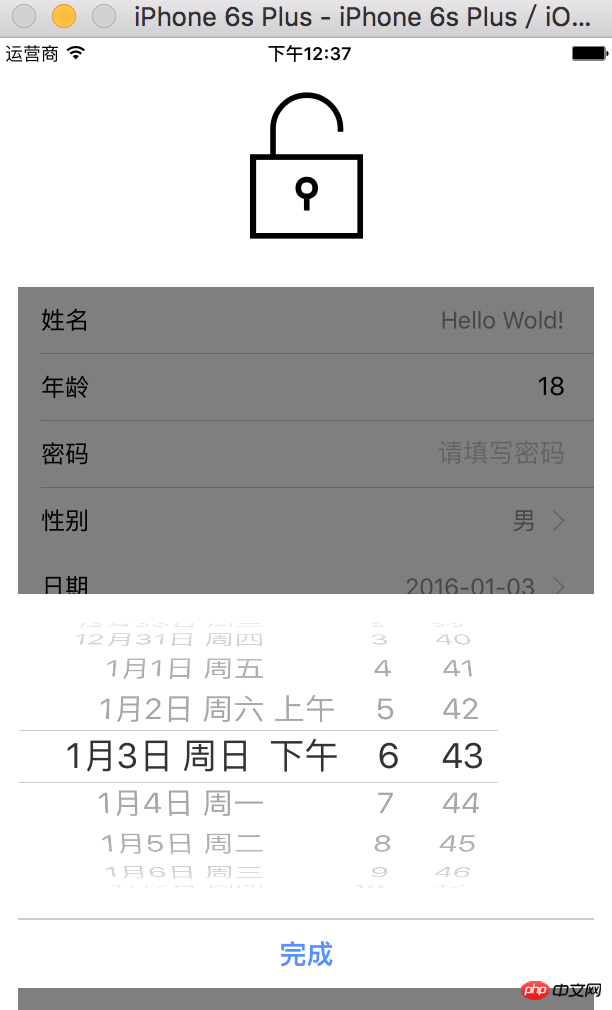 ##android running effect
 Usage method
<DateTimePicker ref={(picker)=>{this.picker=picker}}/>
...
this.picker.showDatePicker(...)
this.picker.showTimePicker(...)
this.picker.showDateTimePicker(...)
When used on the ios platform, you need to ensure that the current DataTimePicker view is at the top
Usage example
'use strict';
var React = require('react-native');
var {
StyleSheet,
TouchableOpacity,
View,
Text,
} = React;
var DateTimePicker = require('react-native-datetime');
var Button = require('@remobile/react-native-simple-button');
module.exports = React.createClass({
getInitialState() {
return {
date: new Date(),
}
},
showDatePicker() {
var date = this.state.date;
this.picker.showDatePicker(date, (d)=>{
this.setState({date:d});
});
},
showTimePicker() {
var date = this.state.date;
this.picker.showTimePicker(date, (d)=>{
this.setState({date:d});
});
},
showDateTimePicker() {
var date = this.state.date;
this.picker.showDateTimePicker(date, (d)=>{
this.setState({date:d});
});
},
render() {
return (
<View style={styles.container}>
<Text style={{textAlign: 'center'}}>
{this.state.date.toString()}
</Text>
<View style={{height:40}} />
<Button onPress={this.showDatePicker}>showDatePicker</Button>
<View style={{height:40}} />
<Button onPress={this.showTimePicker}>showTimePicker</Button>
<View style={{height:40}} />
<Button onPress={this.showDateTimePicker}>showDateTimePicker</Button>
<DateTimePicker ref={(picker)=>{this.picker=picker}}/>
</View>
);
},
});
var styles = StyleSheet.create({
container: {
flex: 1,
justifyContent: 'center',
paddingTop:20,
},
});Method introduction
- showDatePicker(date, callback(date))
- ##showTimePicker(date, callback(date))
-
showDateTimePicker(date, callback(date)) - Property introduction
- okText (default: Ok)
The above is the detailed content of Detailed explanation of React Native open source time and date picker component. For more information, please follow other related articles on the PHP Chinese website!
Related articles
See more- An in-depth analysis of the Bootstrap list group component
- Detailed explanation of JavaScript function currying
- Complete example of JS password generation and strength detection (with demo source code download)
- Angularjs integrates WeChat UI (weui)
- How to quickly switch between Traditional Chinese and Simplified Chinese with JavaScript and the trick for websites to support switching between Simplified and Traditional Chinese_javascript skills