Home >Java >javaTutorial >Annotations in Java Reflection
Annotations in Java Reflection
- 大家讲道理Original
- 2017-05-28 11:35:241420browse
"Annotation" is a term that has a relatively high appearance rate in Javaprogramming, and it is also a commonplace topic. When we talked about things related to Spring before, annotations were everywhere. Before, we briefly talked about some "annotations" related content, such as how "annotations" are combined in Spring. Because annotations are still relatively important in Java programming, our blog today will give a systematic introduction to annotations. Of course, we will rely on specific examples.
To put it bluntly, "annotations" are a way to store data. If annotations are singled out, their functions are average. If "annotations" are combined with Java's "reflection mechanism", Then there's a lot more that can be done. In other words, you can read the information provided by "annotations" through reflection, and then do something based on your specific needs. Of course, we used to use XML to provide information for the reflection mechanism. However, the configuration of "XML" still does not have the data form of "annotations" that is easy to manage and maintain, so the status of "annotations" is still relatively important. .
Below we first talk about "meta-annotations", and then customize annotations based on these "meta-annotations" and use Java's "reflection mechanism" to read various types of annotation information.
1. Meta-annotation
In the first part of this blog, let’s take an overall look"Meta-annotations", and then the content below is expanded based on these meta-annotations.
1. @Target
##@Target##Usage:@Target(ElementType .CONSTRUCTOR)
The annotation is more important. The Chinese name for Target is "target, position" means knowing the name and knowing the meaning. @Target is used to declare the location of the annotation we created, that is, what kind of elements the annotation we created can modify. The parameter of @Target is an enumeration of ElementType, and each enumeration item represents a position. Below are several commonly used values of the ElementType enumeration:
- TYPE
: class. If the parameter of @Target is TYPE, then the annotation we create can only Modified classes, interfaces, enumerations and other types.
- FIELD
: Field modification, if our custom annotation is of FIELD type, then our annotation can only be used to modify fields of classes or enumerations. That is, member variable .
- CONSTRUCTOR
: Constructor type, the "annotation" of this type can only modify the constructor.
- METHOD
: annotation that modifies "method".
- PARAMETER
: Annotations that modify the parameters in the "method".
- LOCAL_VARIABLE
: Modify the annotation of "local variable".
Of course, the above is a brief discussion, and specific examples of the above types of annotations will be given below. The screenshot below shows all the options in
and the role of each enumeration value. The details are as follows. The two below are the newly added enumeration items after 1.8, as follows:

2, @Retention
Usage:@Retention(RetentionPolicy.
The above is how to use
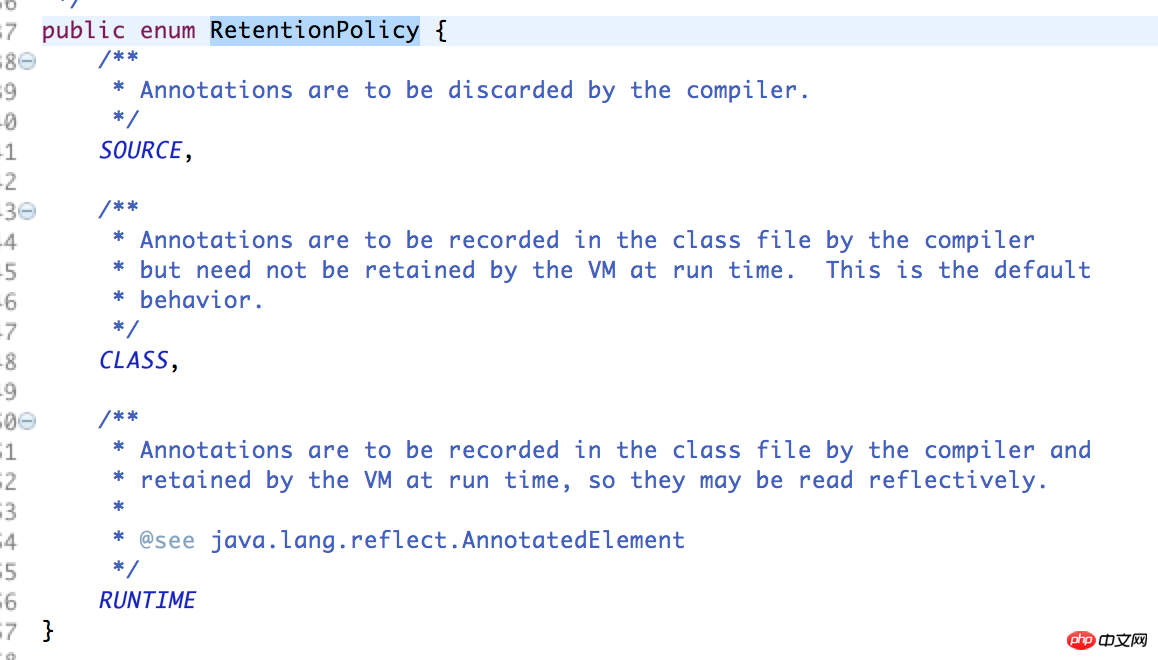
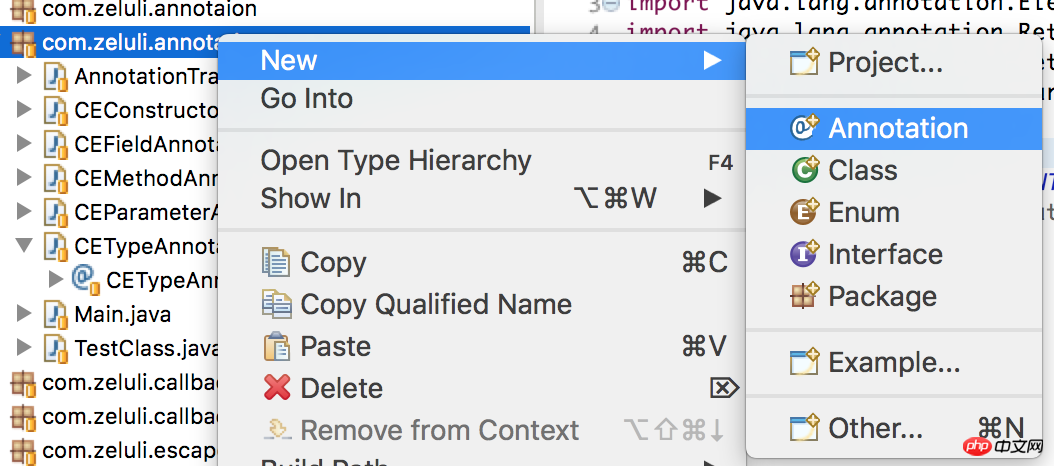
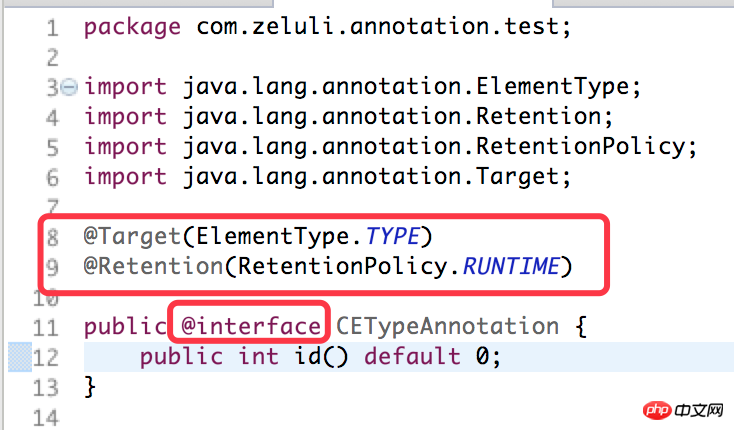
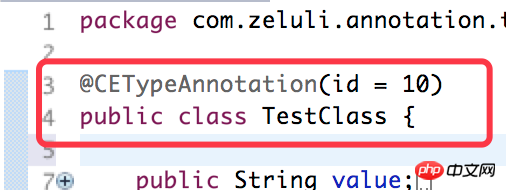
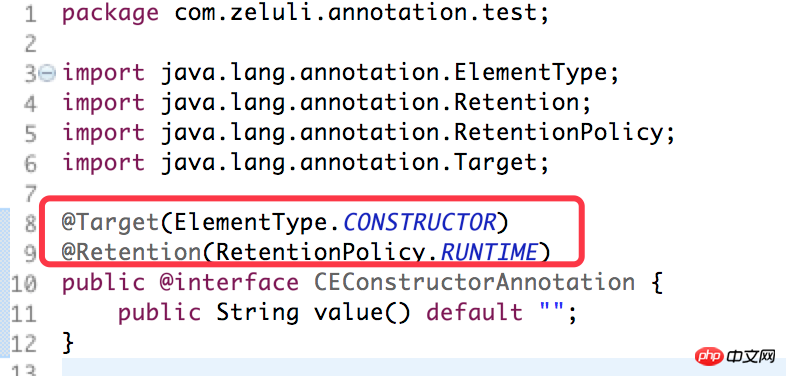
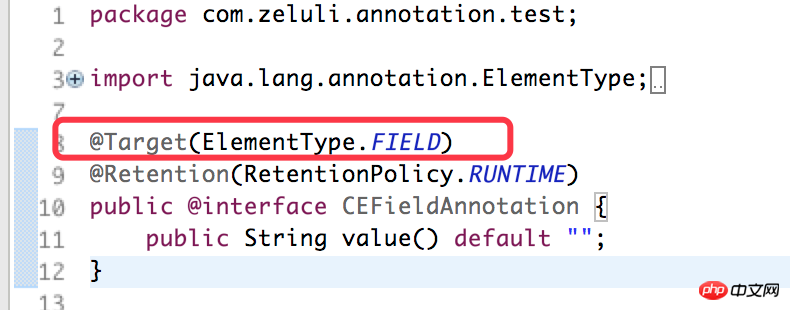
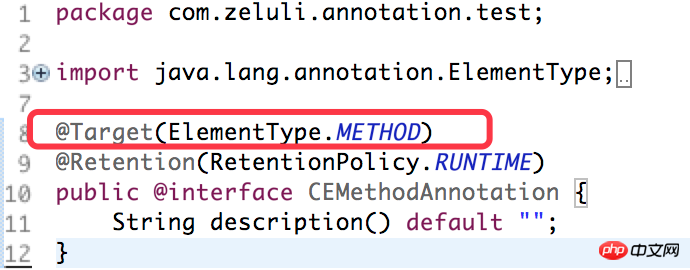
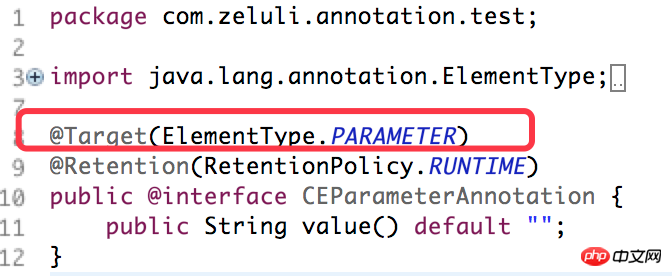
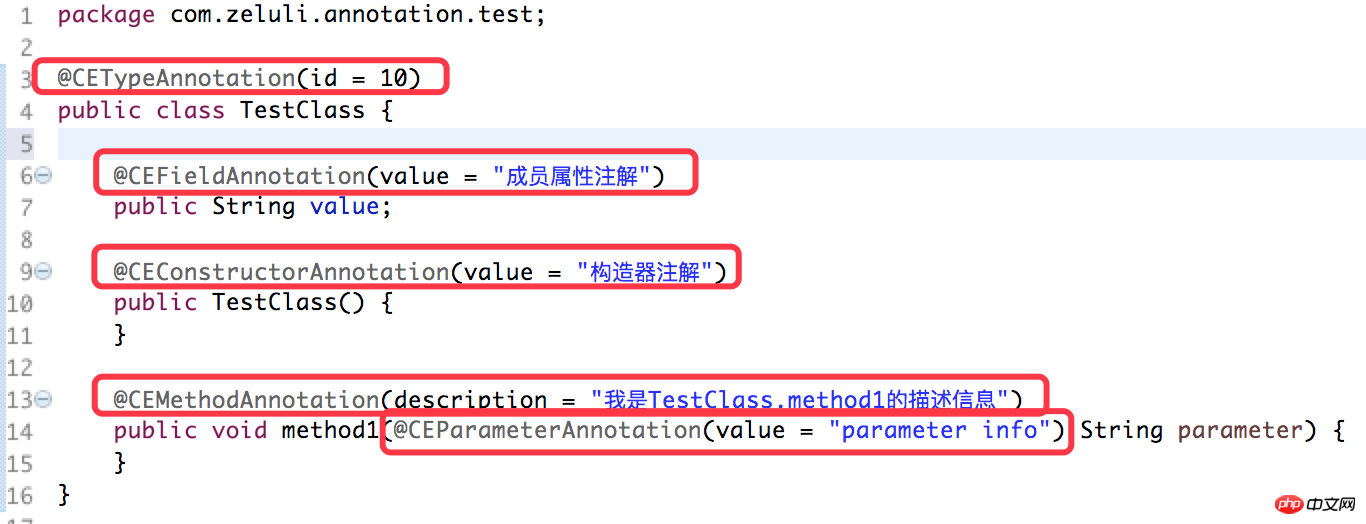
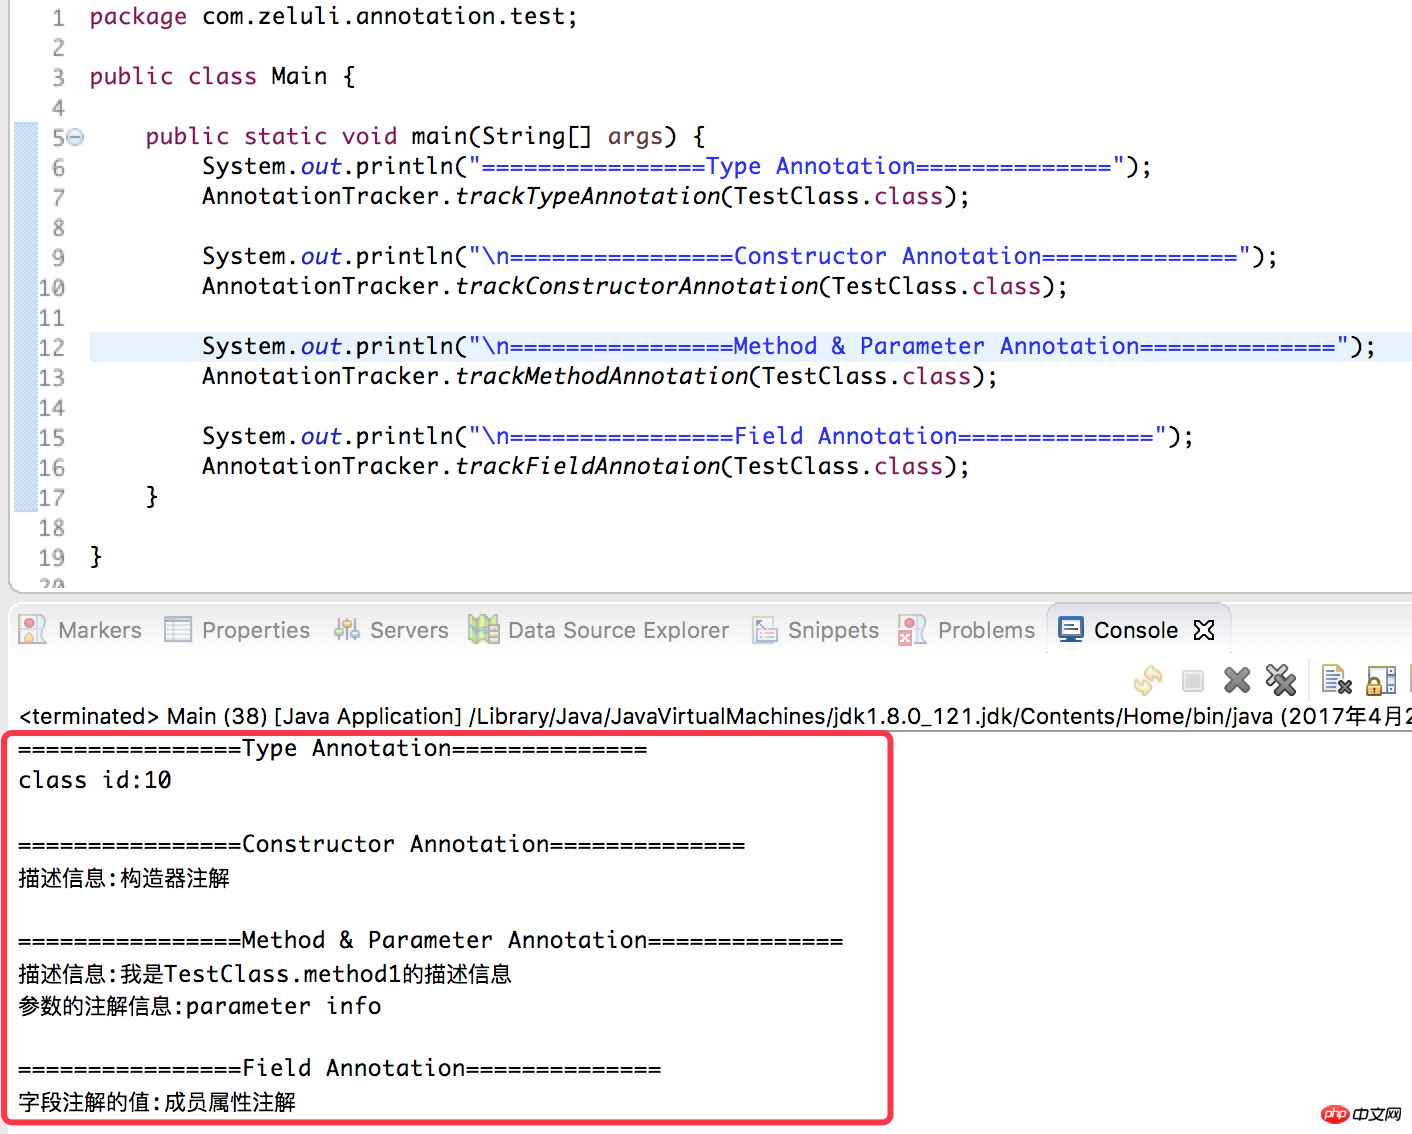
@Retention. The Chinese meaning of Retention is "KEEP", that is to say, the meta-annotation gives the retention period of the "annotation". @Retention also receives a parameter of an enumeration type. Below is the type contained in the enumeration. The English Comments below have specifically given the meaning of each enumeration item. 3, @Document and @Inherited @Document indicates that this annotation is included in Javadoc, while @Inherited indicates Indicates that this annotation can be inherited by subclasses . 2. Introduction to test cases 3. Type annotation: @Target( ElementType.TYPE) 1. Create annotation Annotation and type Just click Enter on the annotation name. @Target meta-annotation are of type ElementType.TYPE. This means that the annotation we created is a modification type annotation, which can be scoped classes, interfaces, enumerations and other types. Then we also see that the parameter of @Retention is of type RetentionPolicy.RUNTIME, indicating that the annotation is retained until runtime. @Interface, which is similar to interfaces. @Interface is followed by the name of the annotation. The name of this annotation is CETypeAnnotation. There is a public integer(int) type idattribute. The default value of this attribute is 0, as shown below. 2. Use of annotations The code snippet below is the use of the above annotations. Because the annotation created above is of type ElementType.TYPE, we use this annotation to modify a class we created, which is the TestClass below. When annotating modification, we set a value for id, which is id = 10 below. 3. Use reflection to obtain relevant information about modified type annotations Next, we will add the "reflection mechanism" of Java to the AnnotationTracker class to obtain the annotation-related information of the corresponding TestClass class. The key code is as follows. The parameter of the trackTypeAnnotation() method is a Class type, and then the annotation object in the corresponding class can be obtained through the getAnnotation() method of Class. As shown in the red box below. After obtaining the corresponding annotation object, we can obtain the configuration information in the corresponding annotation. 4. Test cases and test results Next we will In the Main method, call the above method in the AnnotationTracker class and pass in TestClass, as shown below. Below is a printout of it. ##4. Other types of annotations ElementType.TYPE type annotations in detail above. Next, let’s take a look at other types of annotations and how to use these annotations. 1、@Target(ElementType.CONSTRUCTOR) CEConstructorAnnotation below is the annotation we created to modify the class constructor. The default value of the value field is an empty string. 2、@Target(ElementType.FIELD) CEFieldAnnotation. The specific code is as follows: 3、@Target(ElementType.METHOD) CEMethodAnnotation. The specific code is as follows. 4、@Target(ElementType.PARAMETER) 5. Use of the above-mentioned related annotations 6. Use reflection mechanism to obtain different types of annotation information 1. Obtain the annotation information of the modified constructor type 2. Obtain the annotation information of modified methods and method parameters 3. Obtain the annotation information of the modified field 4. Test cases and output result
##
SOURCE: It means that our annotations will only stay in our source code and will not be compiled.
CLASS: Indicates that our annotations will be compiled into bytecode and stored in the .class file. But it will not be linked and run in the virtual machine.
RUNTIME: This means that our annotations will be retained until the program is running. If you want to do something through the reflection mechanism based on the annotation information at runtime If so, then we must keep our annotations until this stage.
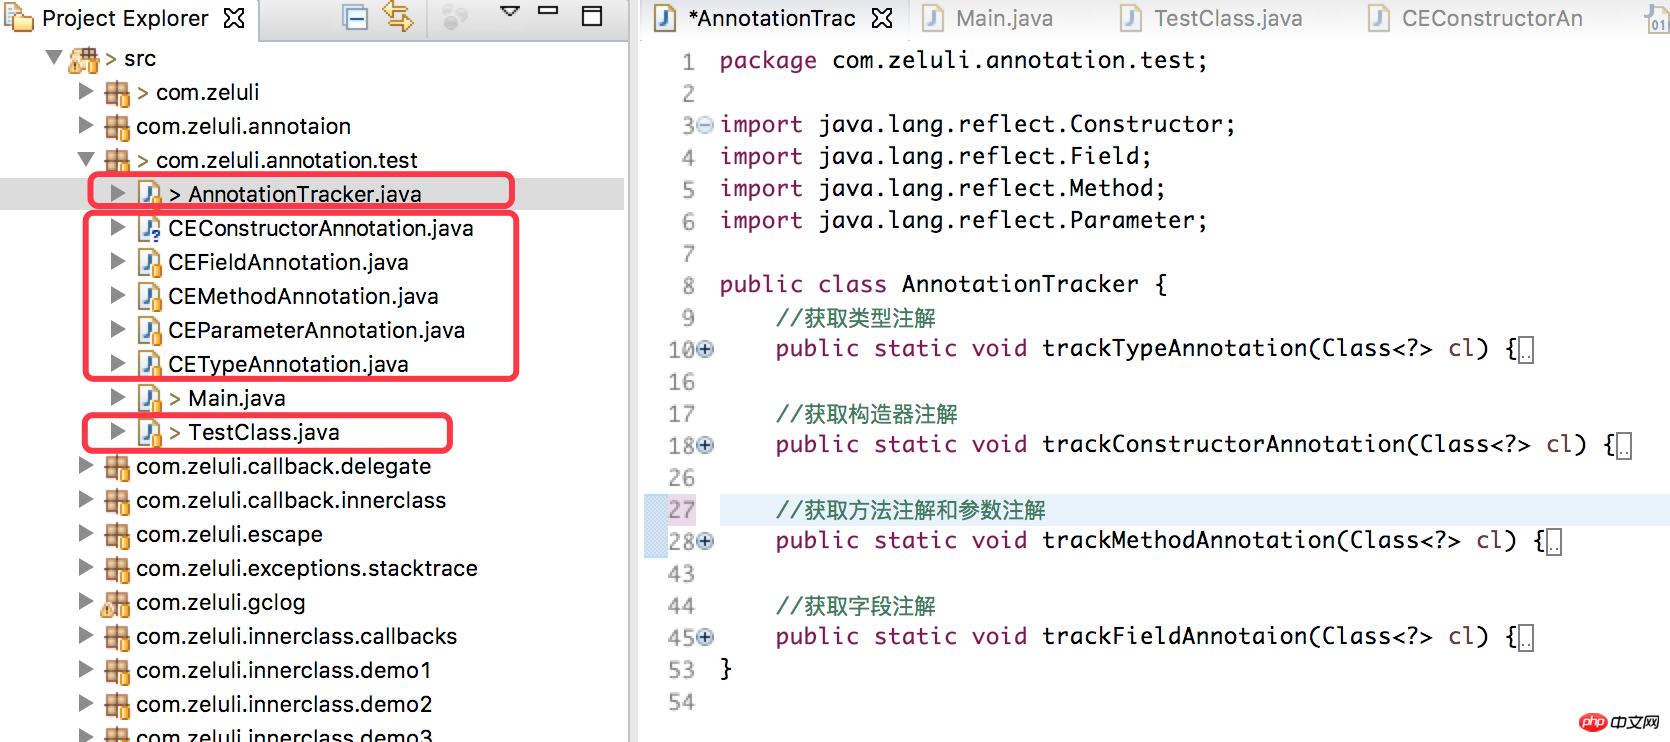
AnnotationTracker: This class is responsible for obtaining the object of the corresponding type of annotation and the related information in the annotation through Java's "reflection mechanism" . In the AnnotationTracker class, there are all static methods. The static methods pass in the relevant annotation-modified Class. The general structure is as follows.
Annotation: These classes are different types of annotations, which we will discuss in detail later.
TestClass: This class is the test class modified by the annotation.
Main: The execution method of our test case for this Demo.




The above is the detailed content of Annotations in Java Reflection. For more information, please follow other related articles on the PHP Chinese website!

