
Home >Backend Development >PHP Tutorial >PHP Basics Tutorial 1: Configuration of Development Environment
PHP Basics Tutorial 1: Configuration of Development Environment

- 黄舟Original
- 2017-03-01 09:17:281369browse
Preface
Write a basic tutorial on PHP. I hope it can help a few people who want to learn PHP, and at the same time, I can also understand the basics. It is very important to deepen the understanding and summary of knowledge and master the basic knowledge in development. I hope that people who learn PHP can stick to it, and I also hope that I can become more and more NB.
This section explains the detailed installation of
php environment variables.
php editing software
Overall process
Php is a server-side development language, and you want to To access the server on your own computer, you can install an Apache server on your own computer. In this way, you can access the web pages on your computer through the browser on your computer.
When we access a web page, we usually access a file ending with .html. This file is parsed by the browser, but when the browser accesses a file with the .php suffix, the browser cannot Parsing, then the Php code needs to be parsed by the PHP development module. Sometimes the PHP code will operate the database. In this case, the PHP module needs to be associated with the database.
The rough flow chart is like this:

The Apache version we use here is 2.4
The version used for Php development is 5.6.25 ;
Most of the databases used to develop PHP are Mysql databases, a relational database. The version we use here is
5.6.27.
It is recommended for installation to create an empty folder and put the three Modules are installed together at the same time for easy management.
Apache installation
Download the Apache installation software, link:
http://www.php.cn/
You can install it after the download is complete, but Apache The installation is performed from the command line.
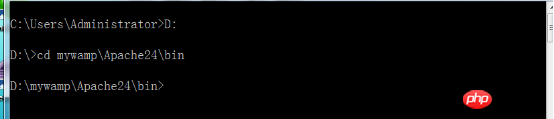
To install apache, first we create a folder (for unified management), such as D:/mywamp. Please note that there should be no Chinese characters or spaces in the folder.
Copy the entire downloaded and decompressed Apache24 (you can name it yourself) directory to D:/mywamp, and enter it under
Command line console, click Run->Command Line->run as administrator to enter the bin directory of the installation directory.

-
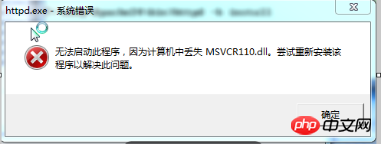
Enter httpd -k install in the bin directory to install,
You may have problems here
Download the software and install it to solve the problem. Link:
http://www.php.cn/
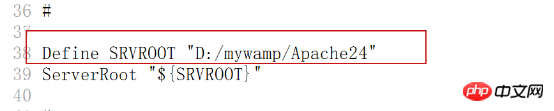
When there is the above prompt message, it means that the installation has been successful, but there is a problem with the apache configuration file. We need to modify the apache configuration file Apache24/conf /httpd.conf file Here, after we install it, we need to modify the apache installation directory /conf/httpd.conf. In about 38 lines of the file, modify it to the specific installation Location.
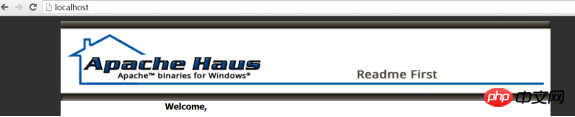
After that, we enter httpd -k start in the command line (still in the bin directory) to start the service. It can only be accessed by turning on the service of our browser.
After starting the service, open the browser and enter the localhost URL. When you see this screen
, it means that Apache is installed successfully.

But sometimes we will see a message saying that our 80 port is occupied. At this time, we can modify the Apache port to solve the problem, or in the Apache24/conf/httpd.conf directory 
Modify it and restart the server.
When operating Apache, the commonly used commands are:
Httpd –h: View all commands
Httpd -k install: Install apache
Httpd –k start: Start apache
Httpd –k stop: Stop apache
Httpd –k restart:Restart apache
Httpd –k uninstall:Uninstall apache
Configuration of environment variables:
Every time we start the server, restart, shut down, etc., we have to enter the bin directory. This is too troublesome. There is a solution to configure the environment variables so that you can Start from any directory.
Configuration steps:
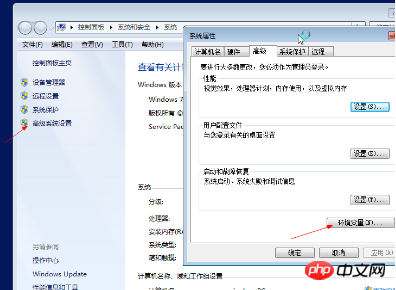
Computer->Properties->Advanced Environment Configuration->Environment Variables, you will see the following interface
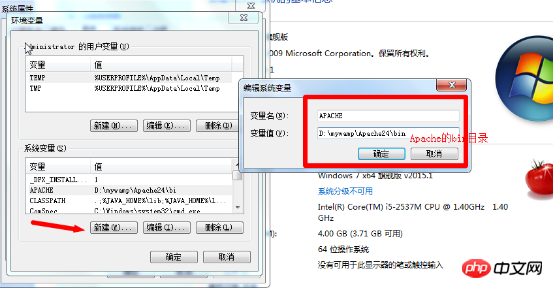
Create APACHE variable
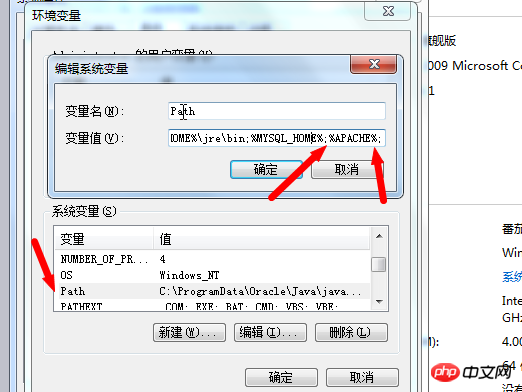
Find the path variable and click. If there is no semicolon after the variable value, add a semicolon and fill in %APACHE%;
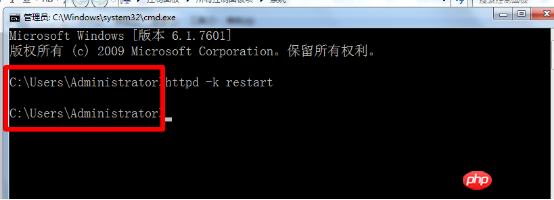
At this point, the environment variables are configured. Close the command line window and reopen it.
Directory structure
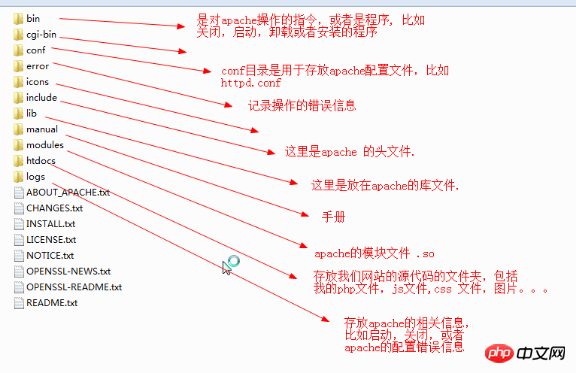
Note: htdocs is where you want to access through the browser document.
Php installation
Download php version link:
http://www.php.cn/
Copy the decompressed file (you can name the file yourself) Go to the file you created yourself, mine is D:/mywamp/php
The Php module does not need to be installed, just integrate the Apache and php modules here.
Steps:
Modified the Apache24/conf/httpd.conf file
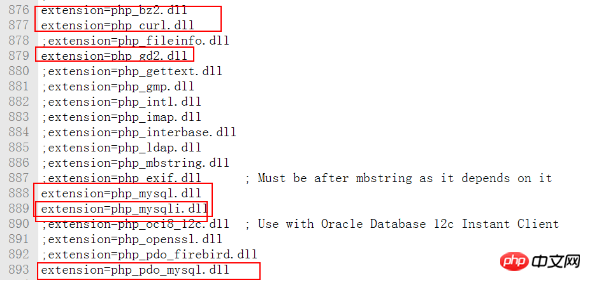
Configuration of the php module File to open the php extension, find the php.ini-development file in the php directory, copy it and rename it to php.ini
- ##Open the php extension, used for php and other Integration of functions, such as mysql.
- #Change the path of the extension
- Restart apache, you can use the php module function. You can create a test.php in the htdocs directory of Apache, write the file and open the file in the browser. http://www.php.cn/When you see this screen, it means success


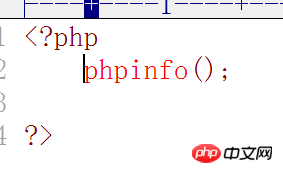 and open the file in the browser. http://www.php.cn/When you see this screen, it means success
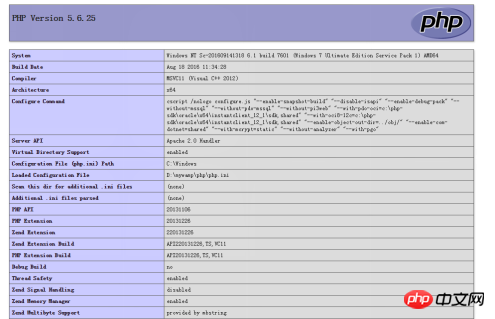
http://www.php.cn/
- Double-click to install the software
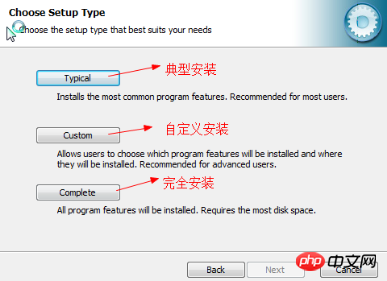
- Choose custom installation
- Specify the components and path for installation, your own file directory
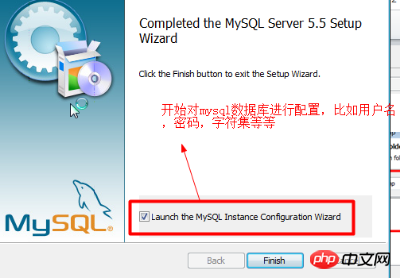
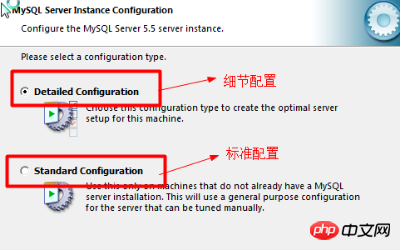
- Start configuration
- Select configuration method
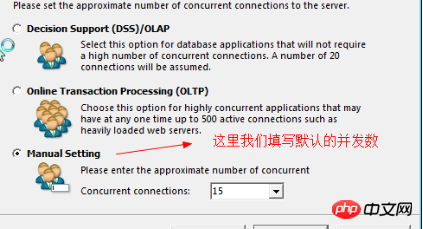
- Set default concurrency Number
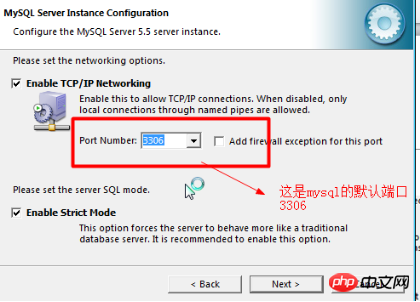
- Configure the mysql port. Generally, we do not modify the port number.
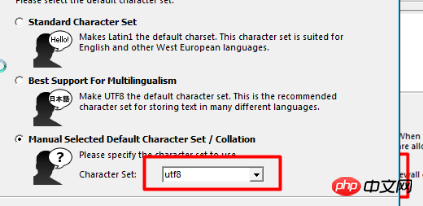
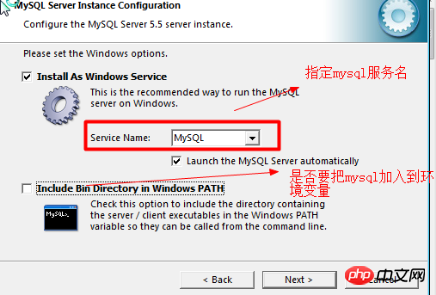
- Select The default character set of our database is -utf8
- Specify the mysql service name and whether to add it to the environment variable
- Root user password specification
Start mysql


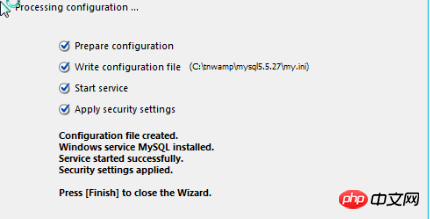
When there are four check marks in front of them, it means the installation is successful.
12. Test whether the mysql database can be used normally. Here we need to pay attention to ensure that mysql is running
Modify the following code in the above Apache24/htdocs/test.php file. 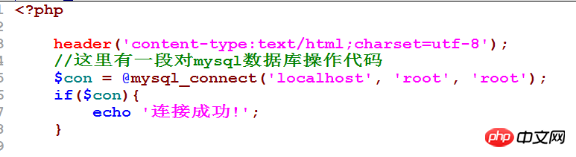
If the access returns "Connection successful", say ok
But during the installation process, sometimes we will prompt that the .net40 file is missing, download link:
http://www.php.cn/
How to enter the mysql console after successful installation: 
If you want to facilitate operation, you can set an environment path. Same as apache.
php editing software
When writing PHP code during development, you can use Notepad, but Notepad is too slow. For beginners, you can use editplus or sublime
sublime download address
EditPlus download address
Summary
At this point, our PHP development environment is configured. The most important thing is the integration of the PHP module and the Apache module. , be careful not to write the wrong letters. Colleagues, please pay attention to the meaning of each option during the mysql installation process. Don't choose wrong.