
Home >Web Front-end >H5 Tutorial >canvas API, popular canvas basics (5)
canvas API, popular canvas basics (5)

- 黄舟Original
- 2017-02-25 11:50:211716browse
The previous issues were all about drawing path graphics. In this section we are going to talk about how to manipulate pictures on the canvas. Because graphics cannot draw beautiful girls (painting experts can ignore this), what should I do if I want to draw beautiful girls? Follow me:
If you want to insert a picture into the canvas, the method we need is this hero:
drawImage() Draw an image, canvas or video on the canvas
This hero can be said to be very powerful in martial arts. He has so many unique skills and deep internal strength that he can be called the master among masters. Let’s take a look at what unique skills he has:
Cheats 1:
drawImage(img ,x,y) Position a picture on the canvas
Parameters: img represents the imported picture object, x,y represents the introduced coordinates
ps: img here represents the image object rather than the path of the image , indicating that the picture cannot be quoted directly, but needs to be referenced by operating the DOM
The above tips talk about the particularity of the picture, so how do we get the picture? Let’s start with the simplest one:
<canvas width="500" height="400" id="canvas">
<span>亲,您的浏览器不支持canvas,换个浏览器试试吧!</span>
</canvas>
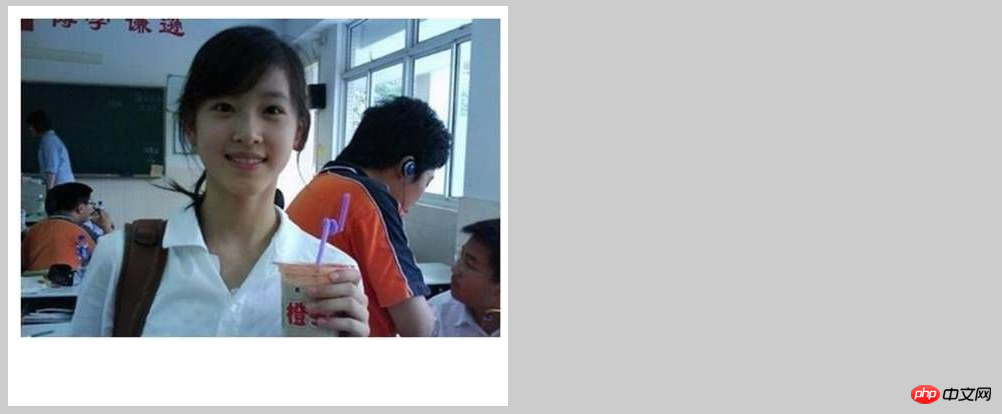
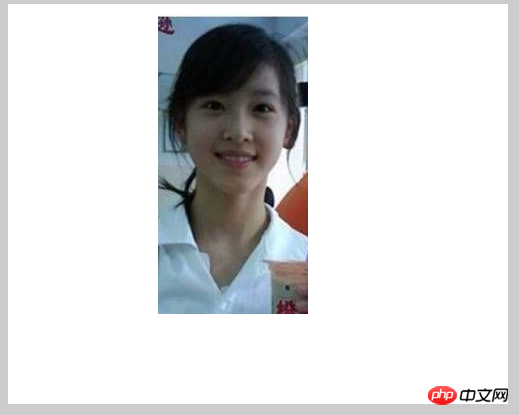
<img src="2.jpg" alt="" id="img">We put a picture on the page (the milk tea girl from back then, oh back then), then get the picture and put it on the canvas
var canvas = document.getElementById("canvas");
var ctx = canvas.getContext("2d");
var oImg = document.getElementById("img");
ctx.drawImage(oImg,10,10);
Look, the milk tea girl outside the canvas has come to our canvas. Unfortunately, the current milk tea girl is no longer the current one. I have a milk tea girl. Some students will say, I just want my milk tea girl on my canvas (why is it my milk tea girl) and don’t want her to be seen elsewhere? What should I do? Clever students must have figured it out, can't I just hide the pictures outside? Is it okay to just hide it?
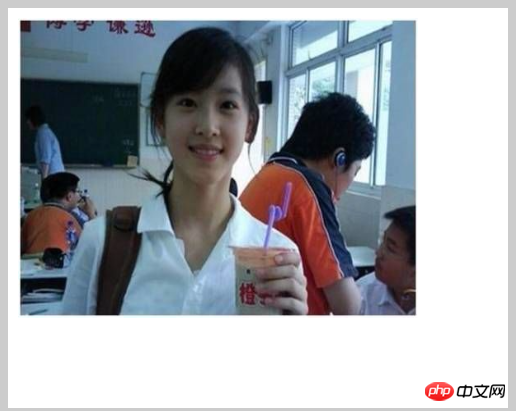
<img src="2.jpg" alt="" id="img" style="display:none;">
The milk tea girl on the right is missing. Only the milk tea girl on my canvas is okay. Yes, this is what I want Yes, it means that if you have this picture on the page, you can get this DOM element. As for whether the picture is displayed or not, it doesn't matter. There are many ways to hide the picture. Hide it by yourself. Put it in a p to hide it. , put it in the canvas tag (because the content in the browser that supports canvas is not displayed), etc., you can also use pure js to add pictures:
var canvas = document.getElementById("canvas");
var ctx = canvas.getContext("2d");
var aImg = new Image();
aImg.src = '2.jpg';
ctx.onload = function(){
    ctx.drawImage(aImg,10,10,400,300);
}
Cheats 2:
drawImage(img,x,y,w,h) Position the image on the canvas and specify the width and height of the image
parameters : img represents the imported image object, x, y represents the imported coordinates, w, h represents the specified image size
Some students will say that Milk Tea Girl is good, but my canvas is too small, Milk Tea Girl is too Big (how big), the picture is too big, it basically fills up my canvas. If I draw other graphics on the canvas, wouldn’t it be a disgrace to the milk tea girl? Can I make her smaller? Haha, drawImage has the transformation ability of Sun Wukong. It can be big or small. If you don’t believe it, look here:
var canvas = document.getElementById("canvas");
var ctx = canvas.getContext("2d");
var oImg = document.getElementById("img");
ctx.drawImage(oImg,10,10,200,150);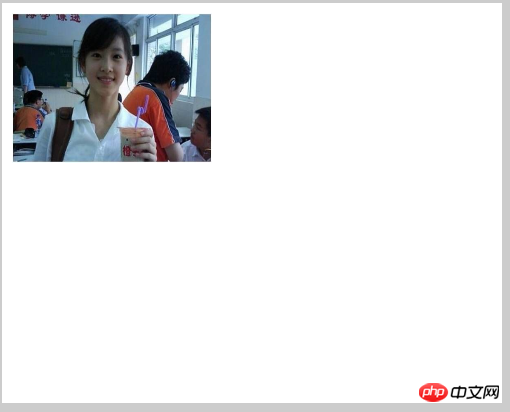
Look, the milk tea girl above It suddenly became smaller. Oops, it’s too small and I can’t see clearly. And I only want to see the milk tea girl, not the other bad classmates, is that okay? Of course you can
Cheats 3
drawImage(img,sX,sY,sWidth,sHeight,x,y,width,height) Cut the canvas and position the cut part on the canvas
Parameters: img represents the imported picture object, sX, sY represents the actual coordinates of the clipping, sWidth, sHeight represents the width and height of the clipping, x, y represents the coordinates of placing the picture on the canvas, width, height represents the picture to be used. The width and height
Although there are many parameters above, they are still easy to understand. Let’s take a look at how to cut the milk tea girl:
var canvas = document.getElementById("canvas");
var ctx = canvas.getContext("2d");
var oImg = document.getElementById("img");
ctx.drawImage(oImg,150,0,150,300,10,10,400,300);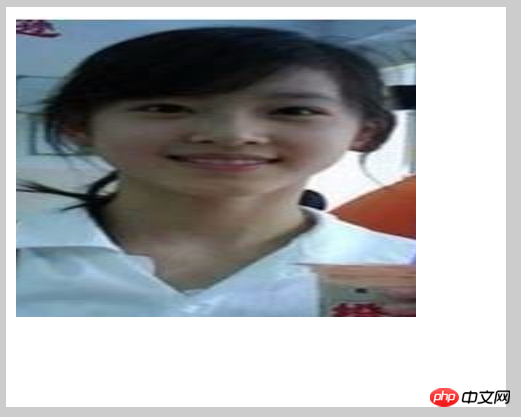
##Nari, why did the milk tea girl become fat? Looking at the parameters again, I found that the last width and height at this time have different meanings from the previous w and h. They now indicate how big the cropped image needs to be displayed. If it is larger than the cropped width and height, it will be pulled. If it is smaller than the cropped width and height, it will be reduced. Well, let’s adjust it to the same size as the cropped size and have a look:
var canvas = document.getElementById("canvas");
var ctx = canvas.getContext("2d");
var oImg = document.getElementById("img");
ctx.drawImage(oImg,150,0,150,300,10,10,150,300);

Yes, that’s it. The x and y at the back represent the position where the cropped picture is displayed. Let’s move it to the middle and take a look.
ctx.drawImage(oImg,150,0,150,300,150,10,150,300);
所以在使用裁剪功能的时候,要特别注意,图片的坐标和宽高和原来的意思有区别了
秘籍四
drawImage(video,x,y,w,h) 在画布上定位视频,并规定视频的宽高
参数:video表示引入是视频对象 ,x,y表示视频引入的坐标 ,w,h表示规定视频的大小
其实这里跟引入图片是一样的,只不过它是可以引入视频的,但是这里的引入只是视频的某一帧,所以,当我们直接引入时,是没有什么反应的:
<canvas width="500" height="400" id="canvas">
<span>亲,您的浏览器不支持canvas,换个浏览器试试吧!</span>
</canvas>
<video id="video1" controls width="270">
<source src="http://www.w3school.com.cn/example/html5/mov_bbb.mp4" type='video/mp4'>
<source src="http://www.w3school.com.cn/example/html5/mov_bbb.ogg" type='video/ogg'>
<source src="http://www.w3school.com.cn/example/html5/mov_bbb.webm" type='video/webm'>
</video>var canvas = document.getElementById("canvas");
var ctx = canvas.getContext("2d");
var oVideo = document.getElementById("video1");
ctx.drawImage(oVideo,10,10,270,135);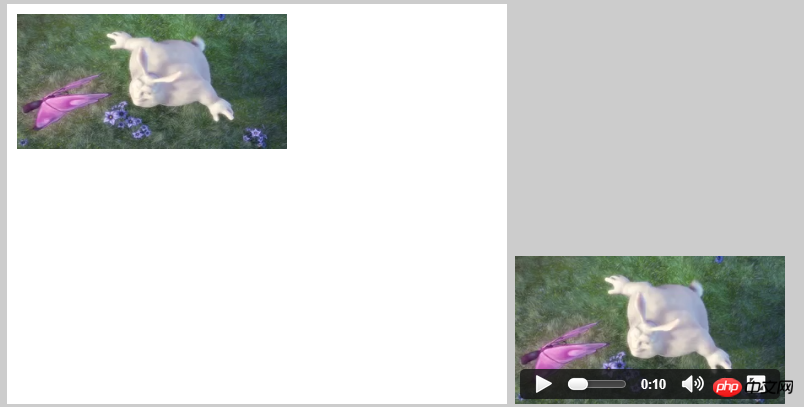
当视频设置为autoplay时:
可以看到,右侧视频在播放,左侧没有什么反应,那怎么来播放视频呢?我们可以加一个定时器,然后每隔20秒执行一次绘画,这样一帧一帧的执行,连续起来就是一个视频了,其实视频的原理也是如此:
var canvas = document.getElementById("canvas");
        var ctx = canvas.getContext("2d");
        var oImg = document.getElementById("img");
        var oVideo = document.getElementById("video1");
        var timer = setInterval(function(){
            ctx.drawImage(oVideo,10,10,270,135);
        },20)
不想让画布外的视频显示的方法跟图片是一样的,这里我就不细说了
除了drawImage具有裁剪功能外,还有一个方法可以裁剪——clip(),不同的是drawImage是裁剪图片,而clip只能裁剪图形,我们具体来看一下clip吧:
clip() 从原始画布中剪切任意形状和尺寸
ps:一旦剪切了某个区域,则所有之后的绘图都会被限制在被剪切的区域内(不能访问画布上的其他区域)。您也可以在使用 clip() 方法前通过使用 save() 方法对当前画布区域进行保存,并在以后的任意时间对其进行恢复(通过 restore() 方法)。
提示这里很重要,一定要看清楚,就好比是一张很大的油画布,现在我们用一个木框架子框一部分,然后就只能在这个框里画画了,框外面的就不能来画,恩,就是这个意思,当我们用restore()方法恢复画布是时候,就好比是把木框架子取掉了,这样就可以在别的地方画了,当然画好的这部分就不要动了
举个栗子:
不用clip裁剪:
ctx.arc(200, 200, 80, (Math.PI/180)*0, (Math.PI/180)*360, false);
ctx.fill();
ctx.beginPath();
ctx.fillStyle = 'green';
ctx.arc(150, 150, 100, (Math.PI/180)*0, (Math.PI/180)*360, false);
ctx.fill();
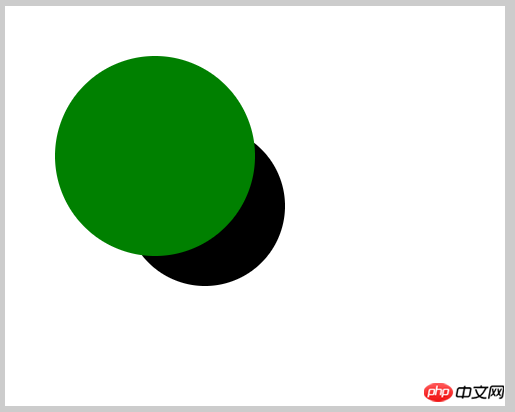
使用clip裁剪:
ctx.arc(200, 200, 80, (Math.PI/180)*0, (Math.PI/180)*360, false);
ctx.clip();
ctx.fill();
ctx.beginPath();
ctx.fillStyle = 'green';
ctx.arc(150, 150, 100, (Math.PI/180)*0, (Math.PI/180)*360, false);
ctx.fill();

可以比较看出,后面画的圆只显示在裁剪的圆的范围中,其他的都不见了,再看一个例子:
ctx.fillRect(50,50,200,100);
ctx.clip();
ctx.beginPath();
ctx.fillStyle = 'green';
ctx.fillRect(100,100,200,100);
我们将圆改成实心的矩形,且是用的fillRect,而不是用fill,rect,结果是:
只显示第一个矩形,第二个矩形貌似不见了,而我们分开写:
//不用clip裁剪
ctx.rect(50,50,200,100);
ctx.fill();
ctx.beginPath();
ctx.fillStyle = 'green';
ctx.fillRect(100,100,200,100);
//使用clip裁剪
ctx.rect(50,50,200,100);
ctx.fill();
ctx.clip();
ctx.beginPath();
ctx.fillStyle = 'green';
ctx.fillRect(100,100,200,100);
//第一个矩形不填充,只画路径
ctx.rect(50,50,200,100);
ctx.clip();
ctx.beginPath();
ctx.fillStyle = 'green';
ctx.fillRect(100,100,200,100);
//将clip放在第二个矩形
ctx.rect(50,50,200,100);
ctx.fill();
ctx.beginPath();
ctx.fillStyle = 'green';
ctx.rect(100,100,200,100);
ctx.clip();
ctx.fill();
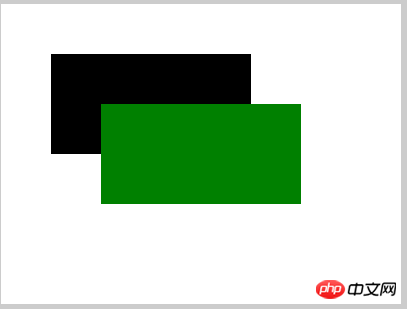
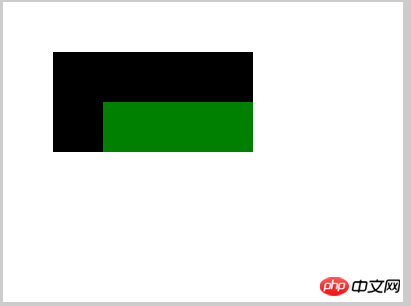
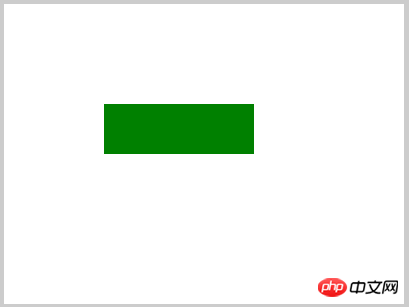

上面的4张图分别代码上面的4段代码的效果,从这4组对比我们可以看出:
第一:裁剪的路径必须在被裁剪图形的前面申明,如果在后面申明,则会没有效果或只有第一个图形显示;
第二:如果前面的裁剪区域要是没有填充的话,显示的部分就要2图形相交的部分,但是绘图区域还是裁剪部分的区域
下面要讲的是像素操作,相对来说比较复杂,需要大家的强大大脑来脑补和理解,何为像素操作?我们说任何在屏幕上显示的图形,图片,画面等等都是由像素构成的,最好理解的就是户外大屏幕的画面了,因为户外大屏幕分辨率比较小,相比之下像素的颗粒就比较大,可以清晰的看到画面是又密密麻麻的像素来显示的,当户外大屏幕的屏幕有部分花了的话,会看到呈现的画面就会在花掉的部分显示成别的颜色,很明显,对于我们的电脑显示器也是一个原理!
那么像素是通过什么来获取的呢?我们来一一介绍:
getImageData(x,y,w,h) 拷贝画布指定矩形的像素数据
参数:x,y表示开始复制的左上角的坐标 w,h表示将要复制的区域大小
参数很好理解,就是在什么地方复制多大一个地方,而且它返回一个ImageData对象,ImageData对象里面包含了几个参数:
data:数组集合 width :对象的宽度 height:对象的高度
后面2个好理解,这个data集合到底是什么呢?我们来举个栗子:
ctx.fillRect(0,0,100,100);
//获取矩形框的像素
var oImg = ctx.getImageData(0,0,100,100);
console.log(oImg);
console.log(oImg.data)
console.log(oImg.data.length)
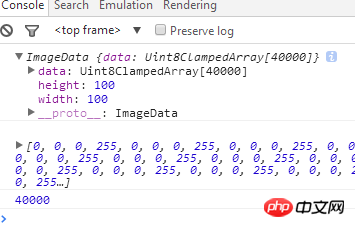
我们画了一个100*100的实现矩形,然后获取它的像素,然后分别查看了他们代表的意思,可以看到一个很有意思的东西,就是100*100的矩形的像素点应该是10000个像素,为什么它的长度是40000,这个我们可以在data数组中可以看到端倪,一个像素点是由rgba构成的:
r : 0-255 黑-白
g : 0-255 黑-白
b : 0-255 黑-白
a : 0-255 透明-不透明
也就是说,一个像素是用这4个值组成的,那么10000个像素的长度自然就是40000了,而且对应的值在console中也能看到,好了,理解了这一点,那么就里像素操作不远了!
除了我们在已知的地方去获取像素外,我们能不能自己来创造像素区域呢?答案是肯定的:
createImageData(w,h) 表示创建一个规定尺寸的ImageData对象
createImageData(ImageData) 表示创建与指定的另一个 ImageData 对象尺寸相同的新 ImageData 对象(不会复制图像数据)
我们也来写一个例子:
var oImg = ctx.createImageData(100,100);
console.log(oImg);
console.log(oImg.data)
console.log(oImg.data.length)
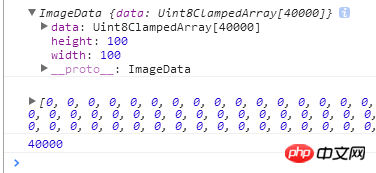
恩,跟前面的是一样的,创建了一个ImageData对象,当然画布是没有任何的效果的,因为我们只是创建了一个对象,那么我们怎么将我们创建的对象放到画布上呢?那就要用到这个方法:
putImageData(imageData,x,y,dirtyX,dirtyY,dirtyWidth,dirtyHeight) 方法将图像数据(从指定的 ImageData 对象)放回画布上
参数:
imageData指创建或获取的imageData对象
x,y表示imageData对象的左上角坐标
dirtyX,dirtyY 表示在画布上放置图像的坐标,以像素计,可选
dirtyWidth,dirtyHeight 表示在画布上放置的图形大小,可选
我们也举2个例子:
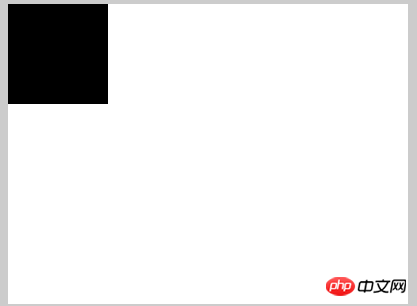
ctx.fillRect(0,0,100,100);
//获取矩形框的像素
var oImg = ctx.getImageData(0,0,100,100);
ctx.putImageData(oImg,100,100);
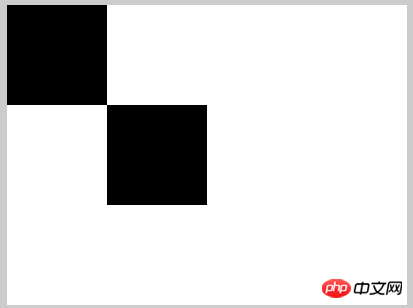
ctx.fillRect(0,0,100,100);
//获取矩形框的像素
var oImg = ctx.getImageData(0,0,100,100);
ctx.putImageData(oImg,100,100);
ctx.putImageData(oImg,100,0,10,10,50,50);
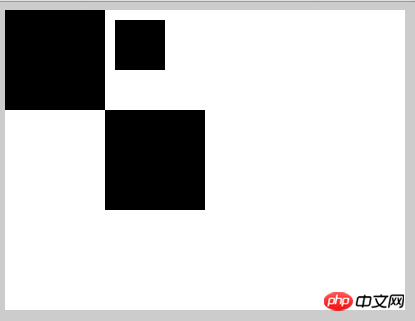
看,这么一对比,就知道这些参数是什么意思了,其中第二个我还得解释一下,如图小矩形,x,y依然是表示大的ImageData对象的起始坐标,dirtyX,dirtyY,dirtyWidth,dirtyHeight表示是相对于现在的x,y的起始坐标再来定义位置和大小,这么解释应该就明白了!
这就是操作像素的方法,看着很简单,也挺好理解,但是真正用起来,还是蛮费脑子的,我们先来看第一个小实例,改变像素的颜色:
实例效果,改变100*100的黑色矩形框中的第10行第10列的颜色,颜色为红色,先画个图分析一下: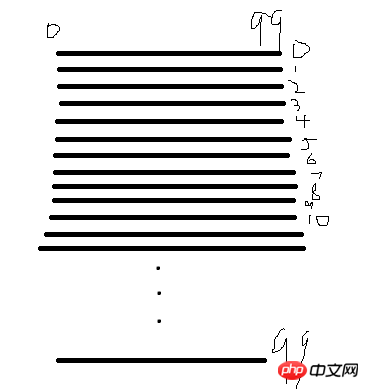
从上面的console中也可以看出,像素点是从0开始的,如果上图就是矩形的像素点的分布(画的有点烂,将就看一下),第10行,也就是第11行,第10列也就是第11列,那么前十列的像素就是矩形的宽度*10,剩下的就是11个像素,二者相加就是所有的像素,然后每个像素用4个值表示,就是总和乘以4,好具体我们看代码:
ctx.fillRect(0,0,100,100);
//获取矩形框的像素
var oImg = ctx.getImageData(0,0,100,100);
setXY(oImg,10,10,[255,0,0,255]);
//设置目标像素点的颜色
function setXY(obj,x,y,color){
    var w = obj.width;
    var h = obj.height;
    obj.data[4*(w*y+x)] = color[0];
    obj.data[4*(w*y+x)+1] = color[1];
    obj.data[4*(w*y+x)+2] = color[2];
    obj.data[4*(w*y+x)+3] = color[3];
}
ctx.putImageData(oImg,100,100);
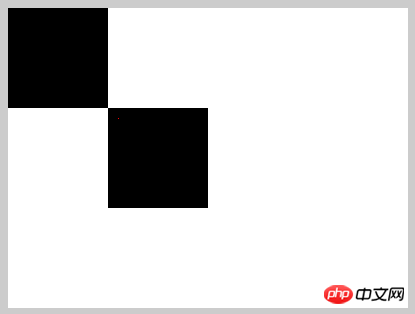
看,(10,10)坐标点的颜色就变成了红色,一个点还是不太明显,如果是一条横向的或者的纵向的,就跟明显了:
ctx.fillRect(0,0,100,100);
//获取矩形框的像素
var oImg = ctx.getImageData(0,0,100,100);
for(var i=0;i<oImg.width;i++){
    setXY(oImg,i,10,[255,0,0,255]);
}
for(var i=0;i<oImg.height;i++){
    setXY(oImg,10,i,[255,0,0,255]);
}
//设置目标像素点的颜色
function setXY(obj,x,y,color){
    var w = obj.width;
    var h = obj.height;
    obj.data[4*(w*y+x)] = color[0];
    obj.data[4*(w*y+x)+1] = color[1];
    obj.data[4*(w*y+x)+2] = color[2];
    obj.data[4*(w*y+x)+3] = color[3];
}
ctx.putImageData(oImg,100,100);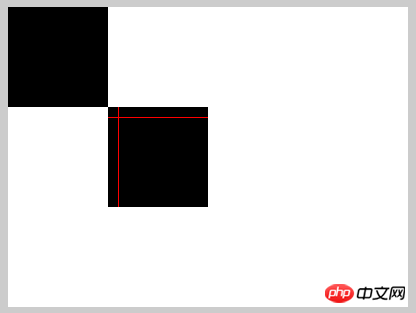
我们经常看到那种很炫酷的粒子文字,图形的效果,既然我们可以操作像素,如果我们只显示一部分的像素点,不就是粒子效果吗?看下面的例子:
ctx.fillStyle = 'red';
        ctx.arc(150,150,100,0,360*Math.PI/180,false);
        ctx.fill();
        //获取矩形框的像素
        var oImg = ctx.getImageData(50,50,200,200);
        ctx.clearRect(0,0,canvas.width,canvas.height);
        var w = oImg.width;
        var h = oImg.height;
        var arr = randomNum(w*h,w*h/10);
        var newImg = ctx.createImageData(oImg);
        for(var i=0;i<arr.length;i++){
            newImg.data[4*arr[i]] = oImg.data[4*arr[i]];
            newImg.data[4*arr[i]+1] = oImg.data[4*arr[i]+1];
            newImg.data[4*arr[i]+2] = oImg.data[4*arr[i]+2];
            newImg.data[4*arr[i]+3] = oImg.data[4*arr[i]+3];
        }
        ctx.putImageData(newImg,50,50);


        //某区域的部分随机数
        function randomNum(iAll,iNow){
            var arr = [];
            var newArr = [];
            for(var i=1;i<=iAll;i++){
                arr.push(i);
            }
            for(var i=0;i<iNow;i++){
                newArr.push(arr.splice(Math.random()*(arr.length),1));
            }
            return newArr;
        }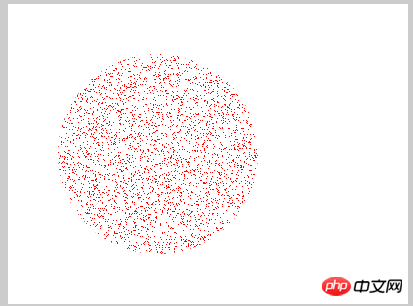
上面的例子表示,我只显示当前的十分之一的像素,具体效果看这里——粒子图形
像素操作不仅仅只能操作图形,图片我们一样可以操作,这样我们就能做出更多的效果,看看下面的例子,我们将图像换成图片,看看能不能做出粒子图片:
var aImg = new Image();
        aImg.src = '3.jpg';

        //当图片加载完毕才能进行下面的操作
        aImg.onload = function(){
            draw(this);
        }
        function draw(obj){
            ctx.drawImage(obj,0,0,400,400);
            //获取矩形框的像素
            var oImg = ctx.getImageData(0,0,400,400);
            var w = oImg.width;
            var h = oImg.height;
            var arr = randomNum(w*h,w*h/2);
            var newImg = ctx.createImageData(oImg);
            for(var i=0;i<arr.length;i++){
                newImg.data[4*arr[i]] = oImg.data[4*arr[i]];
                newImg.data[4*arr[i]+1] = oImg.data[4*arr[i]+1];
                newImg.data[4*arr[i]+2] = oImg.data[4*arr[i]+2];
                newImg.data[4*arr[i]+3] = oImg.data[4*arr[i]+3];
            }
            ctx.putImageData(newImg,0,0);
        }

        //某区域的部分随机数
        function randomNum(iAll,iNow){
            var arr = [];
            var newArr = [];
            for(var i=1;i<=iAll;i++){
                arr.push(i);
            }
            for(var i=0;i<iNow;i++){
                newArr.push(arr.splice(Math.random()*(arr.length),1));
            }
            return newArr;
        }
这里我用的是二分之一的像素点,十分之一太少了,看得不明显,由此我们可以知道,也是可以来操作图片的像素点的,具体效果看这里 —— 图片粒子化
既然我们可以操作图片,那可以做的事就太多了,先看看下面这个例子,图片反色(即将原图片的像素颜色用相反的颜色替代):
var aImg = new Image();
        aImg.src = '1.jpg';
        aImg.onload = function(){
            draw(this);

        }

        function draw(obj){
            ctx.drawImage(obj,0,0,400,400);
            var oImg = ctx.getImageData(0,0,400,400);
            var w = oImg.width;
            var h = oImg.height;

            for(var i=0;i<h;i++){
                for(var j=0;j<w;j++){
                    var result = [];
                    var color = getXY(oImg,j,i);
                    result[0] = 255 - color[0];
                    result[1] = 255 - color[1];
                    result[2] = 255 - color[2];
                    result[3] = 255;
                    setXY(oImg,j,i,result);
                }
            }
            ctx.putImageData(oImg,w,0);
        }

        function getXY(obj,x,y){
            var w = obj.width;
            var h = obj.height;
            var d = obj.data;
            var color = [];
            color[0] =     obj.data[4*(y*w+x)];
            color[1] =     obj.data[4*(y*w+x)+1];
            color[2] =     obj.data[4*(y*w+x)+2];
            color[3] =     obj.data[4*(y*w+x)+3];
            return color;
        }

        function setXY(obj,x,y,color){
            var w = obj.width;
            var h = obj.height;
            var d = obj.data;
            obj.data[4*(y*w+x)] = color[0];
            obj.data[4*(y*w+x)+1] = color[1];
            obj.data[4*(y*w+x)+2] = color[2];
            obj.data[4*(y*w+x)+3] = color[3];
        }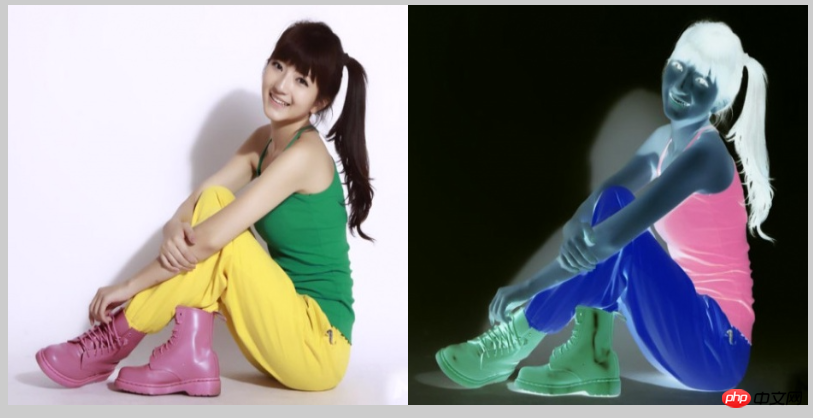
是不是很有意思,具体效果可以看这里—— canvas图片反色
用这个例子,我们还可以延伸一下,让它反色后,我们再加一个倒影,美女不明显,我们用山峰那张:
var aImg = new Image();
        aImg.src = '3.jpg';
        aImg.onload = function(){
            draw(this);

        }
        function draw(obj){
            ctx.drawImage(obj,0,0,obj.width,obj.height);
            var oImg = ctx.getImageData(0,0,obj.width,obj.height);
            var w = oImg.width;
            var h = oImg.height;

            var newImg = ctx.createImageData(obj.width,obj.height)

            for(var i=0;i<h;i++){
                for(var j=0;j<w;j++){
                    var result = [];
                    var color = getXY(oImg,j,i);
                    result[0] = 255 - color[0];
                    result[1] = 255 - color[1];
                    result[2] = 255 - color[2];
                    result[3] = 255;
                    setXY(newImg,j,h-i,result);
                }
            }
            ctx.putImageData(newImg,0,h);
        }

        function getXY(obj,x,y){
            var w = obj.width;
            var h = obj.height;
            var d = obj.data;
            var color = [];
            color[0] =     obj.data[4*(y*w+x)];
            color[1] =     obj.data[4*(y*w+x)+1];
            color[2] =     obj.data[4*(y*w+x)+2];
            color[3] =     obj.data[4*(y*w+x)+3];
            return color;
        }

        function setXY(obj,x,y,color){
            var w = obj.width;
            var h = obj.height;
            var d = obj.data;
            obj.data[4*(y*w+x)] = color[0];
            obj.data[4*(y*w+x)+1] = color[1];
            obj.data[4*(y*w+x)+2] = color[2];
            obj.data[4*(y*w+x)+3] = color[3];
        }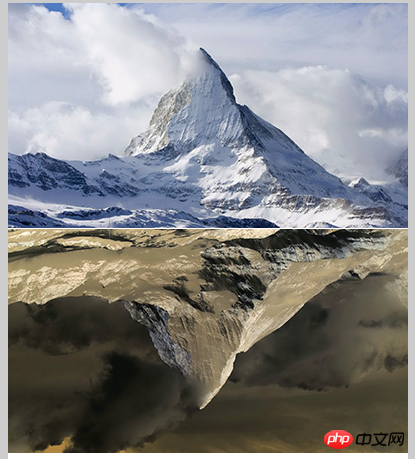
细心的同学一定能看出它的原理,没错,就是在设置像素的时候,将它的像素方向反向,即此处“h-i”,具体效果看这里——canvas图片反色倒影
我们还可以做一些延伸,我们可以通过像素的透明度的参数,给它设置投影渐变,我们来看看:
var aImg = new Image();
        aImg.src = '3.jpg';
        aImg.onload = function(){
            draw(this);

        }
        function draw(obj){
            ctx.drawImage(obj,0,0,obj.width,obj.height);
            var oImg = ctx.getImageData(0,0,obj.width,obj.height);
            var w = oImg.width;
            var h = oImg.height;

            var newImg = ctx.createImageData(obj.width,obj.height);

            for(var i=0;i<h;i++){
                for(var j=0;j<w;j++){
                    var result = [];
                    var color = getXY(oImg,j,i);
                    result[0] = 255 - color[0];
                    result[1] = 255 - color[1];
                    result[2] = 255 - color[2];
                    result[3] = 255*i/h;
                    setXY(newImg,j,h-i,result);
                }
            }
            ctx.putImageData(newImg,0,h);
        }

        function getXY(obj,x,y){
            var w = obj.width;
            var h = obj.height;
            var d = obj.data;
            var color = [];
            color[0] =     obj.data[4*(y*w+x)];
            color[1] =     obj.data[4*(y*w+x)+1];
            color[2] =     obj.data[4*(y*w+x)+2];
            color[3] =     obj.data[4*(y*w+x)+3];
            return color;
        }

        function setXY(obj,x,y,color){
            var w = obj.width;
            var h = obj.height;
            var d = obj.data;
            obj.data[4*(y*w+x)] = color[0];
            obj.data[4*(y*w+x)+1] = color[1];
            obj.data[4*(y*w+x)+2] = color[2];
            obj.data[4*(y*w+x)+3] = color[3];
        }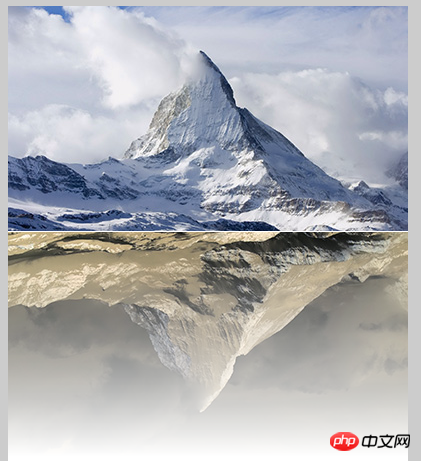
核心代码就一个地方,255*i/h 给透明度乘以一个百分比的值,从0-255,也是很巧妙啊,具体效果看这里——canvas图片反色投影渐变
总结一下吧:虽然像素操作的方法不多,但是其功能之强大,是很多人都要望其项背的,关键在于人的想象力和深入的理解,要理解这样一个概念,掌握了像素操作,就好比是掌握了物体的核心本质,你就是造物者,你想造出什么东西,全凭你的想法,这里只是展示了一个很低劣的效果,旨在给大家展示一下canvas像素操作的魅力,抛砖引玉而已,后期会单独发一下canvas的像素操作的实例给大家参考,这个东西实在是太重要了!
好了,弄了几天了,终于写完了,本来想多写一点的,想想,后面再扩展吧!谢谢大家!
以上就是canvas API ,通俗的canvas基础知识(五) 的内容,更多相关内容请关注PHP中文网(www.php.cn)!
Related articles
See more- AlloyTouch full-screen scrolling plug-in creates a smooth H5 page in 30 seconds
- HTML5 actual combat and analysis of touch events (touchstart, touchmove and touchend)
- Detailed explanation of image drawing examples in HTML5 canvas 9
- Regular expressions and new HTML5 elements
- How to combine NodeJS and HTML5 to drag and drop multiple files to upload to the server