Home >Web Front-end >PS Tutorial >The second part of the series on the skillful use of photoshop for front-end engineer skills - Measurement
The second part of the series on the skillful use of photoshop for front-end engineer skills - Measurement
- 高洛峰Original
- 2017-02-20 09:27:451698browse
Previous words
A lot of work done by front-end engineers using photoshop is actually measurement. This article is the second article in the series of photoshop clever uses - measurement
Measurement information
The information that needs to be measured using photoshop in web production is divided into two categories, namely Size information and color information
【1】Size information
Size information is mainly measured through the rectangular marquee tool and the information panel, including the following items:
1. Width , height
2. Padding, margin
3. Border
4. Positioning
5. Text size
6. Line height
7. Background image position
[Note] When measuring, make the canvas as large as possible, so that the result will be relatively more accurate
【2】Color Information
Color information is mainly measured through the color picker, including the following items:
1. Border color
2. Background color
3. Text color
Practical combat
Next, let’s explain in detail the key points of using photoshop measurement through several actual measurements
[Measure picture width and height]
1. Measure the width and height of an ordinary picture
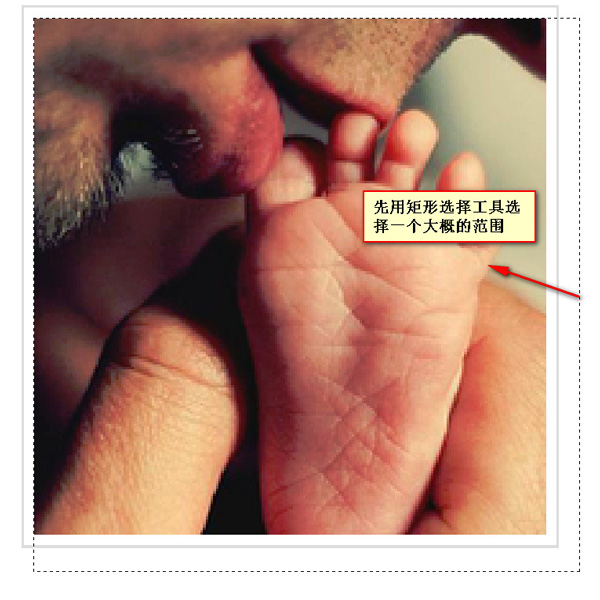
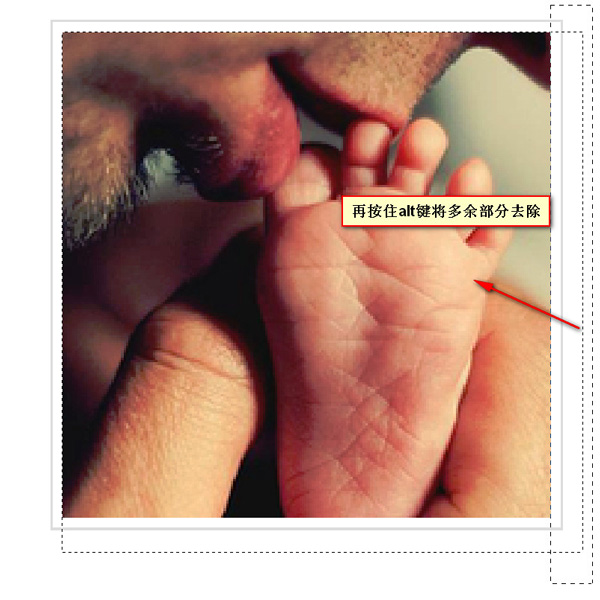
First use the rectangular marquee tool to select a large area, and then press and hold alt key, subtract the excess
 |
 |
 |
## 2、Measure the width and height of a large area exceeding 1 screen
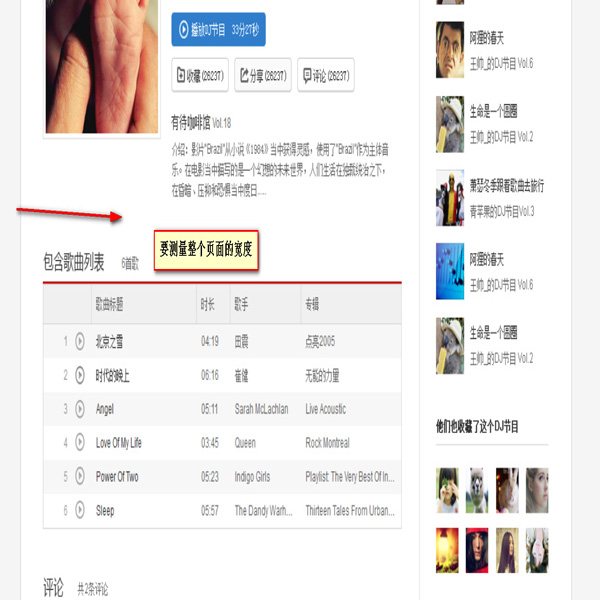
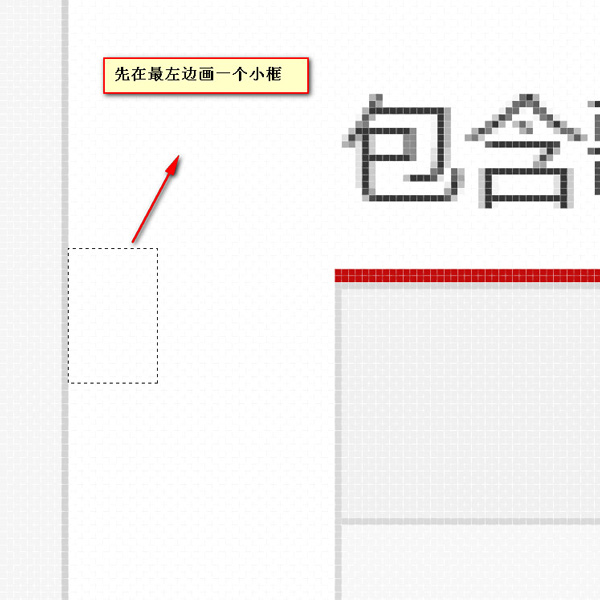
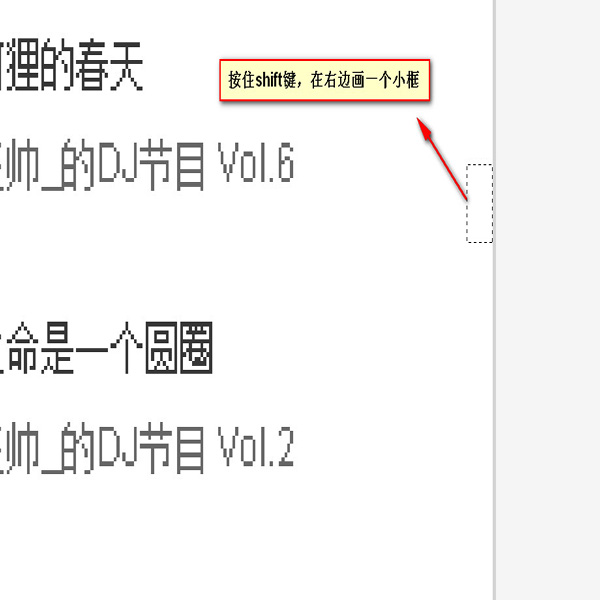
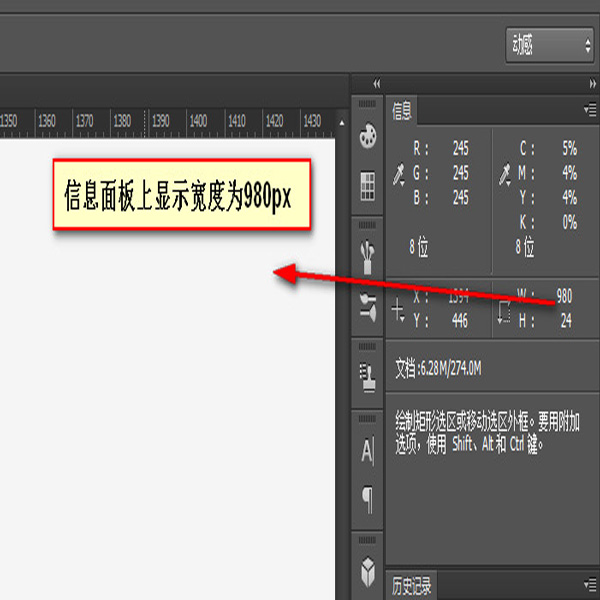
Use first Use the rectangular marquee tool to draw a small rectangle on the far left, hold down the shift key, and draw a small rectangle on the far right. The width information on the information panel is the width information of the area to be measured
 |
 |
 |
 |
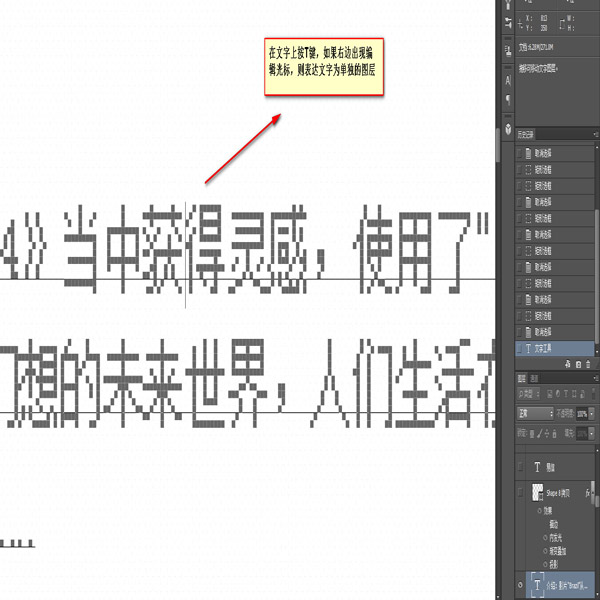
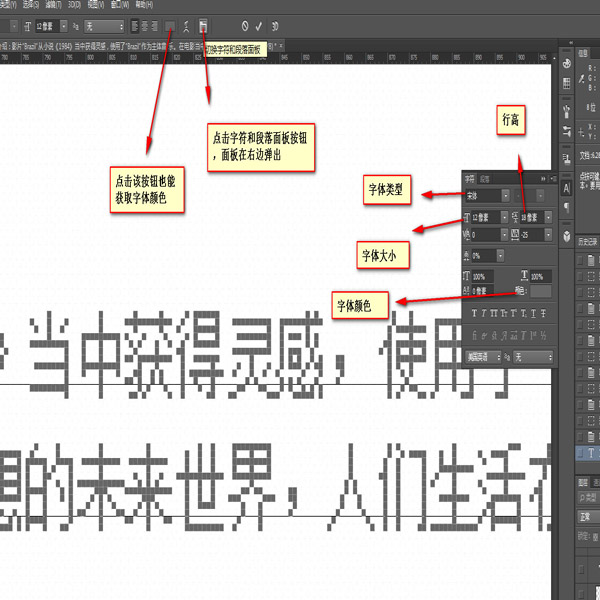
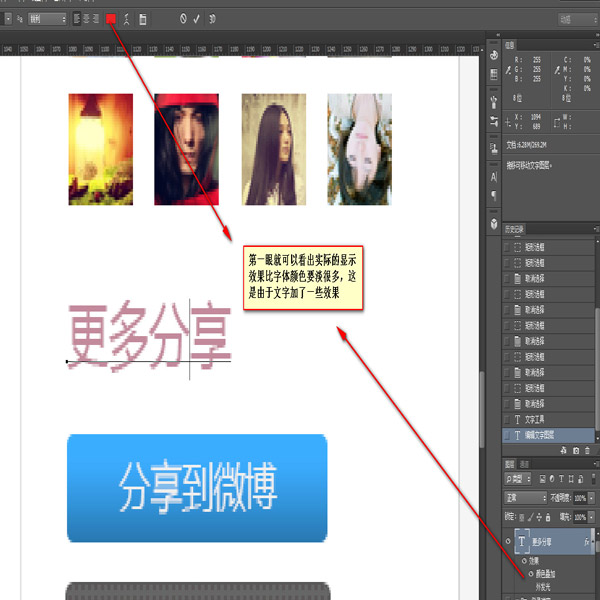
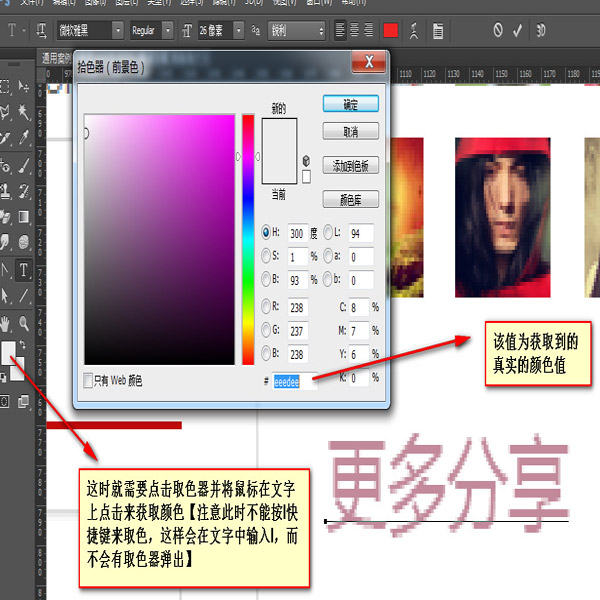
1. When the text is a separate layer
Through several panels on the options panel, you can get the text size, line height and text color information
 |
 |
 |
 |
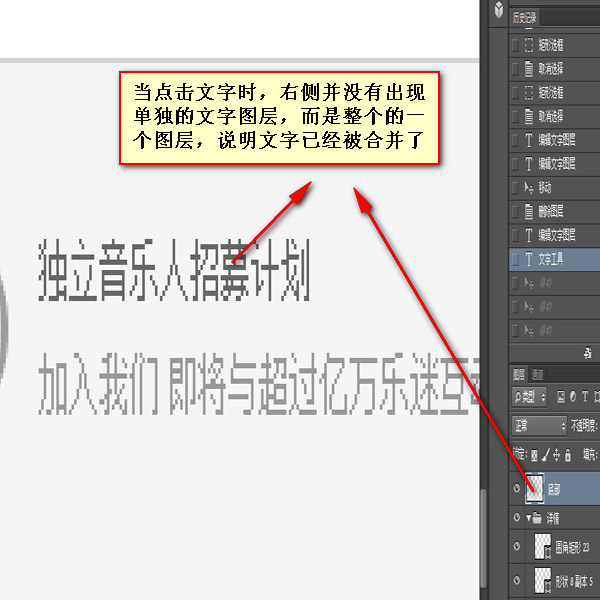
# 2. When text When already merged in a layer, the situation is more complicated
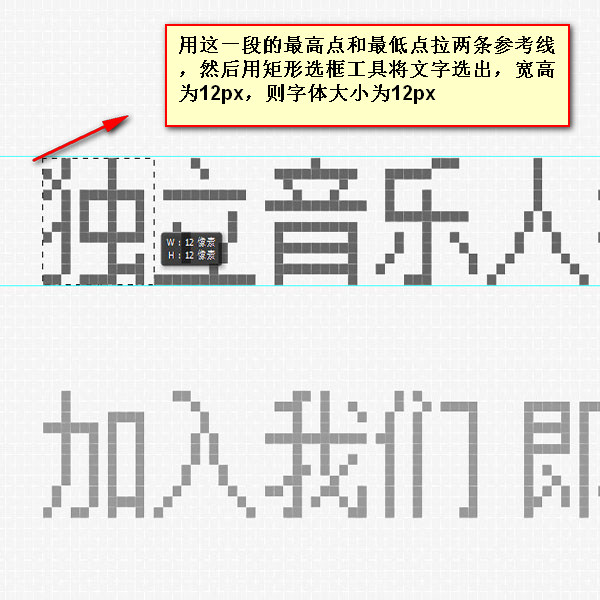
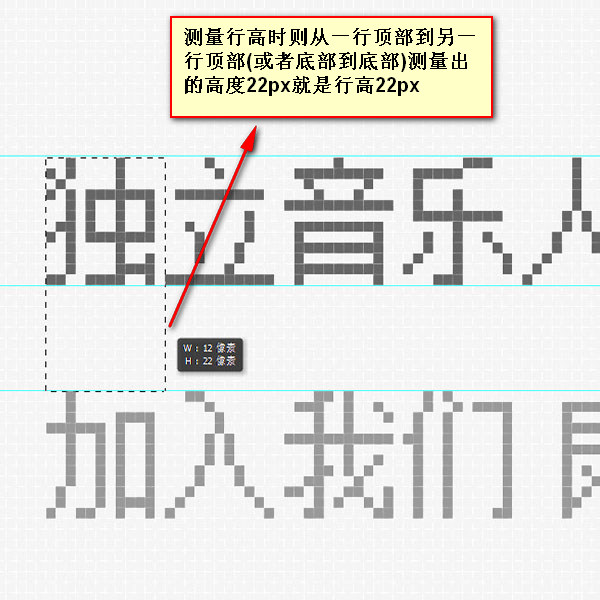
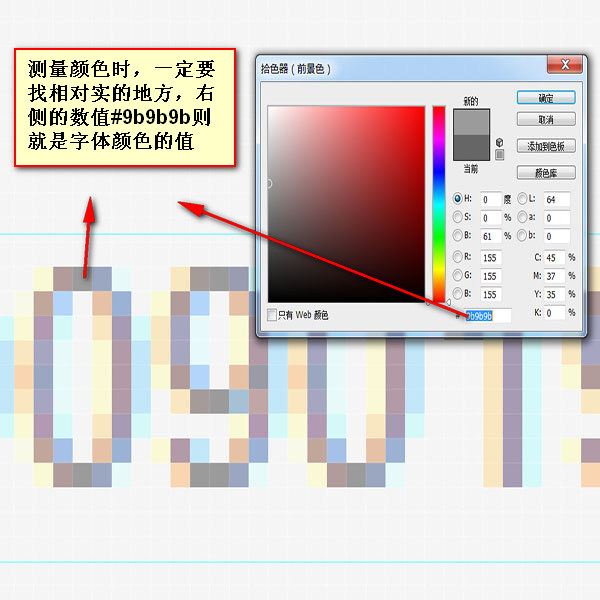
a. Font size For text in different fonts, the font size may be different. Generally, the largest text in a line is selected for measurement, and the result is relatively accurate [Note] There is sometimes a gap of 1 pixel to the right or below the text b. Line height The measurement of line height is actually the measurement of one line, from the bottom of the first line to the bottom of the second line c. Get the font colorUse the eyedropper tool When absorbing, please note that there are many jagged characters after enlarging them, so you must absorb the parts with solid colors
 |
 |
 |
 |
【Amount of letters, numbers, Symbol size】
Type a letter to compare. Then set the line height and font size to be consistent, look at the letters and how many spaces are left at the top and bottom, and then set the line height
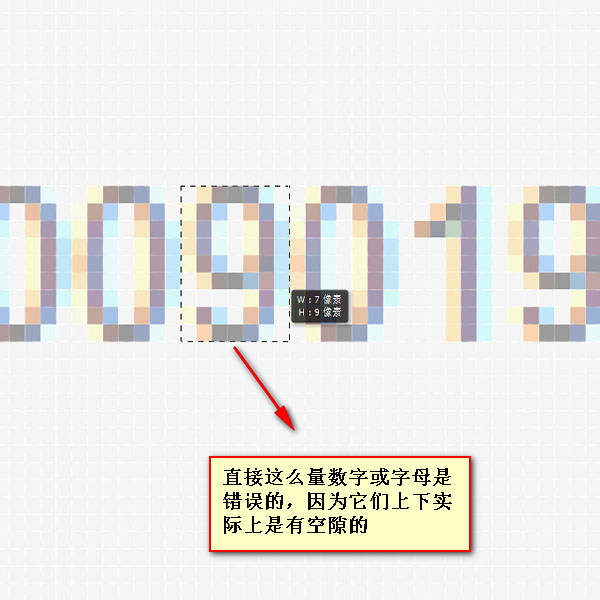
|
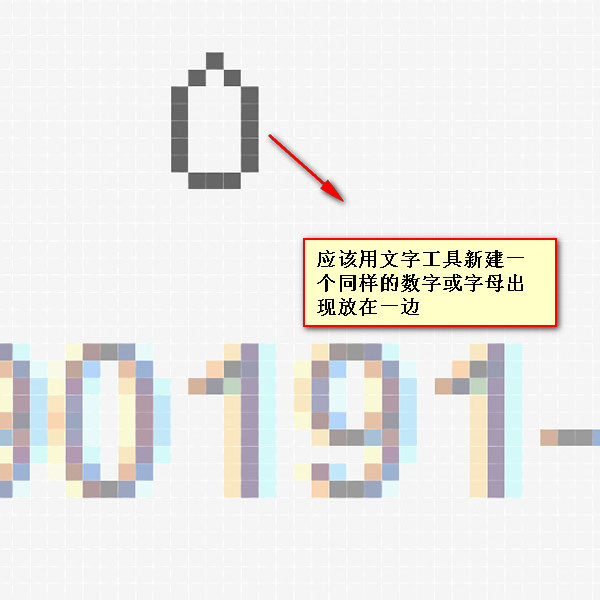 |
 |
|||||||
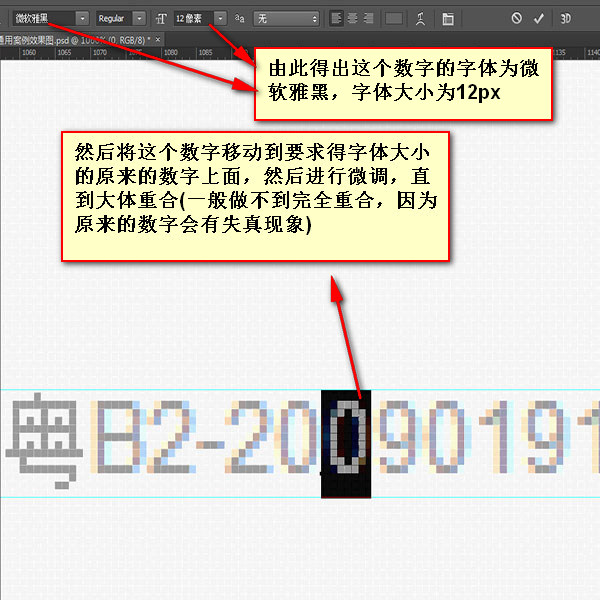 |
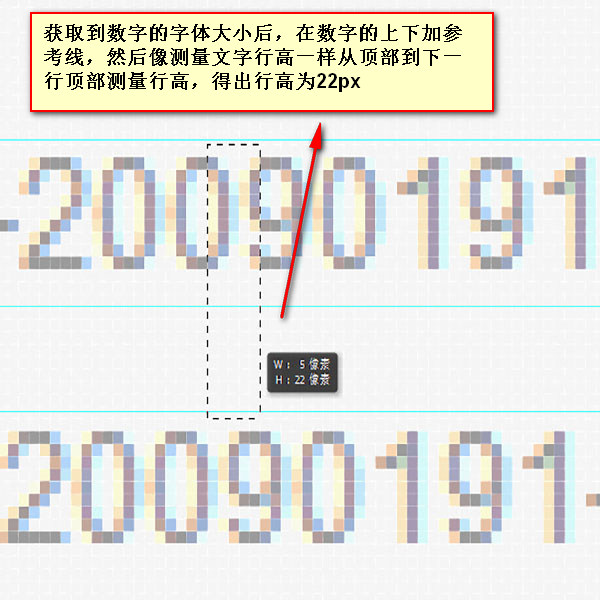 |

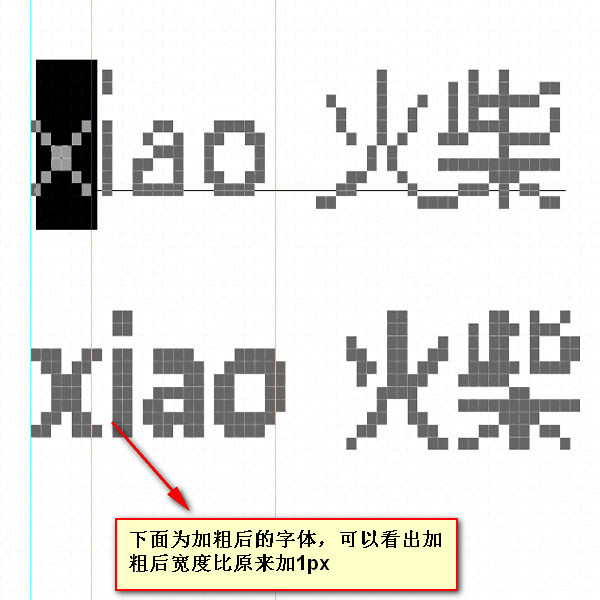
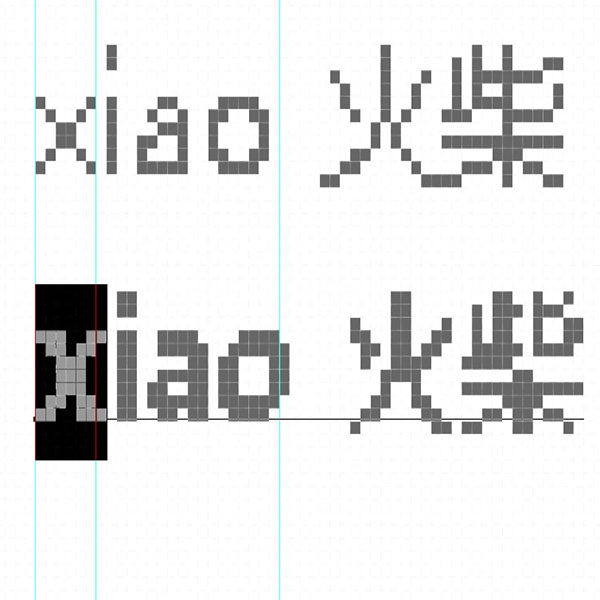
[Set bold] After setting bold, the letters will have one more pixel, but they will still be calculated according to the original font size. After bolding, the original 1 pixel vertical line becomes 2 pixels
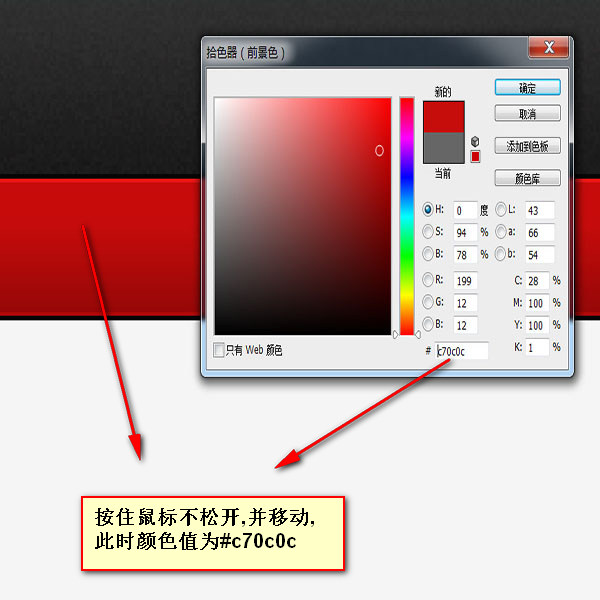
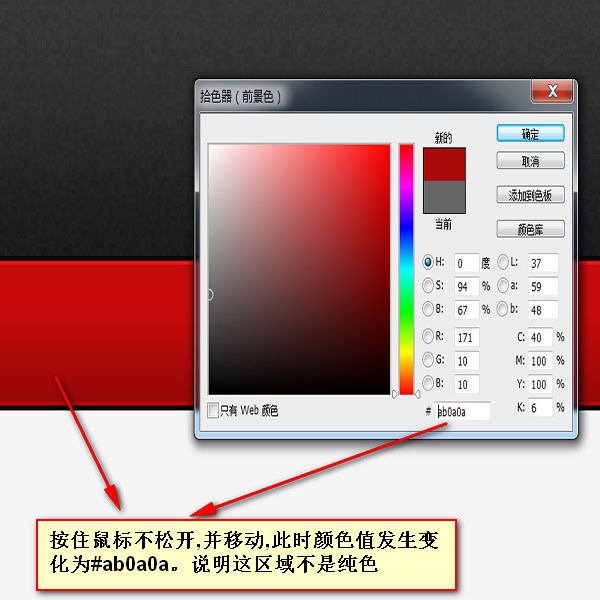
【Determine the color】 1. Confirm the solid color When the naked eye cannot determine whether an area is a solid color, you can use the color picker tool to help. Open the color picking tool, hold down the mouse and move it. When the color value changes, it is not a solid color
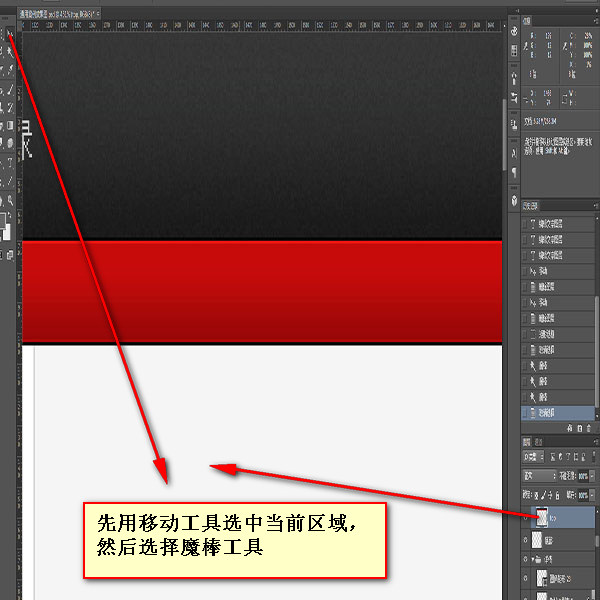
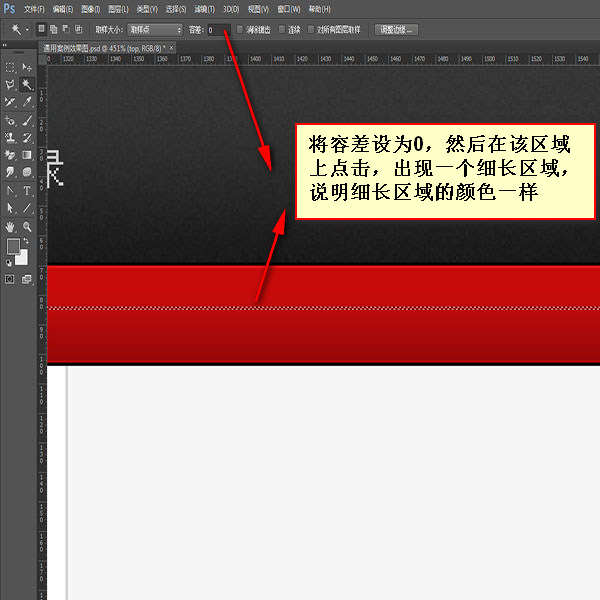
## 2. Determine the linear gradient First use the move tool to select the layer, and then click with the magic wand tool. If all horizontal strips appear, it will be a linear gradient of vertical color changes
##Notes 【1】The width of the content area measured when measuring the image, if any padding, you need to subtract the value of padding[2] When the font type is font, the space is half the text size [3] The punctuation of Chinese characters occupies the size of one character, and the punctuation of English characters is half the size of the text. The punctuation mark of a character occupies half the size of a character 【4】The colon point of 1 pixel is in Song Dynasty English state, and the colon point of 4 pixels may be in Song Dynasty Chinese and Microsoft Yahei Chinese and English 【5】If two characters are too close or even overlap, it is likely that letter-spacing is negative 【6】If the accuracy of pulling the reference line is not high, pull out the reference line first , don’t let go of the mouse, and then hold down the ctrl key to move the reference line at 0.1px More front-end engineer skills: The second part of the series of photoshop skills - Measurement For related articles, please pay attention to the PHP Chinese website! |


