Home >Web Front-end >H5 Tutorial >Use ActionScript-like syntax to write html5 - Part 8, image processing + particle effects
Use ActionScript-like syntax to write html5 - Part 8, image processing + particle effects
- 黄舟Original
- 2017-01-17 16:58:181398browse
Part 8, Image Processing + Particle Effect
Use ActionScript-like syntax to write the html5 series. By now, you should be able to make something. Let’s first study the various aspects of the picture. Each effect
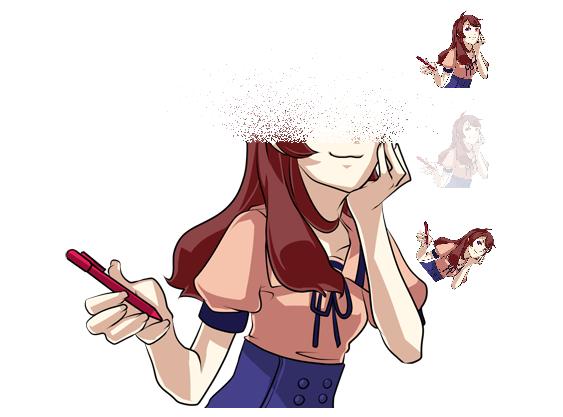
To preview various effects, please see the picture below

Look here for the effect and code. If you cannot see the effect, please download a browser that supports HTML5
http://fsanguo.comoj.com/html5/jstoas07/index.html
lufylegend.js engine download link
http://lufylegend.com/lufylegend
Because after the engine was encapsulated, some adjustments were made to the previous code and some attributes were deleted. The following is the same particle effect I developed with the new version of the engine
<!DOCTYPE html>
<html>
<head>
<meta charset="UTF-8">
<title>粒子效果</title>
</head>
<body>
<div id="mylegend">loading......</div>
<script type="text/javascript" src="http://lufylegend.com/js/lufylegend-1.6.1.min.js"></script>
<script type="text/javascript">
init(40,"mylegend",300,300,main);
var imgData = [{name:"img",path:"http://lufylegend.com/images/face.jpg"}];
var imglist;
var mainBitmap,mainBitmapHeight;
var windList = [];
var backLayer;
function main(){
    LLoadManage.load(
        imgData,
        function(progress){},
        loadover
    );
}
function loadover(result){
    imglist = result;
    //加入一个LSprite对象
    backLayer = new LSprite();
    addChild(backLayer);
    //加入一个LBitmap对象来显示一张大图片,将图片加载到backLayer对象上
    mainBitmap = new LBitmap(new LBitmapData(imglist["img"]));
    backLayer.addChild(mainBitmap);
    //将LBitmap对象初始的高度保存起来
    mainBitmapHeight = mainBitmap.getHeight();
    //给LSprite对象加载一个贞事件,即时间轴
    backLayer.addEventListener(LEvent.ENTER_FRAME,onframe);
}
function onframe(){
    var bitmapdata;
    var bitmap;
    var addY,addX;

    if(mainBitmap){
        //通过LBitmapData对象的setProperties函数,来修改LBitmapData对象显示图片的范围,每运行一次,显示范围在y轴方向上的起始位置向下移动addY个单位
        addY = 3;
        mainBitmap.y += addY;
        if(mainBitmap.y >= mainBitmapHeight){
            addY += mainBitmapHeight - mainBitmap.y;
            mainBitmap.y = mainBitmapHeight;
            //当LBitmapData对象显示图片的范围变为0之后,将其从backLayer上移除
            backLayer.removeChild(mainBitmap);
        }else{
            mainBitmap.bitmapData.setProperties(0,mainBitmap.y,mainBitmap.getWidth(),(mainBitmapHeight - mainBitmap.y));
        }
        //下面是将图片一行一行的分解,每运行一次分解一行
        var arr = [];
        for(i=0;i<mainBitmap.getWidth();i += 3){
            addX = 3;
            if(i+addX > mainBitmap.getWidth()){
                addX = mainBitmap.getWidth() - i;
            }
            //通过设定LBitmapData对象的显示范围,来得到分解后的小图片,并且将分解后的小图片压入到arr数组
            bitmapdata = new LBitmapData(imglist["img"],i,mainBitmap.y-addY,addX,addY);
            bitmap = new LBitmap(bitmapdata);
            bitmap.x = i;
            bitmap.y = mainBitmap.y-addY;
            backLayer.addChild(bitmap);
            arr.push(bitmap);
        }
        if(mainBitmap.y >= mainBitmapHeight)mainBitmap=null;
        //将分解后的一行小图片压入windList数组
        windList.push(arr);
    }
    windrun();
}
function windrun(){
    var i,j,flag,ml=1;
    //循环windList数组中的每一张小图片,随机向左上右等方向进行移动
    for(i=0;i<windList.length;i++){
        if(windList[i].length == 0){
            windList.splice(i,1);
            i--;
            continue;
        }
        for(j=0;j<windList[i].length;j++){
            if(windList[i][j].i == null)windList[i][j].i=1;
            flag = Math.random();
            if(flag < 0.3){
                windList[i][j].x += ml*windList[i][j].i;
            }else if(flag < 0.6){
                windList[i][j].x -= ml*windList[i][j].i;
            }else{
                windList[i][j].y -= ml*windList[i][j].i;
            }
            windList[i][j].alpha -= 0.05;
            windList[i][j].i += 2;
            if(windList[i][j].alpha <= 0 || windList[i][j].x > LGlobal.width || windList[i][j].y > LGlobal.height){
                backLayer.removeChild(windList[i][j]);
                windList[i].splice(j,1);
                j--;
            }
        }
    }
}
</script>
</body>
</html>
Test connection
http ://lufylegend.com/demo/astojs/8.html
The above is to use ActionScript-like syntax to write html5 - Part 8, image processing + particle effects, please pay attention to more related content PHP Chinese website (www.php.cn)!
Related articles
See more- AlloyTouch full-screen scrolling plug-in creates a smooth H5 page in 30 seconds
- HTML5 actual combat and analysis of touch events (touchstart, touchmove and touchend)
- Detailed explanation of image drawing examples in HTML5 canvas 9
- Regular expressions and new HTML5 elements
- How to combine NodeJS and HTML5 to drag and drop multiple files to upload to the server

