Home >Web Front-end >JS Tutorial >JS implements the 'hide and show' function (multiple methods)
JS implements the 'hide and show' function (multiple methods)
- 高洛峰Original
- 2016-12-05 13:28:461303browse
I will show the renderings below:
1. Hide and display through buttons:

This is hiding and displaying through button clicks. The specific code is as follows:
<!DOCTYPE html>
<html>
<head>
<meta charset="UTF-8">
<title>通过按钮实现隐藏和显示</title>
<style type="text/css">
.body{
margin: 0 auto;
}
#show{
width: 600px;
height: auto;
font-size: 14px;
background-color: #E4C392;
display: block;
padding: 10px;
margin: 0 auto;
border-radius: 10px;
}
#show h2{
color: #11C2EE;
margin: 0 auto;
}
.slide{
margin: 0 auto;
padding: 0;
width: 600px;
border-top: solid 4px #D6A55C;
}
.btn-slide{
background-color: bisque;
width: 80px;
height:30px;
text-align: center;
margin: 0 auto;
border-radius: 8px;
margin: 0 auto;
display: block;
}
</style>
<script type="text/javascript">
function divShow(){
document.getElementById("btnshow").style.display="block";
document.getElementById("btnhref").innerHTML ="关闭";
document.getElementById("btnhref").href ="javascript:divhidden()";
}
function divhidden(){
document.getElementById("btnshow").style.display="none";
document.getElementById("btnhref").innerHTML ="了解";
document.getElementById("btnhref").href ="javascript:divShow()";
}
</script>
</head>
<body>
<div id="show">
<h2>通过点击按钮实现隐藏和显示</h2>
<hr />
<p>
欢迎来到我的博客Jaxzm!
</p>
<p>
目前我在学习GoF的设计模式,你想了解么?想要了解的话,请点击按钮。
</p>
<div id="btnshow" style="display: none;">
<p>
GoF所描述的23种设计模式,总共可以分为三种类型:创建型模式,行为型模式,结构型模式。
</p>
<p>
我觉得比较难的是创建型模式,因为它说的比较抽象,所以我不容易理解它,然后我编码也比较少,所以就不太容易理解这个。
</p>
</div>
</div>
<p class="slide">
<a href="javascript:divShow();" id="btnhref" class="btn-slide">了解</a>
</p>
</body>
</html>
Among them, it can mainly realize this function It is js code.
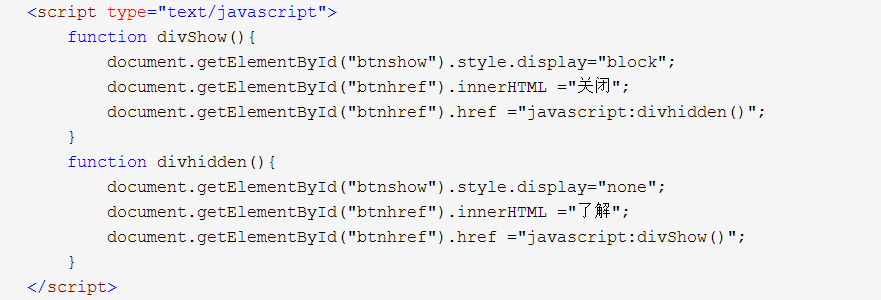
finds the corresponding element through the getElementById() method, and then controls its style to perform the corresponding function. This is a relatively simple method.
The next demonstration is another way:
This is to control its hiding and display through specific time limits.

The code is as follows:
<!DOCTYPE html>
<html>
<head>
<meta charset="UTF-8">
<title>通过定时实现隐藏和显示</title>
<style type="text/css">
.body{
margin: 0 auto;
padding: 0;
background-color: #D6A55C;
}
#show{
background-color: #E4C392;
width: 700px;
height: 100px;
display: block;
margin: 0 auto;
padding: 10px;
font-size: 14px;
height: auto;
text-align: center;
}
#show h2{
color: #3CC4A9;
}
.hid{
background: #E8E8E8;
text-align: center;
width: 700px;
height: 100px;
padding: 10px 10px 0 0;
margin: 0 auto;
display: block;
text-decoration: none;
}
</style>
<script type="text/javascript">
var h = 0;
function addH(){
if(h < 400){
h=h+5;
document.getElementById("show").style.height = h+"px";
}
else{
return;
}
setTimeout("addH()",30);
}
window.onload = function showAds(){
addH();
setTimeout("subH()",5000);
}
function subH(){
if(h >0){
h -= 5;
document.getElementById("show").style.height = h+"px";
}
else{
document.getElementById("show").style.display = "none";
return;
}
setTimeout("subH()",30);
}
</script>
</head>
<body>
<div id="show">
<h2>Jaxzm欢迎您的访问</h2>
<span>此茶虽未饮,未闻,我心自生香.</span>
</div>
<div class="hid">
<h1>Jaxzm欢迎您的访问</h1>
</div>
</div>
</body>
</html>
Pay attention to the setTimeout in this js () function, setTimeout(function, time). More precise usage:
Execute a piece of code:
var i=0;
setTimeout("i+=1;alert(i)",1000);
Execute a function:
var i=0;
setTimeout(function(){i+=1;alert(i);},1000);
Another way is to implement it through the jQuery method , hiding and displaying are realized by switching; the effect is as follows:
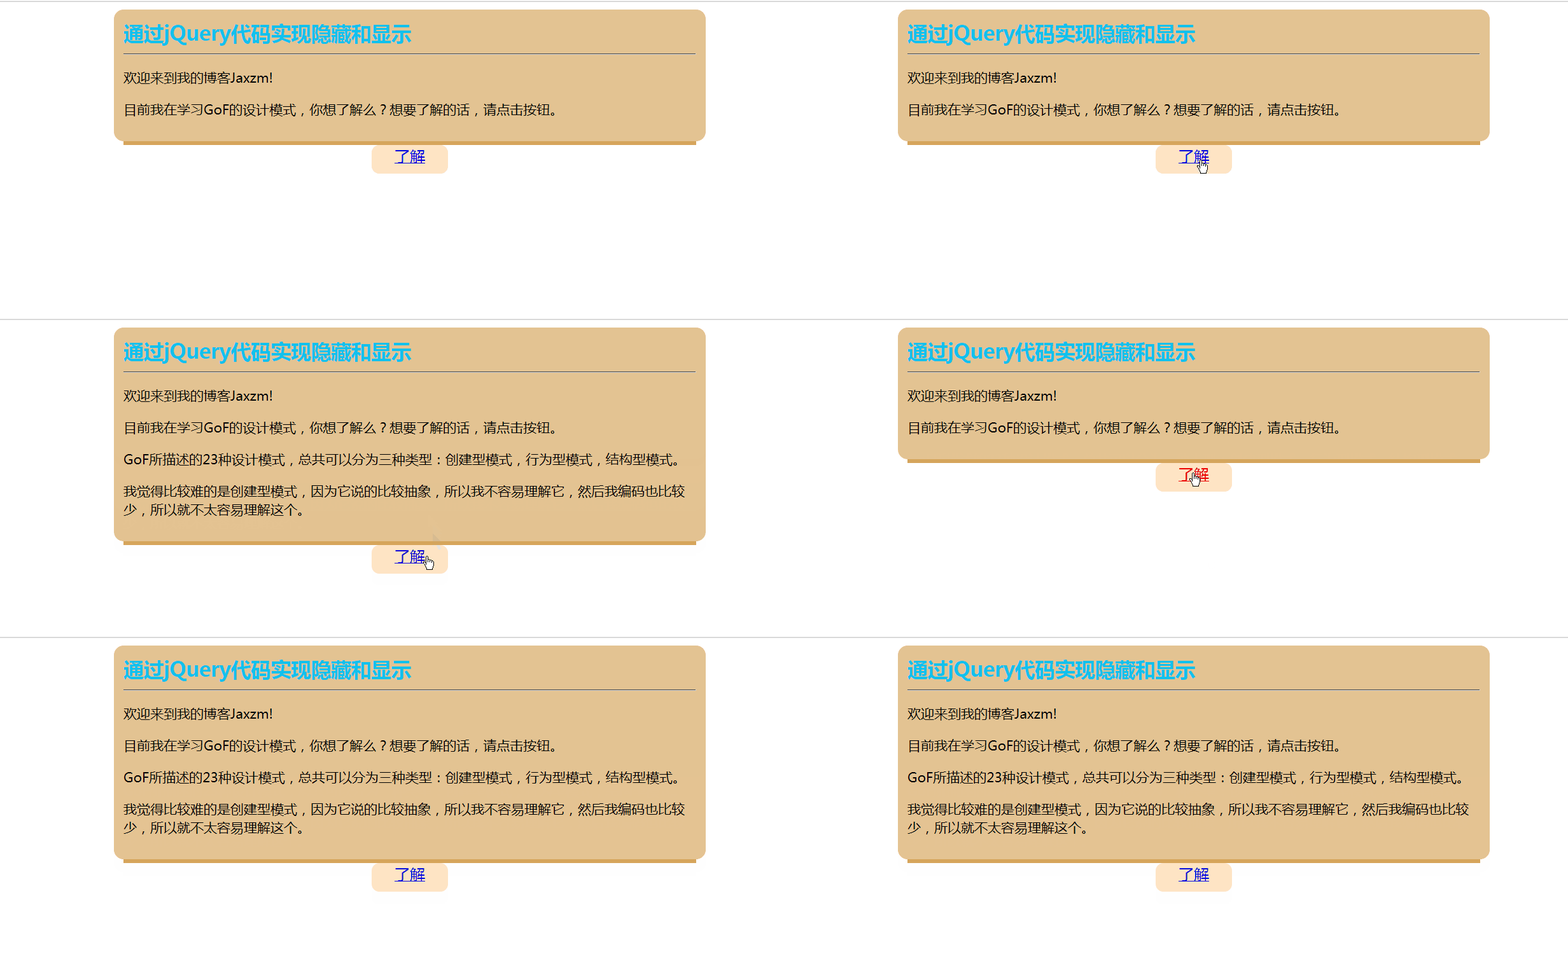
When you see it, do you think it is similar to the first one, but you will also find that it is different from the first one. The specific code is as follows:
<!DOCTYPE html>
<html>
<head>
<meta charset="UTF-8">
<title>通过jQuery实现展开收缩</title>
<script src="http://libs.baidu.com/jquery/1.10.2/jquery.min.js" type="text/javascript"></script>
<style type="text/css">
.body{
margin: 0 auto;
}
#show{
width: 600px;
height: auto;
font-size: 14px;
background-color: #E4C392;
display: block;
padding: 10px;
margin: 0 auto;
border-radius: 10px;
}
#show h2{
color: #11C2EE;
margin: 0 auto;
}
.slide{
margin: 0 auto;
padding: 0;
width: 600px;
border-top: solid 4px #D6A55C;
}
.btn-slide{
background-color: bisque;
width: 80px;
height:30px;
text-align: center;
margin: 0 auto;
border-radius: 8px;
margin: 0 auto;
display: block;
}
</style>
<script type="text/javascript">
$(document).ready(function () {
$(".btn-slide").click(function () {
$("#btnshow").slideToggle();
});
});
</script>
</head>
<body>
<div id="show">
<h2>通过jQuery代码实现隐藏和显示</h2>
<hr />
<p>
欢迎来到我的博客Jaxzm!
</p>
<p>
目前我在学习GoF的设计模式,你想了解么?想要了解的话,请点击按钮。
</p>
<div id="btnshow" style="display: none;">
<p>
GoF所描述的23种设计模式,总共可以分为三种类型:创建型模式,行为型模式,结构型模式。
</p>
<p>
我觉得比较难的是创建型模式,因为它说的比较抽象,所以我不容易理解它,然后我编码也比较少,所以就不太容易理解这个。
</p>
</div>
</div>
<p class="slide">
<a href="javascript:divShow();" id="btnhref" class="btn-slide">了解</a>
</p>
</body>
</html>
The only difference between this code and the first one is this js code:
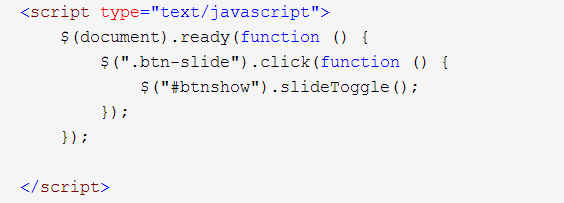
Here you need to introduce the jQuery library first, and then you can call the method slideToggle() in the jquery library. The details of the method The implementation is as follows:
When the button is clicked, it will switch between showing and hiding.
After learning the above knowledge, you can realize the page display of the blog. But here we also need to understand the two properties nextSibling and previousSiling.
nextSibling It returns the element immediately following a certain element. previousSibling It returns the element immediately before an element.
<!DOCTYPE html PUBLIC "-//W3C//DTD XHTML 1.0 Transitional//EN" "http://www.w3.org/TR/xhtml1/DTD/xhtml1-transitional.dtd">
<html xmlns="http://www.w3.org/1999/xhtml">
<head>
<meta http-equiv="Content-Type" content="text/html; charset=utf-8" />
<title>鼠标控制动画展开</title>
<style type="text/css">
body
{
margin: 0 auto;
padding: 0;
font-size: 9pt;
line-height: 180%;
}
#pn
{
background: #f8f8f8;
height: auto;
width: 750px;
display: block;
margin: 0 auto;
padding: 5px;
}
.btn
{
width: 80px;
height: 20px;
padding: 5px 3px 5px 3px;
text-align: center;
text-decoration: none;
background: #f0f0f0;
border: 1px solid #CCC;
}
.content
{
border: 1px solid #CCC;
display: none;
padding: 5px;
}
.title
{
font-weight: bold;
color: #3030FF;
font-size:11pt;
}
.subtitle
{
color: #CCC;
}
.btm
{
text-align: right;
height: 30px;
}
</style>
<script type="text/javascript">
var time = 300;
var h = 40;
function showdiv(obj) {
//obj.parentNode.nextSibling.nextSibling.style.display = "block";
var x = obj.parentNode.nextSibling;
//包含众多空格作为文本节点,因此在我们使用nextSibling和previousSibling时就会出现问题。
//因为FireFox会把文本节点误当做元素节点的兄弟节点来处理。我们可以添加nodeType来判断。
//当上一节点或者是下一节点为文本节点时,就继续寻找,直到找到下一个元素节点。
// 其中nodeType的值主要有以下几种:
//
// 元素节点的nodeType值为1
// 属性节点的nodeType值为2
// 文本节点的nodeType值为3
if (x.nodeType != 1) {
x = x.nextSibling;
}
x.style.display = "block";
obj.parentNode.style.display = "none";
}
function hidediv(obj) {
obj.parentNode.parentNode.style.display = "none";
var x = obj.parentNode.parentNode.previousSibling;
if (x.nodeType != 1) {
x = x.previousSibling;
}
x.style.display = "block";
}
</script>
</head>
<body>
<div id="pn">
<div>
<p class="title">
原生js实现tooltip提示框的效果</p>
<p class="subtitle">
2016年11月13日 </p>
<p>
摘要: 在js的世界里面,每一个小的特效都那么微不足道,却又那么的令人向往与好奇。
前端工程师的任务特别高大上,因为他们的一个小小的设计就会激发别人的求知欲。
比如说我,只是随机一瞟,便看到了这个tooltip的特效,就有一种想要征服它的愿望。
比如这个tooltip的效果展示: 这个便是tooltip提示框的... <a onclick="showdiv(this);" href="#">全文</a>
</p>
<div class="content">
<p>摘要: 在js的世界里面,每一个小的特效都那么微不足道,却又那么的令人向往与好奇。
前端工程师的任务特别高大上,因为他们的一个小小的设计就会激发别人的求知欲。
比如说我,只是随机一瞟,便看到了这个tooltip的特效,就有一种想要征服它的愿望。
比如这个tooltip的效果展示: 这个便是tooltip提示框的效果。</p>
<p>工具提示(Tooltip)插件根据需求生成内容和标记,默认情况下是把工具提示(tooltip)放在它们的触发元素后面。
您可以有以下两种方式添加工具提示(tooltip):
<p>通过 data 属性:如需添加一个工具提示(tooltip),只需向一个锚标签添加 data-toggle="tooltip" 即可。
锚的 title 即为工具提示(tooltip)的文本。</p>
默认情况下,插件把工具提示(tooltip)设置在顶部。 </p>
<div class="btm">
<a href="#" class="btn" onclick="hidediv(this);">收起全文</a>
</div>
</div>
<hr />
<div>
<p class="title">
原生js实现tooltip提示框的效果</p>
<p class="subtitle">
2016年11月13日 </p>
<p>
摘要: 在js的世界里面,每一个小的特效都那么微不足道,却又那么的令人向往与好奇。
前端工程师的任务特别高大上,因为他们的一个小小的设计就会激发别人的求知欲。
比如说我,只是随机一瞟,便看到了这个tooltip的特效,就有一种想要征服它的愿望。
比如这个tooltip的效果展示: 这个便是tooltip提示框的... <a onclick="showdiv(this);" href="#">全文</a>
</p>
<div class="content">
<p>摘要: 在js的世界里面,每一个小的特效都那么微不足道,却又那么的令人向往与好奇。
前端工程师的任务特别高大上,因为他们的一个小小的设计就会激发别人的求知欲。
比如说我,只是随机一瞟,便看到了这个tooltip的特效,就有一种想要征服它的愿望。
比如这个tooltip的效果展示: 这个便是tooltip提示框的效果。</p>
<p>工具提示(Tooltip)插件根据需求生成内容和标记,默认情况下是把工具提示(tooltip)放在它们的触发元素后面。
您可以有以下两种方式添加工具提示(tooltip):
<p>通过 data 属性:如需添加一个工具提示(tooltip),只需向一个锚标签添加 data-toggle="tooltip" 即可。
锚的 title 即为工具提示(tooltip)的文本。</p>
默认情况下,插件把工具提示(tooltip)设置在顶部。 </p>
<div class="btm">
<a href="#" class="btn" onclick="hidediv(this);">收起全文</a>
</div>
</div>
</div>
</body>
</html>
The effect is as follows:
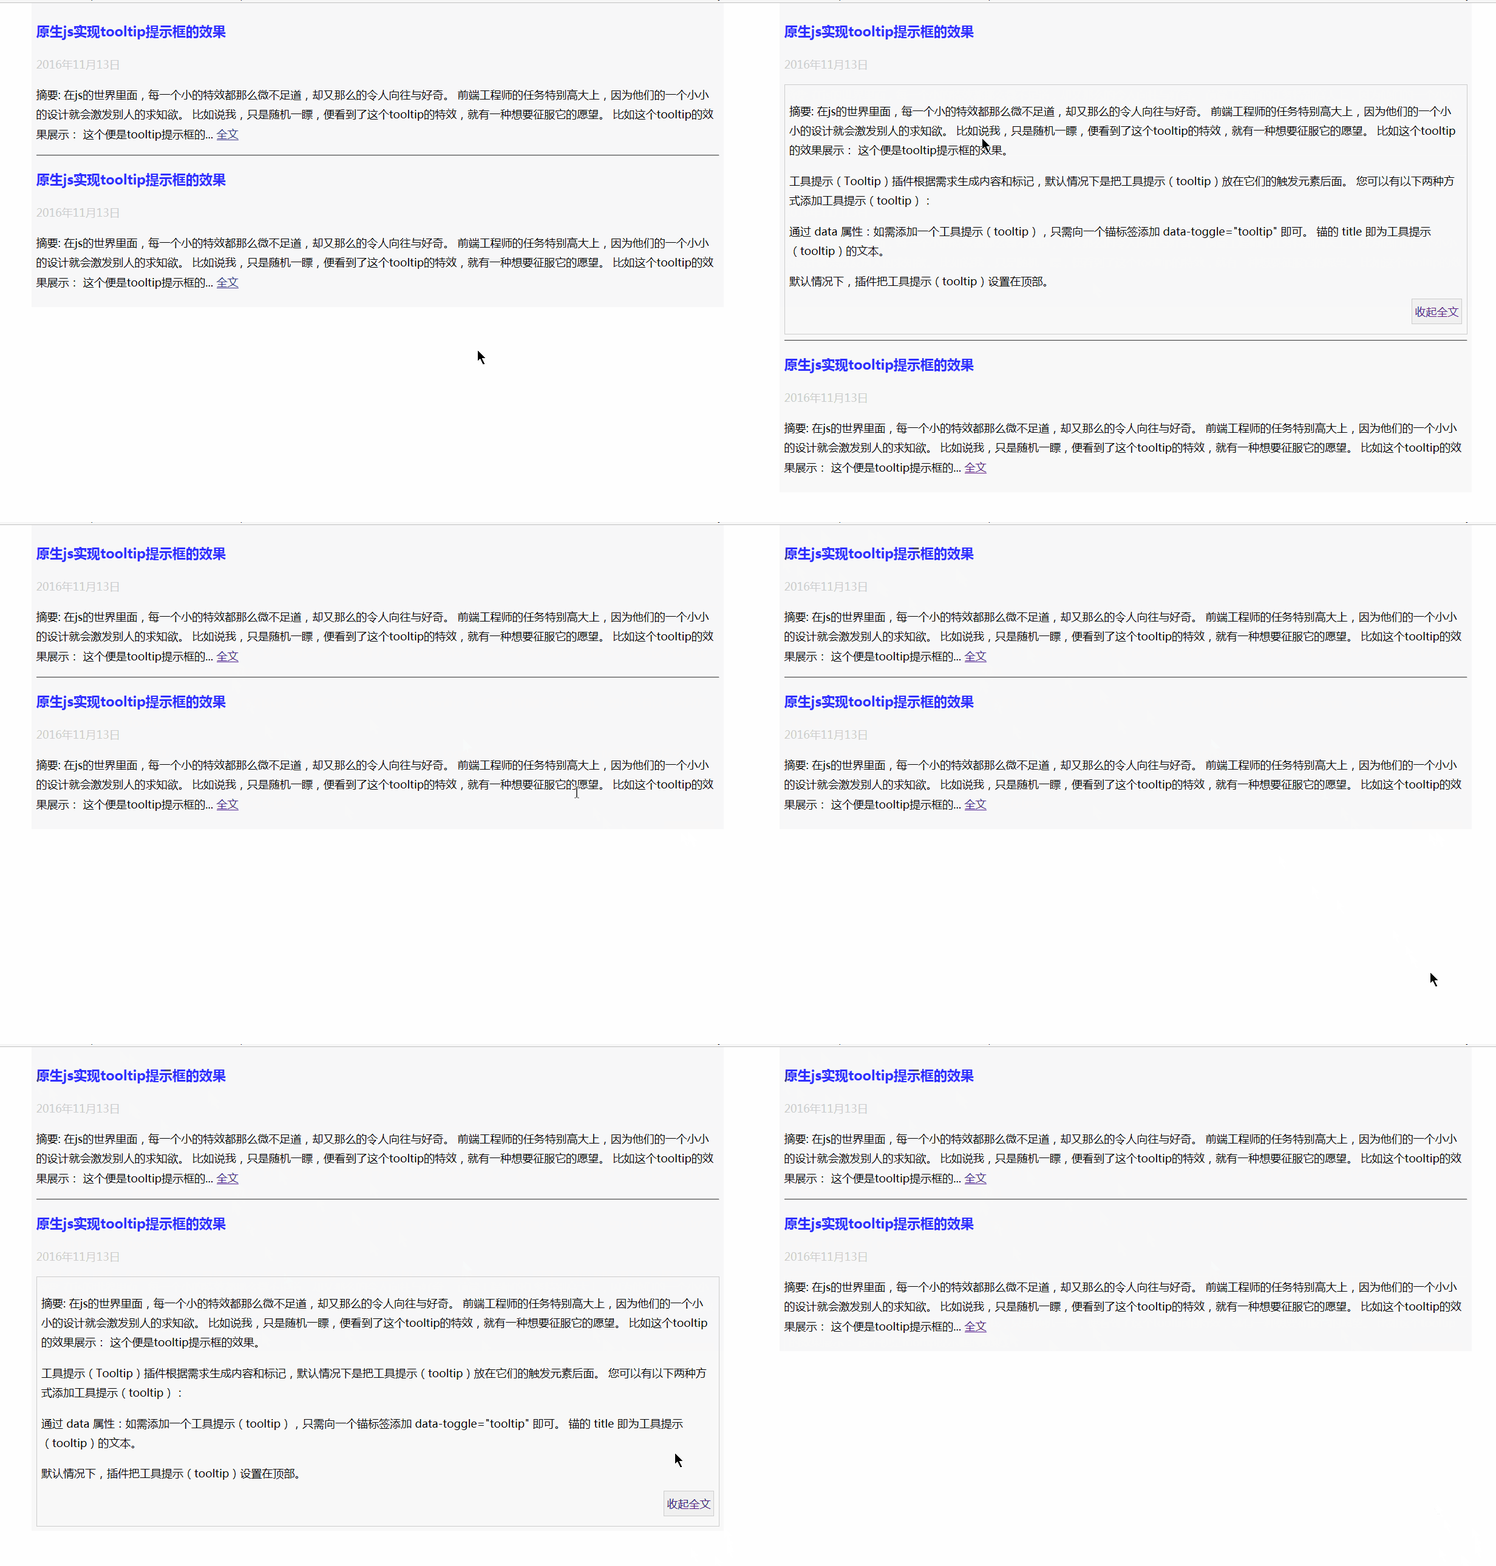
In fact, the above methods are relatively simple to implement. The practicality is also relatively large.
Related articles
See more- An in-depth analysis of the Bootstrap list group component
- Detailed explanation of JavaScript function currying
- Complete example of JS password generation and strength detection (with demo source code download)
- Angularjs integrates WeChat UI (weui)
- How to quickly switch between Traditional Chinese and Simplified Chinese with JavaScript and the trick for websites to support switching between Simplified and Traditional Chinese_javascript skills

