
Home >Web Front-end >JS Tutorial >extjs study notes 4 grid_extjs with paging
extjs study notes 4 grid_extjs with paging

- WBOYWBOYWBOYWBOYWBOYWBOYWBOYWBOYWBOYWBOYWBOYWBOYWBOriginal
- 2016-05-16 18:44:061113browse
Therefore, almost all grid controls now support paging functionality. extjs is no exception. It also provides powerful and convenient support for paging, making it easy for us to handle paging.
In extjs, the class Ext.PagingToolbar encapsulates paging operations. This class is inherited from Toolbar. From the name alone, we can also guess that this is a toolbar that can handle paging. Okay, let's take a look at how to construct such a toolbar. The constructor of the PagingToolbar class requires a json object for configuration. In js, it is very convenient to use a json object to provide the required parameters, so that we can only fill in the parameters of interest and do not have to care about the order of the parameters. Commonly used configuration parameters of our paging toolbar include:
pageSize: the number of records displayed on each page, the default is 20.
store: This is the same as the store parameter in the grid. Because paging also needs to deal with data, this parameter is needed.
displayMsg: Displayed paging status information, such as "{0}-{1}, total {2} items". Note that there must be 0, 1, and 2 enclosed in curly brackets, representing the current page respectively. The start, end, and total number of records. You can write the other words as you like. As long as they read smoothly, the information will be displayed on the right side of the paging toolbar.
displayInfo: Whether to display displayMsg, the default is not to display.
emptyMsg: Text displayed when there is no record.
items: Items to be displayed on the toolbar. Let’s take a look at what items are available after construction.
Okay, now we can construct our paging toolbar, but because we need a Store class object in our parameters, we construct it first:
var store = new Ext.data.JsonStore({
root: 'topics',
totalProperty: ' totalCount',
idProperty: 'threadid',
remoteSort: true,
fields: [
'title', 'forumtitle', 'forumid', 'author',
{ name: 'replycount', type: 'int' },
{ name: 'lastpost', mapping: 'lastpost', type: 'date', dateFormat: 'timestamp' },
'lastposter', 'excerpt'
],
// Because it is cross-domain, use ScriptTagProxy and HttpProxy in the same domain.
proxy: new Ext.data.ScriptTagProxy({
url: 'http://extjs. com/forum/topics-browse-remote.php'
})
});
This time, we use the JsonStore class to construct the required Store object. As the name suggests, This is used to convert data in json format. In addition, we are getting data from an external server, so the code is more complicated than getting data from an array. Let's take a look at the meaning of the parameters used:
root: contains the attribute name of the data row collection.
totalProperty: The property name that represents the total number of records in the data set. It is only needed when paging.
idProperty: The name of the attribute used as an identifier in the data row.
remoteSort: Whether to obtain new data through proxy when sorting, the default is false.
fields: mentioned in the previous series. There is an additional mapping here, which maps the names in the data to the names of the encapsulated Record fields. If the names are the same, they can be ignored.
proxy: the source of data. Here, we only need to know that our data is obtained from the address specified by the url, and because this address is cross-domain, ScriptTagProxy is used.
It should be noted that the data returned from the server must have the following format:
{
"totalCount":10000, //The value corresponding to the totalProperty attribute
"topics":[ //The value corresponding to the root house type
//Here is a collection of json objects , the attributes of each object
// need to correspond to the value of the name attribute in fields
// we can see this more clearly by observing the data returned to us by the url
]
}
The next step is to construct our paging toolbar:
var pagingToolbar = new Ext.PagingToolbar({
pageSize: 25,
store: store,
displayInfo: true,
displayMsg: 'Displaying topics {0} - {1} of {2}',
emptyMsg: "No articles",
items: [
'-', {
pressed: true,
enableToggle: true,
text: 'Show Preview',
cls: 'x-btn-text-icon details',
toggleHandler: function(btn, pressed) {
var view = grid.getView();
view.showPreview = pressed;
view.refresh();
}
}]
});
items is a collection of items on the toolbar, and the default type is a button. We only use two items here, "-" represents the separator, and the second item is a button. Let's take a look at what each attribute represents:
pressed: Indicates whether the button was pressed at the beginning. Only useful if enableToggle is true.
enableToggle: Indicates whether the button can be pressed.
text: The text displayed on the button.
cls: css class of button.
toggleHander: The event handler function when the button is clicked when enableToggle is set to true.
It’s time to combine the paging toolbar and grid. This time our grid does not use ColumnModel but uses the columns attribute. At the same time, we use viewConfig to configure the user interface. Take a look at the complete code:
///
/**//*
*Author: Daben
*Date: 2009-10-13
*Version: 1.0
*Blog address: http://yage.cnblogs.com
*/
Ext.BLANK_IMAGE_URL = '/extjs/resources/images/default/s.gif';
Ext.onReady(function() {
//Construct store
var store = new Ext.data.JsonStore({
root: 'topics',
totalProperty: 'totalCount',
idProperty: 'threadid',
remoteSort: true,
fields: [
'title', 'forumtitle', 'forumid', 'author',
{ name: 'replycount', type: 'int' },
{ name: 'lastpost', mapping: 'lastpost', type: 'date', dateFormat: 'timestamp' },
'lastposter', 'excerpt'
],
// Because of cross-domain , so use ScriptTagProxy and HttpProxy in the same domain
proxy: new Ext.data.ScriptTagProxy({
url: 'http://extjs.com/forum/topics-browse-remote.php'
})
});
store.setDefaultSort("lastpost", "DESC"); //Set the default sort column and direction
//Construct a toolbar with paging function
var pagingToolbar = new Ext.PagingToolbar({
pageSize: 25,
store: store,
displayInfo: true,
displayMsg: 'Item {0}-{1}, total {2 }items',
emptyMsg: "No topics to display",
items: [
'-', {
pressed: true,
enableToggle: true,
text: ' preview',
cls: 'x-btn-text-icon details',
toggleHandler: function(btn, pressed) {
var view = grid.getView();
view.showPreview = pressed;
view.refresh();
}
}]
});
//Construct a grid with a paging toolbar
var grid = new Ext.grid. GridPanel({
renderTo:"grid",
width: 700,
height: 500,
title: 'grid with paging function',
store: store,
trackMouseOver : false,
disableSelection: true,
loadMask: true,
// grid columns
columns: [{
id: 'topic',
header: "topic",
dataIndex: 'title',
width: 420,
renderer: renderTopic,
sortable: true
}, {
header: "Author",
dataIndex: ' author',
width: 100,
hidden: true,
sortable: true
}, {
header: "replycount",
dataIndex: 'replycount',
width: 70,
align: 'right',
sortable: true
}, {
id: 'last',
header: "Last reply",
dataIndex: 'lastpost',
width: 150,
renderer: renderLast,
sortable: true
}],
// Customized user interface
viewConfig: {
forceFit: true ,
enableRowBody: true,
showPreview: true,
getRowClass: function(record, rowIndex, p, store) {
if (this.showPreview) {
p.body = '< ;p>' record.data.excerpt '';
return 'x-grid3-row-expanded';
}
return 'x-grid3-row-collapsed';
}
},
//Paging toolbar at the top
//tbar: pagingToolbar,
//Paging toolbar at the bottom
bbar: pagingToolbar
}) ;
//Load data
store.load({ params: { start: 0, limit: 25} });
// Renderer function of topic column
function renderTopic(value, p, record) {
return String.format(
'{0}{1} Forum',
value, record.data.forumtitle, record.id, record.data.forumid);
}
//The renderer function of the last reply column
function renderLast(value, p , r) {
return String.format('{0}
by {1}', value.dateFormat('M j, Y, g:i a'), r.data[' lastposter']);
}
})
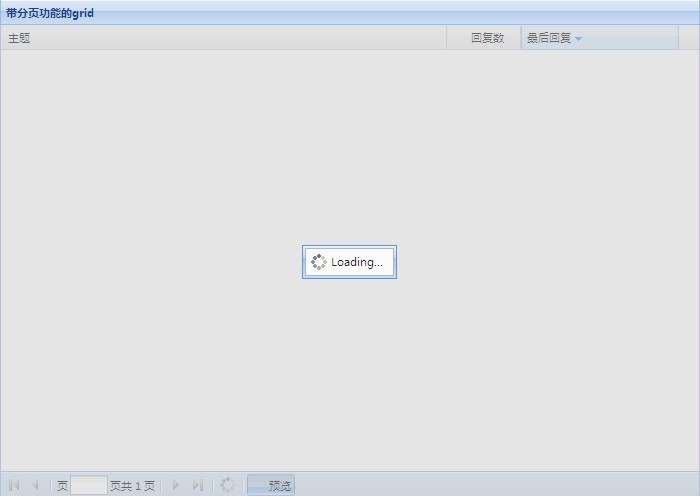
Run it to see the effect. We can see that when acquiring data, the page is covered by animation, as shown in the figure:
When the data is loaded, we see that the data is paginated in the grid. Displayed and sorted in descending order by the last published column, with the author column hidden:

When clicking the column name to sort, new data will be reloaded from the server. Click the right arrow to Turn the page and click the "Preview" button to see the effect. Although the code this time is much more than the simplest grid, the effect is also much cooler. Let’s sort out the code from the beginning:
Line 8 uses a picture placeholder, and the picture it points to is an empty picture. In the extjs library file, this picture placeholder will be replaced with another picture as needed. In our example, if this line is removed, the impact will not be too great, except that the "Last reply" in the title bar will be The small arrow below will disappear. Let's get into the habit of writing this line.
Lines 11-28 construct an object of the Store class. There is nothing much to say about this.
Line 30 sets the lastpost column as the default sorting column, and sorts it in descending order. Note that "DESC" must be uppercase, and ascending order is "ASC".
Lines 33-51 construct a toolbar with paging, which has been mentioned before.
Lines 54-112 construct a grid with paging function.
Instructs that the row will not be highlighted when the mouse is hovering over the row.
Line 61 indicates that the user cannot select the grid.
Line 62 instructs to cover the page when loading data. We can see the effect on the screenshot, but it is recommended to run it yourself to see the effect. After all, what is shown here is animation. The masking effect disappears when the data is loaded.
Lines 94-105 set up the user interface. Let’s take a look at the meaning of each parameter:
forceFit: Whether to force the column to adjust its width so that horizontal scroll bars do not appear. The default is false.
enableRowBody: When true, allow adding a tr element to each row to expand the data row.
showPreview: Custom bool type attribute used to control whether to display preview in code.
getRowClass: This is a method used to rewrite the css style of the row. It has four parameters. The first is the Record object representing the row data, the second is the index of the row, and the third is the enableRowBody setting. The
parameter passed in when true can be used to expand the row data through the body attribute of the parameter. This method should return a css class name. In our example, the summary information of the article is dynamically displayed based on the value of showPreview.
Line 111 displays the paging toolbar at the bottom of the grid. If you want to display it at the top, you can use tbar instead of bbar.
Line 115 sends a request to the server to obtain data. extjs will send the parameters in params to the server in post mode, where start indicates how many pieces of data to start from, and limit indicates how much data is displayed on each page.
118 to 126 are two renderer functions, the usage has been explained in the previous series.
The last thing to point out is that the paging function is actually completed on the server side. When turning pages on the client, parameters will be submitted just like line 115. We need to calculate the data that should be returned based on the passed star and limit values on the server side and send it to the client in the correct format. As for how the server obtains the parameters passed by the client and how to send data to the client, please refer to the first section of this series.
Related articles
See more- An in-depth analysis of the Bootstrap list group component
- Detailed explanation of JavaScript function currying
- Complete example of JS password generation and strength detection (with demo source code download)
- Angularjs integrates WeChat UI (weui)
- How to quickly switch between Traditional Chinese and Simplified Chinese with JavaScript and the trick for websites to support switching between Simplified and Traditional Chinese_javascript skills