
Home >Web Front-end >JS Tutorial >jQuery Jcrop plug-in implements image selection function_jquery
jQuery Jcrop plug-in implements image selection function_jquery

- WBOYWBOYWBOYWBOYWBOYWBOYWBOYWBOYWBOYWBOYWBOYWBOYWBOriginal
- 2016-05-16 17:58:591355browse
In general, the principle is very simple. The general process is: load the original image on the browser--> Use a rectangular frame to select an area on the original image and send the selected vertex coordinates and rectangular size to the server--> Server side Use the image cutting algorithm to cut the original image and output the cut image. Below we will discuss and analyze these steps in detail, and attach a small demo at the end for your reference.
1. Load the original image on the page
Needless to say, this is to display an image on the page and use an img tag to do it, but for the sake of downloading For a one-step demonstration, please post the code 
2. Use a rectangular frame to select an area on the original image
For this we need to use a jQuery plug-in Jcrop, thank you Jcrop, its project page address: http://deepliquid.com/content/Jcrop.html, again grateful. The next step is to use this plug-in to allow us to cut pictures at will on the original picture. First put several hidden fields on the page to store the currently selected vertex coordinates and the size of the selected rectangle, and then put a save button. After clicking the save button, the cut image will be saved on the server. The code is as follows:
The four hidden fields represent x respectively : x coordinate of the upper left vertex; y: y coordinate of the upper left vertex; w: select the width of the rectangle; h: select the length of the rectangle.
Then we call the plug-in, do the initialization work, and introduce the js and css files:
JS code to initialize the original image:
$(document).ready(function(){
$('#TestImage').Jcrop({
onChange: updateCoords,
onSelect: updateCoords
}) ;
$("#BtnSaveAvatar").click(function(){
$.ajax({
url:'Handler.ashx',
data:{'x':$(" #x").val(),'y':$("#y").val(),'w':$("#w").val(),'h':$("#h ").val()},
datatype : "text/json",
type:'post',
success: function(o){ window.location.href="result.aspx?url =" o;} // After success, jump to the result page to view the cut image, change the url
});
return false;
});
});
function updateCoords (c){
$('#x').val(c.x);
$('#y').val(c.y);
$('#w').val(c.w );
$('#h').val(c.h);
};
After the above steps, we are very happy to see a beautiful woman appear in front of us, And let us choose any part. It’s very exciting. Since the demo is at the end, let’s take a screenshot here
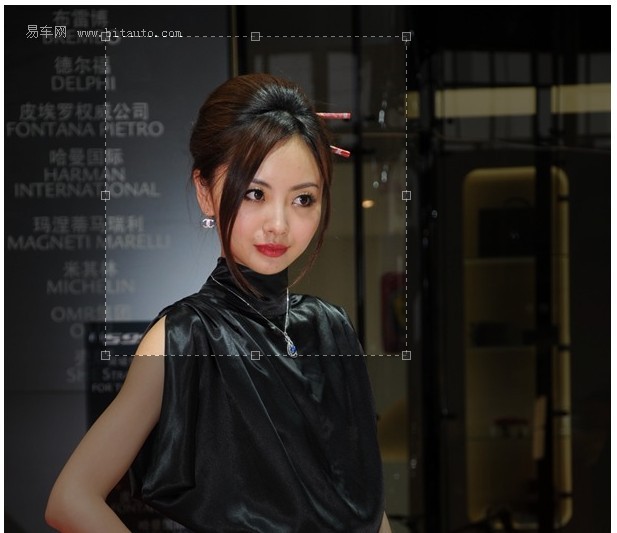
3. The server cuts the image and outputs the cut image:
The main class code for cutting the image is as follows:
public class ImageCut
{
///
/// Cutting -- using GDI
///
// /Original Bitmap
///Start coordinate X
///Start coordinate Y
///Width
///
///
public Bitmap KiCut(Bitmap b)
{
if (b == null)
{
return null;
}
int w = b.Width;
int h = b.Height;
if (X >= w | | >}
if (Y Height > h)
{
Height = h - Y;
}
try
{
Bitmap bmpOut = new Bitmap(Width, Height, PixelFormat.Format24bppRgb);
Graphics g = Graphics.FromImage(bmpOut);
g.DrawImage(b, new Rectangle(0, 0, Width, Height), new Rectangle(X, Y, Width, Height), GraphicsUnit.Pixel);
g.Dispose();
return bmpOut;
}
catch
{
return null;
}
}
public int X = 0;
public int Y = 0;
public int Width = 120;
public int Height = 120;
public ImageCut(int x, int y, int width, int heigth)
{
X = x;
Y = y;
Width = width;
Height = heigth;
}
}
In Handler.ashx, receive the vertex coordinates and length and width dimensions of the cut image passed by the page, and call the C# image cutting class to implement image cutting:
Copy code
The code is as follows:
int y = 0;
int w = 1;
int h = 1;
try
{
x = int.Parse(xstr);
y = int .Parse(ystr);
w = int.Parse(wstr);
h = int.Parse(hstr);
}
catch { }
ImageCut ic = new ImageCut(x, y, w, h);
System.Drawing.Bitmap cuted = ic.KiCut(new System.Drawing.Bitmap(sourceFile));
string cutPath = context.Server.MapPath(savePath) ;
cuted.Save(cutPath, System.Drawing.Imaging.ImageFormat.Jpeg);
context.Response.Write(savePath); //Output the saved path so that the page can receive the path and display the cut image
}
Finally we receive the cut image path on the Result.aspx page and display the cut image:
Okay, the whole process is completed. For everyone to have a better reference and study, a small demo is attached below,
Download the demo
.
Related articles
See more- An in-depth analysis of the Bootstrap list group component
- Detailed explanation of JavaScript function currying
- Complete example of JS password generation and strength detection (with demo source code download)
- Angularjs integrates WeChat UI (weui)
- How to quickly switch between Traditional Chinese and Simplified Chinese with JavaScript and the trick for websites to support switching between Simplified and Traditional Chinese_javascript skills