


Creating a bootable macOS High Sierra USB installer offers a convenient way to deploy the OS across multiple Macs without repeated downloads. This guide details the process, providing options for both startup and non-startup drive installations.
Prerequisites for a Bootable High Sierra USB Drive:
- USB Flash Drive (16GB minimum): A blank USB drive with sufficient storage is essential.
- Reliable Internet Connection: Downloading the High Sierra installer (approximately 5GB) requires a stable connection.
- External Hard Drive (Recommended): Back up your data before proceeding to avoid data loss. The external drive should have at least the same capacity as your Mac's internal storage.
- Time: Allocate about an hour or two for the entire process.
Preparing Your Mac:
Begin by optimizing your Mac's performance. Removing unnecessary files and applications using a utility like MacKeeper can improve efficiency before backing up.
Backing Up Your Data:
- Connect your external hard drive.
- Access System Preferences → Time Machine.
- Enable Time Machine and select your external drive as the backup destination.
- Time Machine will prompt you to reformat the external drive; confirm to proceed.

A detailed Time Machine backup guide is available elsewhere.
Downloading the macOS High Sierra Installer:
- Open the App Store.
- Search for "High Sierra" and download the installer. The installer ("Install macOS High Sierra") will be in your Applications folder. Quit the installer after download.
- If you've already upgraded, locate the installer in the App Store's Purchased section.
- Alternatively, use a direct download link (if available).
Prepare your chosen external drive (an SSD is ideal, but a 16GB USB drive suffices). Rename it "HighSierra." The system will reformat it for Mac compatibility.
Creating the Bootable Installer (Using Terminal):
- Connect the "HighSierra" drive.
- Open Terminal (Applications → Utilities → Terminal).
- Execute this command:
sudo /Applications/Install\ macOS\ High\ Sierra.app/Contents/Resources/createinstallmedia --volume /Volumes/HighSierra - Enter your login password.
- Confirm the drive erasure (Y/N).
- Choose "Don't use" when prompted about Time Machine backups.
- Wait for the installer to copy to the drive.

Installation Options:
A. Installing on Your Startup Disk:
This method erases all data on your main drive. Back up your data first!
- System Preferences → Startup Disk, select the installer.
- Restart, holding Command (⌘) R for Recovery Mode.
- Connect your bootable USB.
- Select "Reinstall macOS" from macOS Utilities.
- Follow the on-screen instructions.

B. Clean Install on a Non-Startup Drive:
This safer method requires a second drive or partitioned volume.
- Use Disk Utility to erase the target volume.
- Download the High Sierra installer.
- Launch the installer, click "Show All Disks," and select your prepared drive.
- Follow the installation instructions.

After installation, restore your data from your backup. For a more general guide on creating macOS bootable USBs, refer to other resources. Maintaining sufficient free disk space is crucial; use MacKeeper's Safe Cleanup to optimize storage.
The above is the detailed content of How to Create a High Sierra Bootable USB. For more information, please follow other related articles on the PHP Chinese website!

 How to Install MacOS Sequoia Public BetaMay 15, 2025 am 10:39 AM
The MacOS Sequoia public beta program is now available, providing Mac users with an early chance to explore the new major MacOS system software update. However, it's important to note that, like all beta versions, MacOS Sequoia public beta may be mor
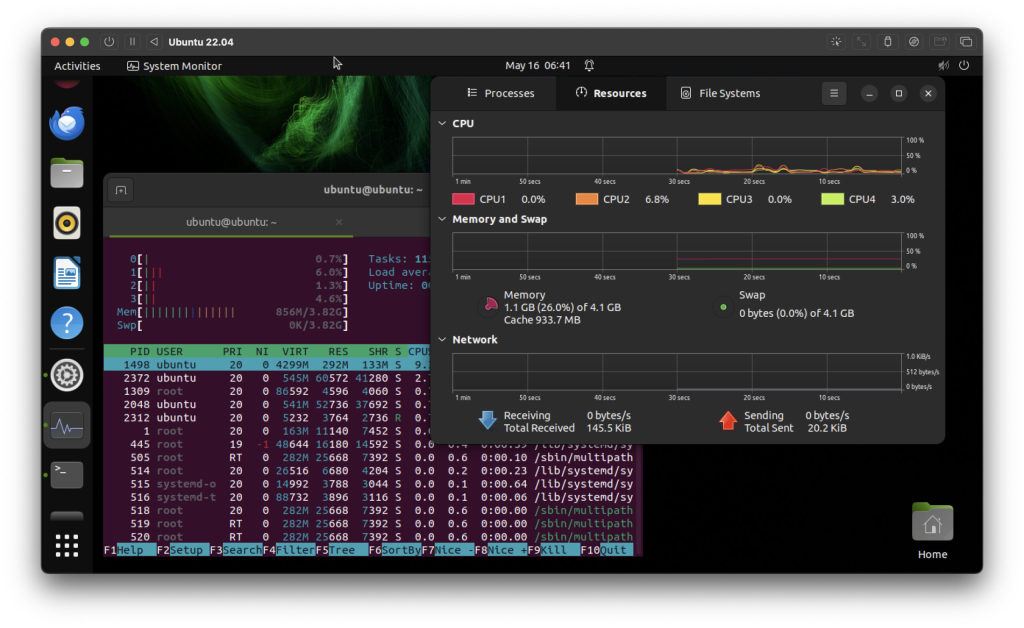 How to Run Ubuntu Linux on Apple Silicon MacMay 15, 2025 am 10:37 AM
Interested in running Ubuntu Linux on your Apple Silicon Mac? It's now simpler than ever to run Ubuntu alongside MacOS without the hassle of partitioning, dual booting, or risking your Mac's operating system. Thanks to virtual machine technology, you
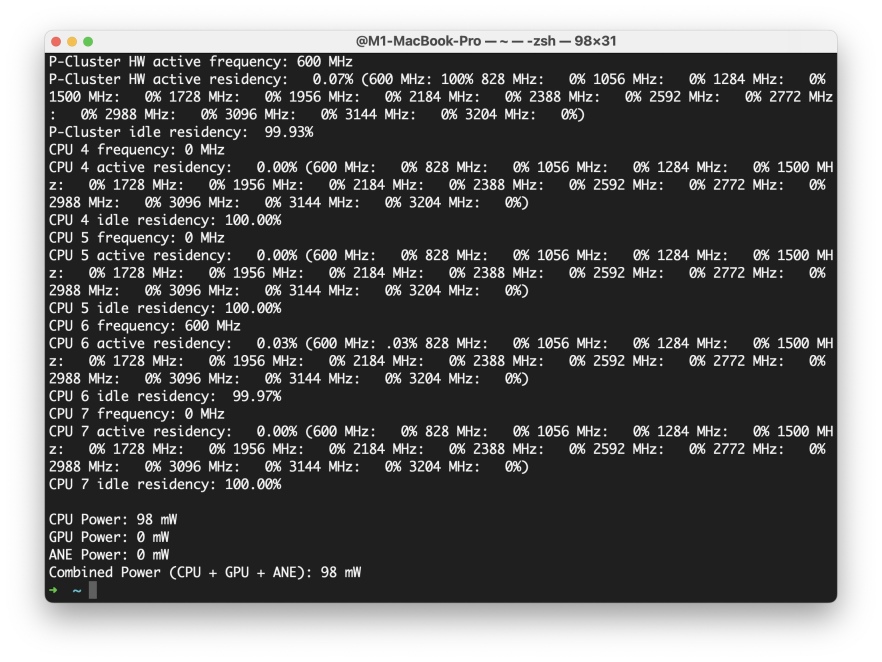 How to See Individual Core CPU Usage on Mac with powermetricsMay 15, 2025 am 10:31 AM
There are multiple methods to track CPU usage on a Mac, with the most popular being Activity Monitor for the graphical interface and htop or top for command line users. While Activity Monitor can display an optional core graph and htop shows CPU core
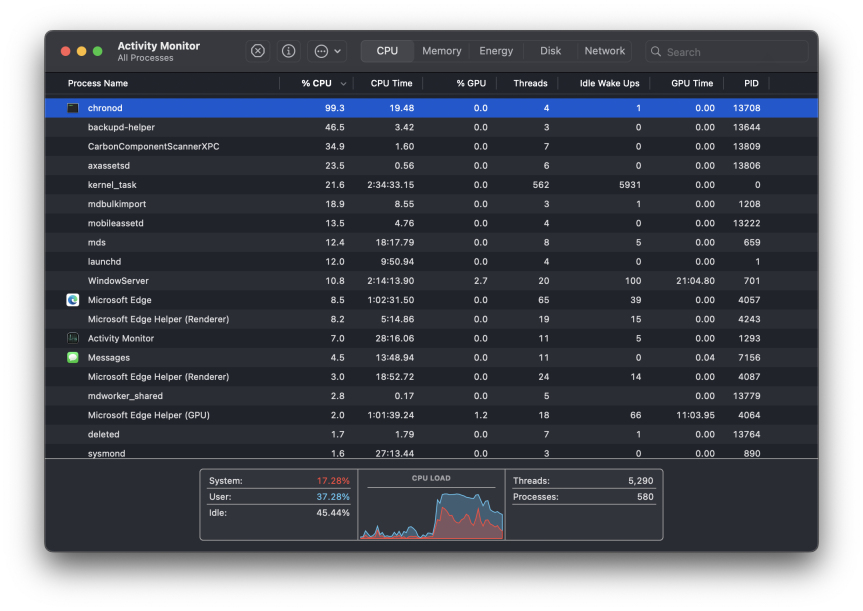 chronod on Mac – High CPU Use & Network Access Requests ExplainedMay 15, 2025 am 10:18 AM
Some Mac users occasionally find that the "chronod" process in MacOS either consumes a lot of system resources or requests access to a network connection. Sometimes, chronods are also marked by overly alert antivirus applications. While many people will ignore this situation, there are also curious Mac users who actively explore what specific processes that consume a lot of resources are, or what the intentions are of a process that requires or requires Internet access. So, what is chronod on Mac? Why does it use high CPU and system resources? Why does it require network access? Let's dive into the chronod process to better understand its functionality. What is chronod? The chronod process is
 Security Agent on Mac: What Is It & What Does It Do on MacBook Air/Pro?May 15, 2025 am 10:11 AM
What is Security Agent on MacSecurity Agent on Mac functions as a background process responsible for managing user authentication, system security notifications, and requests for application permissions. It collaborates with macOS's Security Server t
 2 of the Best Hex Editors for Mac: ImHex & Hex FiendMay 15, 2025 am 10:05 AM
Hex editors are specialized software tools designed for viewing and editing hexadecimal data as well as raw binary data within files. These tools are indispensable for programmers, developers, and reverse engineers who need to inspect, debug, and ana
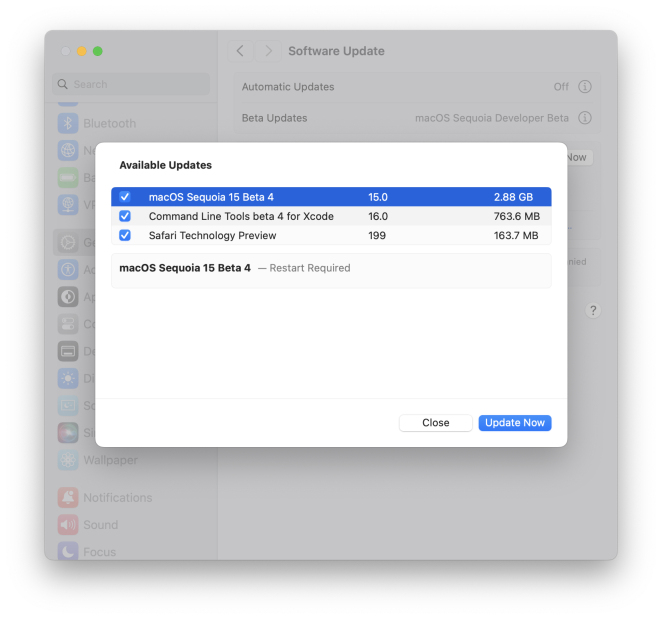 MacOS Sequoia 15 Beta 4 Available to DownloadMay 15, 2025 am 09:54 AM
Apple has unveiled the fourth beta release of MacOS Sequoia 15 for those engaged in the macOS Sequoia developer beta testing program. Typically, the corresponding build for public beta testers, labeled as macOS Sequoia public beta 2, is released shor
 FaceTime Not Working on Mac? Here's How to Fix ItMay 15, 2025 am 09:49 AM
Apple's FaceTime application is designed to connect Apple users seamlessly, offering features such as dual-camera support on smartphones for enhanced video chat experiences.Occasionally, though, FaceTime might not function as intended. This article d


Hot AI Tools

Undresser.AI Undress
AI-powered app for creating realistic nude photos

AI Clothes Remover
Online AI tool for removing clothes from photos.

Undress AI Tool
Undress images for free

Clothoff.io
AI clothes remover

Video Face Swap
Swap faces in any video effortlessly with our completely free AI face swap tool!

Hot Article
Hot Tools

WebStorm Mac version
Useful JavaScript development tools

SublimeText3 Linux new version
SublimeText3 Linux latest version

SublimeText3 Mac version
God-level code editing software (SublimeText3)

Atom editor mac version download
The most popular open source editor

Dreamweaver CS6
Visual web development tools

