
Home >Web Front-end >JS Tutorial >Beginner's Guide to Angular: Routing
Beginner's Guide to Angular: Routing

- Joseph Gordon-LevittOriginal
- 2025-03-17 11:31:091040browse
Angular routing: build the navigation core of a single page application
In any single page application, routing is the core mechanism that ensures that the correct components are loaded for the current view or application state. Routing is usually requested when the application is loaded or when the user action is triggered, and may also be triggered based on the input of the server.
Angular routers have many important building blocks. This article will show the most important part of Angular router and build a practical example in the process.
Step 1: Install Angular Router
First, you have to install the Angular router in your project. Angular Router is an extremely powerful JavaScript-based router created and maintained by the Angular core team.
You can easily install the router from the @angular/router package. There are two different ways to install the @angular/router package, you need to set the root route of your application in your index.html file. In the root folder of the application, you can find the index.html file. Here, use the "/" path to add the base location. This change tells Angular where all different routes start.
<base href="/">
<title>Angular Routing</title>
Step 2: Add dependencies to app.module.ts
If you are using NgModule , the main App Module of the application must have an NgModule declaration. This file must be modified using the following components:
 import { NgModule } from '@angular/core';
import { BrowserModule } from '@angular/platform-browser';
import { RouterModule } from '@angular/router';

import { AppComponent } from './app.component';

@NgModule({
  Imports: [BrowserModule, RouterModule],
  bootstrap: [AppComponent],
  declarations: [AppComponent],
})
export class AppModule {}
Step 3: Configure RouterModule
RouterModule requires information about routing in a single page application. Before providing this information, RouterModule has two static methods that can be used to provide the router with the required configuration for routing in the application. This is when the entire setup is completed.
When defining a route for the root configuration of an application, multiple routing instructions in the application can be accessed using a static method called forRoot . Here is a small code snippet showing how to use forRoot . In many cases, it will be easier to read and maintain if the route is stored in a separate file and imported into the ROUTES array below.
Next, we have RouterModule.forRoot . The main difference is forRoot . Modules in the application can define and configure their own routes. These routes can be imported into the main module as needed.
Here is a small code snippet where we use router-outlet . When our router identifies the component to be loaded for the route, the component is created dynamically. The dynamically created components will be injected along router-outlet element. In AppComponent , you can inject directives as follows:
 import { Component } from '@angular/core';

@Component({
  selector: 'appComponent',
  template: `
<div>
<h1>Angular Routing</h1>
<router-outlet></router-outlet>
</div>
  `,
})
export class AppComponent {}
The settings end here. Now we can look at the specific needs of the project and start building the route.
Step 4: Create a route for a single page application
We will build the route for the application in the following file: app.routing.ts . Having static routing is crucial when building a single page application. In our case, the static routing will be the homepage of the application loading.
Here is our routes array:
 export const AppRoutes: Routes = [
    { path: '', component: HomeComponent },
    { path: 'calc', component: CalcComponent },
    { path: '**', component: NotFoundComponent }
];
- An empty path represents a static route.
-
**means what should be loaded if there is no other matching route.
Step 5: Navigation
Using the routing and configuration changes created above, we can navigate. Let's first create a main component for our application called routerLink , a Angular directive routerLink you can route from one route to another without changing the value in the URL bar. If you want to create a dynamic route, you need to wrap [routerLink]=['/path', variable] .
This is our home.component.html file with static routing links.
<h2>
    Welcome to Home Page
</h2>

<nav>
<a routerlink="/calc" routerlinkactive="active">Go to Calc</a>
</nav>
This is the corresponding home.component.ts file:
 import { Component } from '@angular/core';

@Component({
  selector: 'home',
  templateUrl: 'home.component.html'
})
export class HomeComponent {}
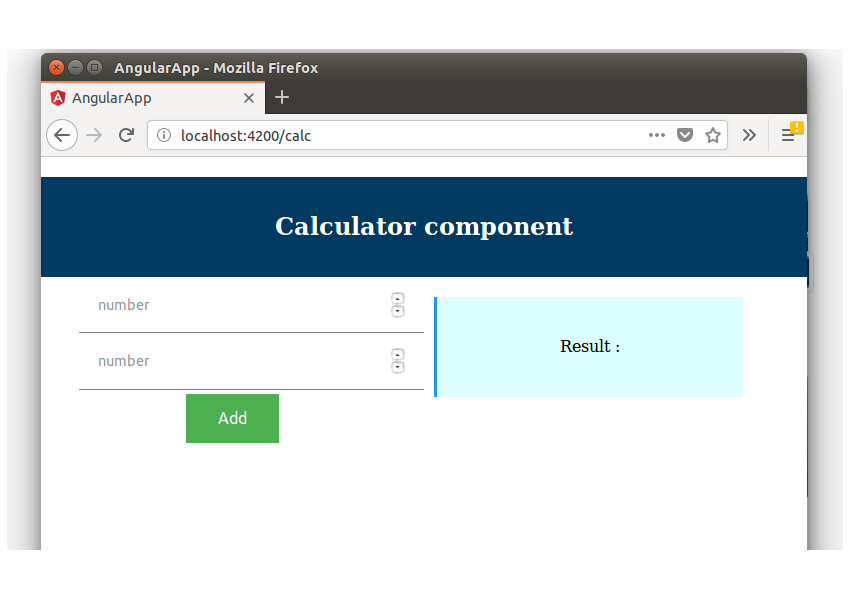
By default, when you load the application, the "" path corresponds to /calc , and the following view will be displayed. Why? Because in our app.routing.ts CalcComponent .
Now that you have learned the basics of routing, you have created a login page and a route for your application! Next, we will introduce some advanced concepts in Angular routing.
Advanced routing concept
Dynamic routing parameters
In a single page application, you may use multiple actions to access a specific route. For example, in our calculator application, the URL snippet is : . The colon tells the router that the value entered is not part of the URL, but a routing parameter.
 export const AppRoutes: Routes = [
    { path: '', component: HomeComponent },
    { path: 'calc/:operation', component: CalcComponent },
    { path: '**', component: NotFoundComponent }
];
We have established a dynamic route. Now, when we create a link or type an address in the address bar, we can easily swap addition, division and more operations.
Now is our next challenge. How will you extract dynamic routing information from the routing URL? Most of the time, we use ngOnInit and its role in the component lifecycle.
To access dynamic routing parameters, we use ActivatedRoute to include a params . Subscribe to ngOnInit . When we route from one parameter to another, the actual routing component is not destroyed. This is the technology Angular uses to improve performance. When you subscribe at ActivatedRoute .
 // The route is defined as path = '/calc/:operation'

import { Component, OnInit } from '@angular/core';
import { ActivatedRoute } from '@angular/router';

@Component({
  selector: 'calc.component',
  templateUrl: './calc.component.html'
})
export class CalcComponent implements OnInit {
  operation: string;
  constructor(private route: ActivatedRoute) {}
  ngOnInit() {
    this.route.params.subscribe((params) => this.operation = params.operation);
  }
}
Create a subroutine
So far, we have seen routes that only contain single-levels. Now, let's define multi-level routing. For example, a single-level routing would be /calc/addition .
We can assign /calc/addition will have another component. To achieve this behavior, we use it in the parent component<router-outlet></router-outlet> , the route will be rendered in it.
Sometimes, we may not use specific components of the parent route at all. In this case, we can delete the component from the routing declaration. This is also called componentless routing.
Here is a simple example that can help you understand these concepts.
 // Define route export const ROUTES: Routes = [
  {
    path: 'calc',
    component: CalcComponent,
    children: [
      { path: 'addition', component: CalcAdditionComponent },
      { path: 'subtraction', component: CalcSubstractionComponent },
    ],
  },
];

// Componentless routing export const ROUTES: Routes = [
  {
    path: 'calc',
    children: [
      { path: 'addition', component: CalcAdditionComponent },
      { path: 'subtraction', component: CalcSubtractionComponent },
    ],
  },
];
@NgModule({
  imports: [BrowserModule, RouterModule.forRoot(ROUTES)],
})


// Build parent component import { Component } from '@angular/core';

@Component({
  selector: 'calc.component',
  template: `
<div>
<calc-addition></calc-addition>
<calc-subtraction></calc-subtraction>
<router-outlet></router-outlet>
</div>
  `,
})
export class CalcComponent {}
Get routes from different modules
As applications grow, handling routing can be a challenge. Sometimes you need to get the route from different modules. In this case you can use RouterModule.forChild() .
Let's start with an example:
 // Subroutine export const ROUTES: Routes = [
  {
    path: '',
    component: CalcComponent,
    children: [
      { path: 'addition', component: CalcAdditionComponent },
      { path: 'subtraction', component: CalcSubtractionComponent },
    ],
  },
];

@NgModule({
  imports: [CommonModule, RouterModule.forChild(ROUTES)],
})
export class CalcModule {}

// Parent route export const ROUTES: Routes = [
  {
    path: 'calc',
    loadChildren: './calc/calc.module#CalcModule',
  },
];

@NgModule({
  imports: [BrowserModule, RouterModule.forRoot(ROUTES)],
})
export class AppModule {}
Some interesting aspects to understand from the above code are:
- We have an empty path. This is because we do not want the route path to
CalcModuleto have to be imported into root/calc/**.
Summarize
In this tutorial, you learned the basics of how to handle routing in Angular. You learned how to define routes and how to navigate differently through Angular applications. The concepts discussed in this article cover the basics. Once you have mastered the basics, you will be able to dig deeper into more advanced Angular routing concepts such as activation guards, routing navigation, and more.
The above is the detailed content of Beginner's Guide to Angular: Routing. For more information, please follow other related articles on the PHP Chinese website!
Related articles
See more- An in-depth analysis of the Bootstrap list group component
- Detailed explanation of JavaScript function currying
- Complete example of JS password generation and strength detection (with demo source code download)
- Angularjs integrates WeChat UI (weui)
- How to quickly switch between Traditional Chinese and Simplified Chinese with JavaScript and the trick for websites to support switching between Simplified and Traditional Chinese_javascript skills