


How to remove page break in Excel
To remove a page break in Excel, follow these steps:
- Open Your Excel Workbook: Start by opening the Excel workbook that contains the worksheet with the page break you want to remove.
- Switch to Page Break Preview: Go to the 'View' tab on the Ribbon and click on 'Page Break Preview'. This view allows you to see where the page breaks are located within your worksheet.
- Identify the Page Break: Once in Page Break Preview, you'll see blue dashed lines that represent automatic page breaks and solid blue lines that represent manual page breaks.
- Remove the Page Break: To remove a manual page break, simply click and drag the solid blue line away from its current position until it disappears. For automatic page breaks, you need to adjust the print settings or the content of your worksheet to shift the break point.
- Confirm Changes: After making the adjustments, switch back to 'Normal' view to continue working on your worksheet.
- Save Your Workbook: Always remember to save your workbook after making these changes to ensure that the page breaks are removed permanently.
How can I prevent automatic page breaks from appearing in my Excel worksheet?
Preventing automatic page breaks in Excel can be managed by adjusting your print settings and worksheet layout:
- Adjust Page Layout Settings: Go to the 'Page Layout' tab and select 'Margins'. Here, you can choose 'Custom Margins' to adjust the margins to fit more content on a single page.
- Scale to Fit: In the 'Page Layout' tab, find the 'Scale to Fit' group. You can adjust the 'Width' and 'Height' settings to scale your worksheet to fit on a specific number of pages, thus controlling automatic page breaks.
- Modify Worksheet Content: If certain rows or columns are causing automatic breaks, consider reducing the amount of content or formatting the cells to take up less space.
- Print Area: Define a print area that fits all your necessary data on one page. Go to 'Page Layout' > 'Print Area' > 'Set Print Area' to select a specific range of cells to print.
- Print Titles: If you need headers to repeat on every page but don't want to disrupt the content flow, use 'Print Titles' under 'Page Setup' in the 'Page Layout' tab.
By implementing these strategies, you can better manage and potentially prevent automatic page breaks from disrupting your Excel worksheet.
What steps should I take to adjust manual page breaks in Excel?
To adjust manual page breaks in Excel, follow these steps:
- Enter Page Break Preview: Navigate to the 'View' tab and click on 'Page Break Preview'. This will show the current layout of your worksheet with page breaks indicated.
- Identify the Manual Page Break: Look for solid blue lines, which indicate manual page breaks. Automatic page breaks are shown as dashed lines.
- Adjust the Manual Page Break: Click on the solid blue line and drag it to the new desired position. You can move it horizontally or vertically depending on where you want the new page break to occur.
- Confirm Placement: Once you have positioned the manual page break to your satisfaction, release the mouse button. The page break will snap into place.
- Exit Page Break Preview: To return to the normal worksheet view, click on 'Normal' in the 'View' tab. Your changes to the manual page break will be saved.
- Review and Save: After adjusting the manual page breaks, review your worksheet to ensure that the breaks are positioned as intended, then save your workbook.
Is there a way to view and manage all page breaks in Excel at once?
Yes, you can view and manage all page breaks in Excel at once using the Page Break Preview feature:
- Access Page Break Preview: Go to the 'View' tab on the Ribbon and click 'Page Break Preview'. This will display the entire worksheet with all page breaks highlighted.
- Identify All Page Breaks: In Page Break Preview, you will see dashed lines indicating automatic page breaks and solid lines indicating manual page breaks. This view allows you to see all the page breaks simultaneously.
-
Manage Page Breaks:
- To remove a manual page break, click and drag the solid line until it disappears.
- To adjust a manual page break, click and drag the solid line to the new desired location.
- Automatic page breaks can be managed by adjusting the worksheet content or print settings as previously described.
- Use Page Layout for Further Adjustments: For more detailed management, you can use settings in the 'Page Layout' tab such as 'Margins', 'Orientation', and 'Print Area' to influence where automatic page breaks will occur.
- Save Your Changes: After making the necessary adjustments to all page breaks, switch back to 'Normal' view and save your workbook.
Using Page Break Preview provides a comprehensive way to view and manage all page breaks within your Excel worksheet at once, making it easier to control the layout and flow of your printed document.
The above is the detailed content of how to remove page break in excel. For more information, please follow other related articles on the PHP Chinese website!

 MEDIAN formula in Excel - practical examplesApr 11, 2025 pm 12:08 PM
This tutorial explains how to calculate the median of numerical data in Excel using the MEDIAN function. The median, a key measure of central tendency, identifies the middle value in a dataset, offering a more robust representation of central tenden
 Google Spreadsheet COUNTIF function with formula examplesApr 11, 2025 pm 12:03 PM
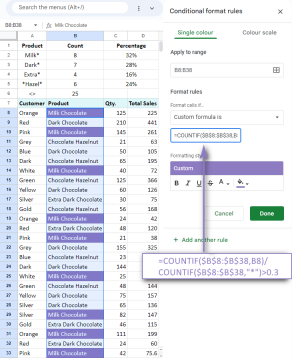
Master Google Sheets COUNTIF: A Comprehensive Guide This guide explores the versatile COUNTIF function in Google Sheets, demonstrating its applications beyond simple cell counting. We'll cover various scenarios, from exact and partial matches to han
 Excel shared workbook: How to share Excel file for multiple usersApr 11, 2025 am 11:58 AM
This tutorial provides a comprehensive guide to sharing Excel workbooks, covering various methods, access control, and conflict resolution. Modern Excel versions (2010, 2013, 2016, and later) simplify collaborative editing, eliminating the need to m
 How to convert Excel to JPG - save .xls or .xlsx as image fileApr 11, 2025 am 11:31 AM
This tutorial explores various methods for converting .xls files to .jpg images, encompassing both built-in Windows tools and free online converters. Need to create a presentation, share spreadsheet data securely, or design a document? Converting yo
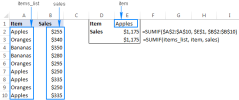 Excel names and named ranges: how to define and use in formulasApr 11, 2025 am 11:13 AM
This tutorial clarifies the function of Excel names and demonstrates how to define names for cells, ranges, constants, or formulas. It also covers editing, filtering, and deleting defined names. Excel names, while incredibly useful, are often overlo
 Standard deviation Excel: functions and formula examplesApr 11, 2025 am 11:01 AM
This tutorial clarifies the distinction between standard deviation and standard error of the mean, guiding you on the optimal Excel functions for standard deviation calculations. In descriptive statistics, the mean and standard deviation are intrinsi
 Square root in Excel: SQRT function and other waysApr 11, 2025 am 10:34 AM
This Excel tutorial demonstrates how to calculate square roots and nth roots. Finding the square root is a common mathematical operation, and Excel offers several methods. Methods for Calculating Square Roots in Excel: Using the SQRT Function: The
 Google Sheets basics: Learn how to work with Google SpreadsheetsApr 11, 2025 am 10:23 AM
Unlock the Power of Google Sheets: A Beginner's Guide This tutorial introduces the fundamentals of Google Sheets, a powerful and versatile alternative to MS Excel. Learn how to effortlessly manage spreadsheets, leverage key features, and collaborate


Hot AI Tools

Undresser.AI Undress
AI-powered app for creating realistic nude photos

AI Clothes Remover
Online AI tool for removing clothes from photos.

Undress AI Tool
Undress images for free

Clothoff.io
AI clothes remover

Video Face Swap
Swap faces in any video effortlessly with our completely free AI face swap tool!

Hot Article
Hot Tools

DVWA
Damn Vulnerable Web App (DVWA) is a PHP/MySQL web application that is very vulnerable. Its main goals are to be an aid for security professionals to test their skills and tools in a legal environment, to help web developers better understand the process of securing web applications, and to help teachers/students teach/learn in a classroom environment Web application security. The goal of DVWA is to practice some of the most common web vulnerabilities through a simple and straightforward interface, with varying degrees of difficulty. Please note that this software

WebStorm Mac version
Useful JavaScript development tools

Atom editor mac version download
The most popular open source editor

EditPlus Chinese cracked version
Small size, syntax highlighting, does not support code prompt function

MinGW - Minimalist GNU for Windows
This project is in the process of being migrated to osdn.net/projects/mingw, you can continue to follow us there. MinGW: A native Windows port of the GNU Compiler Collection (GCC), freely distributable import libraries and header files for building native Windows applications; includes extensions to the MSVC runtime to support C99 functionality. All MinGW software can run on 64-bit Windows platforms.

