


The charm of Linux systems lies in their flexibility and customizability, and the Live environment takes this advantage to the extreme. The Live environment allows users to run a complete operating system directly from a USB drive or CD without installing it on the computer's hard drive. This portability and flexibility make it ideal for software testing, system rescue, secure browsing or carrying a personal desktop system. However, a pre-built Live environment may not meet the needs and preferences of all users. This is especially important to create a custom Linux Live environment, which allows you to adjust everything to your liking. This guide walks you through the process of creating a portable operating system, ensuring you have all the necessary tools and knowledge.
Detailed explanation of the Live environment
Live environment refers to a complete operating system running from a removable medium such as a USB flash drive or CD. Unlike traditional OS installations, it does not change the computer's hard drive (unless otherwise specified). It is an ideal solution to try different distributions, troubleshoot or maintain privacy.
Why choose custom?
Creating a custom Linux Live environment allows you to:
- Includes specific software: Customize applications and tools according to your needs.
- Customize settings and appearance: Preconfigure network settings, themes, and wallpapers according to your preferences.
- Improving portability and convenience: Carry a fully personalized desktop experience with you.
Building preparation
Select your basic distribution
Choose the right basic distribution is crucial. Popular choices include:
- Ubuntu: Known for its user-friendliness and extensive community support.
- Fedora: Provides the latest software and features, ideal for those who prefer cutting-edge technology.
- Debian: It is valued for its stability and simplicity, making it a reliable choice for beginners and advanced users.
When making choices, consider how familiar you are with the distribution, how compatible it is with your hardware, and how large it is in the community.
Required Tools
To create a Live environment, you need to select specific tools based on your underlying distribution. Some of the most commonly used tools include:
- Linux Live Kit: A universal tool that can create live versions of almost any Linux distribution.
- Customizer: A GUI-based customization tool for Ubuntu distribution.
- Remastersys: A universal tool for Debian distributions, but is no longer actively developed.
Make sure your computer has enough processing power and space to handle the build process, which can be very resource-intensive.
Build your custom live environment
Set up your workspace
First, install the packages and dependencies required by the tool of your choice. Download the ISO image of your basic Linux distribution and mount it to your working directory.
Custom environment
This is the most interesting part. Install the software and applications you want through a package manager or directly download. Configure your system settings to the style you like. This may include setting up a network, customizing the desktop environment with themes and wallpapers, and adding any custom scripts to enhance functionality.
Create Live Image
After setting up the environment, use the tool of your choice to package everything into your Live image. This process involves compressing your custom OS into an ISO file that can then be burned to a USB flash drive or CD. Pay attention to compression and optimization options to ensure your Live environment runs smoothly.
Test and Troubleshooting
Be sure to thoroughly test your Live environment before distributing it. Run it on a virtual machine or backup computer to check for any issues or errors. Make the necessary adjustments based on your test results to ensure a smooth user experience.
Distribute your results
When you have your custom Live environment ready, consider how you want to share it. Options include creating a USB flash drive, burning a CD, or uploading an ISO file for online download. If you choose to distribute it widely, make sure you have the appropriate license for any software included in the build.
Advanced customization and tips
To further protect your environment, consider encrypting your Live media. For those who need to save changes between sessions, check Setting up persistent storage. Automatic updates and customization with scripts can save time and ensure consistency if you plan to update your Live environment regularly.
Summary
Creating a custom Linux Live environment is a very rewarding project that combines technical skills with creative customization. By following this guide, you will be able to have a portable, personalized Linux experience that meets your exact needs and preferences. However, the journey did not end there. The Linux community is huge and supportive, full of resources and individuals who are passionate about sharing knowledge and helping with troubleshooting. Deep into the forums, explore more tutorials, and never stop learning and experimenting with your Live environment. Your perfect Linux companion is available in just one build!
The above is the detailed content of How to Build Custom Linux Live Environments. For more information, please follow other related articles on the PHP Chinese website!

 How to Use 'next' Command with Awk in Linux - Part 6May 15, 2025 am 10:43 AM
In this sixth installment of our Awk series, we will explore the next command, which is instrumental in enhancing the efficiency of your script executions by skipping redundant processing steps.What is the next Command?The next command in awk instruc
 How to Efficiently Transfer Files in LinuxMay 15, 2025 am 10:42 AM
Transferring files in Linux systems is a common task that every system administrator should master, especially when it comes to network transmission between local or remote systems. Linux provides two commonly used tools to accomplish this task: SCP (Secure Replication) and Rsync. Both provide a safe and convenient way to transfer files between local or remote machines. This article will explain in detail how to use SCP and Rsync commands to transfer files, including local and remote file transfers. Understand the scp (Secure Copy Protocol) in Linux scp command is a command line program used to securely copy files and directories between two hosts via SSH (Secure Shell), which means that when files are transferred over the Internet, the number of
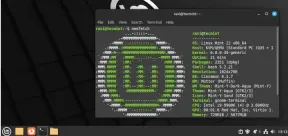
 10 Most Popular Linux Desktop Environments of All TimeMay 15, 2025 am 10:35 AM
One fascinating feature of Linux, in contrast to Windows and Mac OS X, is its support for a variety of desktop environments. This allows desktop users to select the most suitable and fitting desktop environment based on their computing requirements.A
 How to Install LibreOffice 24.8 in Linux DesktopMay 15, 2025 am 10:15 AM
LibreOffice stands out as a robust and open-source office suite, tailored for Linux, Windows, and Mac platforms. It boasts an array of advanced features for handling word documents, spreadsheets, presentations, drawings, calculations, and mathematica
 How to Work with PDF Files Using ONLYOFFICE Docs in LinuxMay 15, 2025 am 09:58 AM
Linux users who manage PDF files have a wide array of programs at their disposal. Specifically, there are numerous specialized PDF tools designed for various functions.For instance, you might opt to install a PDF viewer for reading files or a PDF edi
 How to Filter Command Output Using Awk and STDINMay 15, 2025 am 09:53 AM
In the earlier segments of the Awk command series, our focus was primarily on reading input from files. However, what if you need to read input from STDIN?In Part 7 of the Awk series, we will explore several examples where you can use the output of o
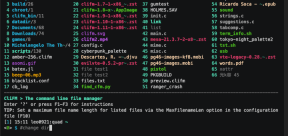 Clifm - Lightning-Fast Terminal File Manager for LinuxMay 15, 2025 am 09:45 AM
Clifm stands out as a distinctive and incredibly swift command-line file manager, designed on the foundation of a shell-like interface. This means that users can engage with their file system using commands they are already familiar with.The choice o
 How to Upgrade from Linux Mint 21.3 to Linux Mint 22May 15, 2025 am 09:44 AM
If you prefer not to perform a new installation of Linux Mint 22 Wilma, you have the option to upgrade from a previous version.In this guide, we will detail the process to upgrade from Linux Mint 21.3 (the most recent minor release of the 21.x series


Hot AI Tools

Undresser.AI Undress
AI-powered app for creating realistic nude photos

AI Clothes Remover
Online AI tool for removing clothes from photos.

Undress AI Tool
Undress images for free

Clothoff.io
AI clothes remover

Video Face Swap
Swap faces in any video effortlessly with our completely free AI face swap tool!

Hot Article
Hot Tools

VSCode Windows 64-bit Download
A free and powerful IDE editor launched by Microsoft

Notepad++7.3.1
Easy-to-use and free code editor

SAP NetWeaver Server Adapter for Eclipse
Integrate Eclipse with SAP NetWeaver application server.

SublimeText3 Mac version
God-level code editing software (SublimeText3)

ZendStudio 13.5.1 Mac
Powerful PHP integrated development environment

