


Build your home server: a complete guide to using Debian
In today's digital age, centralized management of your data and services is crucial. Whether you want to store media files, run a personal cloud, or host various applications, home servers offer enhanced privacy, security, and accessibility. This guide walks you through the process of building a home server using Debian, one of the most stable and universal Linux distributions.
Prerequisites
Hardware requirements
Minimum system requirements:
- CPU: 1 GHz or higher processor
- RAM: 1 GB (2 GB recommended)
- Storage: 20 GB available disk space
Recommended hardware:
- CPU: Multi-core processor (Intel i3/i5/i7 or AMD equivalent processor)
- RAM: 4 GB or more
- Storage: 500 GB or more, it is best to use an SSD as the operating system and use an additional HDD for data storage
- Network: Gigabit Ethernet
Select the right server hardware
When choosing home server hardware, you can choose from a variety of options. You can repurpose your old computer, use dedicated server hardware, and even choose small devices like the Raspberry Pi to complete basic tasks. Make sure your hardware meets the requirements of the services you plan to run.
Software Requirements
Overview of Debian operating system
Debian is a free and open source operating system known for its stability and huge software library. It is an excellent choice for home servers due to its reliability and strong community support.
Required software tools and software packages
- Debian ISO File
- Etcher (or any tool used to create bootable USB drives)
- SSH client (for example, Windows PuTTY, Linux/macOS terminal)
- Web server software (Apache or Nginx)
- File Server Software (Samba or NFS)
- Database server software (MySQL or PostgreSQL)
- Other service software (Nextcloud, Plex, Postfix, etc.)
Set up your server
Step 1: Prepare your hardware
Make sure all components are assembled and connected correctly. This includes installing the CPU, RAM, storage drives, and connecting all necessary peripherals such as keyboards, monitors and network cables.
Initial setup requires connecting the keyboard and monitor to your server. Once the setup is complete, you can use SSH to remotely manage the server.
Step 2: Install Debian
Get Debian official website and download the latest stable version of Debian. Choose the right version for your system architecture (for example, amd64 for 64-bit systems).
Create a bootable USB drive using the downloaded Debian ISO using Etcher or similar tools.
Step installation guide
- Boot from USB: Plug the bootable USB drive into the server and boot from it. You may need to adjust your BIOS settings to boot from USB.
- Language and Locale: Select your preferred language, country, and keyboard layout.
- Configure the network: Select the host name for your server and configure the network settings. For static IP addresses, you can set it during or after installation.
- Partition disk: Partition disk as needed. For simple setup, you can use a boot partition to install Debian onto the entire disk. For more advanced settings, you can configure separate partitions for /home, /var, etc.
- Set user and password: Create root password and user account for daily operations.
- Installing the basic system: As shown in the prompts, install the basic system. This includes selecting the software to be installed; you can choose the minimum installation and add more packages later.
- Complete the installation: After the installation is complete, remove the USB drive and restart the server.
Configure server
Step 3: Set up after installation
After initial restart, update the package list and upgrade the installed packages:
sudo apt update
sudo apt upgrade
Ensure that your server has a static IP address for consistent network accessibility. Edit network interface configuration file:
sudo nano /etc/network/interfaces
Add the following lines and replace the placeholder with your network details:
<code>auto eth0
iface eth0 inet static
    address 192.168.1.100
    netmask 255.255.255.0
    gateway 192.168.1.1
    dns-nameservers 8.8.8.8 8.8.4.4</code>
Restart the network service:
sudo systemctl restart networking
Installing the OpenSSH server package to enable remote access:
sudo apt install openssh-server
Enable and start SSH service:
sudo systemctl enable ssh
sudo systemctl start ssh
You can now use the SSH client to remotely connect to your server.
Step 4: Install basic services
Select Apache or Nginx for your web server.
- Apache:
sudo apt install apache2
Enable and start the Apache service:
sudo systemctl enable apache2
sudo systemctl start apache2
- Nginx:
sudo apt install nginx
Enable and start Nginx service:
sudo systemctl enable nginx
sudo systemctl start nginx
Set the file server
- Samba (for Windows file sharing):
sudo apt install samba
Edit Samba configuration file:
sudo nano /etc/samba/smb.conf
Add your shared folder:
<code>[shared]
path = /srv/samba/shared
read only = no
browsable = yes</code>
Create a shared directory and set permissions:
sudo mkdir -p /srv/samba/shared
sudo chown -R nobody:nogroup /srv/samba/shared
Restart Samba service:
sudo systemctl restart smbd
- NFS (for Linux file sharing):
sudo apt install nfs-kernel-server
Edit export file:
sudo nano /etc/exports
Add your shared directory:
<code>/srv/nfs/shared 192.168.1.0/24(rw,sync,no_subtree_check)</code>
Export share and restart NFS service:
sudo exportfs -a
sudo systemctl restart nfs-kernel-server
Configure database server
- MySQL:
sudo apt install mysql-server
Protect MySQL installation:
sudo mysql_secure_installation
- PostgreSQL:
sudo apt install postgresql
Access PostgreSQL prompt to create database and users:
sudo apt update
sudo apt upgrade
Concentrated data and services
Step 5: Centralized data storage
For redundancy and performance improvement, consider setting up RAID (Redundant Array of Independent Disks). This step is optional, but it is recommended for critical data.
Create and manage shared folders with appropriate user permissions. Use the chown and chmod commands to set ownership and permissions.
Use tools such as rsync to make backups. Automatic backup using cron job:
sudo nano /etc/network/interfaces
Add cron job to add daily backup:
<code>auto eth0
iface eth0 inet static
    address 192.168.1.100
    netmask 255.255.255.0
    gateway 192.168.1.1
    dns-nameservers 8.8.8.8 8.8.4.4</code>
Step 6: Hosting Service
Hosted Personal Cloud Service (Nextcloud):
Install Nextcloud to create your personal cloud:
sudo systemctl restart networking
Download and unzip Nextcloud:
sudo apt install openssh-server
Set up the database for Nextcloud and complete a web-based installation.
Download and install Plex Media Server:
sudo systemctl enable ssh
sudo systemctl start ssh
Access the Plex web interface to complete the setup.
Set up a mail server (Postfix, Dovecot)
Installing Postfix and Dovecot:
sudo apt install apache2
Configure Postfix and Dovecot according to your domain name and security needs.
Installing the version control system (Git)
Installation Git:
sudo systemctl enable apache2
sudo systemctl start apache2
Set version-controlled repository and user access rights.
Installate and configure DHCP and DNS services to effectively manage your network.
Safety Precautions
Step 6: Protect your server
Installation and configuration UFW (Uncomplicated Firewall):
sudo apt install nginx
Install Fail2ban to prevent brute-force attacks:
sudo systemctl enable nginx
sudo systemctl start nginx
Configure Fail2ban to protect SSH and other services:
sudo apt install samba
Add the following configuration:
sudo nano /etc/samba/smb.conf
Restart Fail2ban:
<code>[shared]
path = /srv/samba/shared
read only = no
browsable = yes</code>
Install Certbot to get an SSL certificate from Let's Encrypt:
sudo mkdir -p /srv/samba/shared
sudo chown -R nobody:nogroup /srv/samba/shared
Follow the prompts to protect your website with SSL.
Regist your system regularly:
sudo systemctl restart smbd
Use monitoring tools such as Nagios to track system performance and security.
Maintenance and monitoring
Step 7: Regular maintenance
- Keep the system updated with the latest security patches and software versions.
- Use tools such as htop and Nagios to monitor system performance and resource usage.
- Check system logs regularly and configure alert mechanisms for critical issues.
Conclusion
Building a home server with Debian gives you complete control over your data and services. Compared to cloud services, you can save money, enjoy enhanced privacy and security, and flexibly expand and customize your settings as needed.
The above is the detailed content of Centralize Your Digital World: How to Building a Home Server with Debian. For more information, please follow other related articles on the PHP Chinese website!

 How to Automatically Restart a Failed Service in LinuxApr 28, 2025 am 09:39 AM
This guide details how to configure automatic service restarts in Linux using systemd, enhancing system reliability and minimizing downtime. System administrators often rely on this functionality to ensure critical services, such as web servers (Apa
 10 Hidden Linux Commands Every Sysadmin Should KnowApr 28, 2025 am 09:35 AM
As Linux users, we often rely on commonly used commands ls, grep, awk, sed and find to complete the work. But Linux has a large number of lesser-known commands that can save time, automate tasks and simplify workflows. This article will explore some underrated but powerful Linux commands that deserve more attention. rename – efficient batch rename files The rename command is the savior when you need to rename multiple files at once. Without using loops containing mv, rename allows you to easily apply complex renaming patterns. Change all .txt files to .log. rename 's/\.txt$/\.log/' *
 How to List All Running Services Under Systemd in LinuxApr 28, 2025 am 09:29 AM
Linux systems provide various system services (such as process management, login, syslog, cron, etc.) and network services (such as remote login, email, printer, web hosting, data storage, file transfer, domain name resolution (using DNS), dynamic IP address allocation (using DHCP), and so on). Technically, a service is a process or group of process (usually known as a daemon) that runs continuously in the background, waiting for incoming requests (especially from the client). Linux supports different ways to manage services (start, stop, restart, enable automatic startup at system startup, etc.), usually through a process or service manager. Almost all modern Linux distributions now use the same
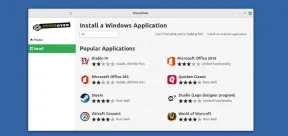 CrossOver 25: Run Windows Software and Games on LinuxApr 28, 2025 am 09:27 AM
Run Windows Software and Games on Linux with CrossOver 25 Running Windows applications and games on Linux is now easier than ever, thanks to CrossOver 25 from CodeWeavers. This commercial software solution lets Linux users run a wide variety of Wind
![pCloud - The Most Secure Cloud Storage [50% Off Offer]](https://img.php.cn/upload/article/001/242/473/174580357418126.jpg?x-oss-process=image/resize,p_40) pCloud - The Most Secure Cloud Storage [50% Off Offer]Apr 28, 2025 am 09:26 AM
pCloud - The Most Secure Cloud Storage [50% Off Offer]Apr 28, 2025 am 09:26 AMSecure Your Data with pCloud: A Comprehensive Guide to Linux Installation pCloud, a leading secure cloud storage service, provides a robust platform for managing your files and data. This guide details the installation process on Linux systems. About
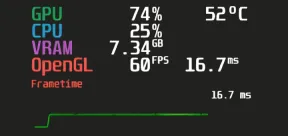 MangoHud - Monitor FPS, CPU & GPU Usage in Linux GamesApr 28, 2025 am 09:25 AM
MangoHud: A powerful tool for real-time monitoring of Linux gaming performance MangoHud is a powerful and lightweight tool designed for gamers, developers, and anyone who wants to monitor system performance in real time. It acts as an overlay for Vulkan and OpenGL applications, displaying important information such as FPS, CPU and GPU usage, temperature, etc. This article will explore the functions, working principles and usage of MangoHud, and provide step-by-step instructions for installing and configuring MangoHud on Linux systems. What is MangoHud? MangoHud is an open source project available on GitHub and aims to provide a simple and customizable way to monitor
 5 Must-Know Linux Command Line Archive Tools – Part 1Apr 28, 2025 am 09:23 AM
Managing archived files is a common task in Linux. This article, the first of a two-part series, explores five powerful command-line archive tools, detailing their features and usage with examples. 1. The tar Command: A Versatile Archiving Utility t
 Top 7 Tools to Compare Files in Linux (with Examples)Apr 28, 2025 am 09:21 AM
This guide explores various methods for comparing text files in Linux, a crucial task for system administrators and developers. We'll cover command-line tools and visual diff tools, highlighting their strengths and appropriate use cases. Let's assum


Hot AI Tools

Undresser.AI Undress
AI-powered app for creating realistic nude photos

AI Clothes Remover
Online AI tool for removing clothes from photos.

Undress AI Tool
Undress images for free

Clothoff.io
AI clothes remover

Video Face Swap
Swap faces in any video effortlessly with our completely free AI face swap tool!

Hot Article
Hot Tools

Dreamweaver CS6
Visual web development tools

SublimeText3 Linux new version
SublimeText3 Linux latest version

DVWA
Damn Vulnerable Web App (DVWA) is a PHP/MySQL web application that is very vulnerable. Its main goals are to be an aid for security professionals to test their skills and tools in a legal environment, to help web developers better understand the process of securing web applications, and to help teachers/students teach/learn in a classroom environment Web application security. The goal of DVWA is to practice some of the most common web vulnerabilities through a simple and straightforward interface, with varying degrees of difficulty. Please note that this software

MantisBT
Mantis is an easy-to-deploy web-based defect tracking tool designed to aid in product defect tracking. It requires PHP, MySQL and a web server. Check out our demo and hosting services.

Atom editor mac version download
The most popular open source editor

