


In Monster Hunter: The Wild, the Double Sword is the perfect weapon that combines offensiveness and style, allowing you to tear monsters apart at amazing speeds. One of the biggest advantages of the Double Blade is that even newbies can use it efficiently, while old players can achieve its maximum potential.

However, the double swords have very strict requirements on matching, and to achieve their functions, it requires more investment than other weapon types.
Overview of Double Knife Equipment

One of the most important aspects of double-knife is that it relies heavily on element attributes . If you use double swords without focusing on stacking of elemental attributes, especially when dealing with large monsters, you will feel very powerless. Therefore, your double sword should select for the monster's weakness attributes and strengthen the attribute with various decorations. In addition, the endurance of the double knife consumes very fast
, which is one of the core features of its game mechanics. Therefore, you need some decorations that can reduce stamina consumption or restore stamina faster so that you can maintain your persistent aggression.Lastly, like any other outfit, the ornament limits for armor and weapons also apply to double-knifes, so you need to spend some time deciding which buffs are important and what you can sacrifice for better fitting performance. Double Knife Equipment Guide
The following is what it looks like after the assembly is completed:

In the weapon field, Artian double swords will be your first choice because it provides a variety of element attributes as well as three level three decoration slots. Artian is particularly suitable for double swords because as long as it matches the element attributes of the weapon, you can inlay any element attribute ornament . For example, a fire-attribute Artian double sword can use fire-attribute decorations to obtain huge fire-attribute damage. If you don't have an Artian weapon, you can use Hungerklauen, which is The Double Blade of the Molten Mountain Dragon
. It has dragon attributes and can work in all situations, especially when dealing with monsters like the Blaster Dragon and the Molten Mountain Dragon.In the head bar , the equipment to protect Obsidian Resentment Tiger and Dragon is crucial because it provides a Level 2 burst skill and a Level 2 decoration slot. You can inlay the destruction king beads here to deal more damage to monster parts. Ideally, double swords are not the best choice for destroying monster parts, so the Destroy King skill helps in this regard.
In the chest bar, you need Molten Mountain Dragon equipment to obtain the first part of Molten Mountain Dragon Furious Buff. You need to inlay the third-level combo beads to get a level 1 burst, and first-level sober beads to get a level 1 resistance buff. Both buffs are extremely important for this setup, and you should brush them repeatedly until you find these decorations. No matter which element attribute you choose to build this equipment, Explosion is the most important skill here, because continuous attacks on enemies will increase the attack power and elemental damage of your weapon.
In the arm bar , you again need to protect the Obsidian Resentment Tiger and Dragon equipment because it has a level one burst skill . In addition, you will also need to attach the stamina recovery bead as it provides a stamina buff which helps improve the recovery speed of stamina. You can also attach a second wake bead here to increase resistance level .
In the waist bar, you need Hammer Dragon equipment because it has the second-level weakness special effect , which is another valuable attribute of this equipment. You also need to attach two first-level Ironman beads, as they come with a marathon runner buff
, which reduces the endurance consumption of continuous movements that require stamina. This buff works perfectly with the double knife.
Finally, in the Leg Bar , you need the Molten Mountain Dragon Equipment again, as it provides a first-level resistance, bringing the total level to level three, plus the awake beads of the previous few gears. You need to attach a level 3 weakness special effect bead to this equipment to obtain the weakness special effect . You also need another Iron Man Bead to raise the marathon runner to level 3, and you can add a defense bead to get some god-protective buffs. In the guardrail, you need Weakness Special Effects Guardrail II to obtain the weakness special effect buff. This will help you deal additional damage to monsters’ weakness areas, including their wounds. Molten Mountain Dragon Furious is a suit skill of the Molten Mountain Dragon Armor Set, and the two-piece set provides black etch 1buff. This buff will cause you to be violent when facing large monsters, but will heal yourself when you actively attack enemies. This will trigger a 10% heart rate boost for you, and it will also trigger a resistant buff, providing an additional 15%. Overview of Double Knife Equipment Skills The following is what your skills look like after the installation is completed: It is very easy to use this double knife to match, because Most of your buffs will be passively activated. When you hit a monster, buffs such as dragon-attribute attacks and bursts will be triggered, and the weakness special effects will work in any weakness area.
You need to pay attention to resistance buff because you have to remain aggressive to ensure that the raging debuff is cleared. Also, if you use double swords, you must remain aggressive, otherwise you will lose a lot of damage.
Finally, make sure you are familiar with the basics of double swords so that you can use the various modes optimally and make the most of the ghost man.
Two-knife matching game skills

The above is the detailed content of Monster Hunter Wilds: Dual Blades Build Guide. For more information, please follow other related articles on the PHP Chinese website!

 Dinkum: Barracuda Fishing GuideApr 29, 2025 am 09:05 AM
Catching pikes in Dinkum games is not difficult, as long as you know when and where to look. If you don't know, you can only watch the empty sea water dry and anxious. Barracuda habitat Barracuda only appears in the northern waters. But it's picky - only on spring and summer nights. If you wander around in the fall or winter, it's a waste of time. Special Event Rewards On the 22nd of summer and winter, the fishing competition for Max will begin. Due to “migration,” during these activities, pikes can be captured throughout the day in any marine biome. Even in winter, they usually don't appear. How to catch pikes Tools required: Fishing rod Buy a basic one from John after obtaining a Level 1 phishing license from Fletch
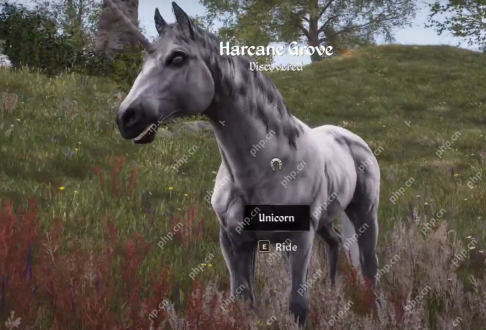 How to Keep the Unicorn in Oblivion RemasteredApr 29, 2025 am 09:04 AM
Oblivion Remastered: Taming the Elusive Unicorn – A Guide to Keeping This Magical Mount The unicorn in Oblivion Remastered is a coveted prize, a rare mount you can keep permanently with a bit of clever strategy. Forget mods or cheats; this guide uti
 How Long Does It Take To Beat Clair Obscur: Expedition 33?Apr 29, 2025 am 08:07 AM
Clair Obscur: Expedition 33 Time Guide: An Enthusiastic RPG Adventure Clair Obscur: Expedition 33 is an excellent role-playing game that tells the story of a group of characters taking a risk to save themselves and their companions from the disaster. It is different from many RPG games that last more than 80 hours and have a wide open world to explore. While there are some open areas in the game, it's more like a linear experience. Still, it's an RPG game, so you won't finish it in just a few hours. The game takes some time to pass, especially if you are a perfectionist player, hopefully
 Oblivion Remastered: Scheduled For Execution Quest WalkthroughApr 29, 2025 am 08:06 AM
In Oblivion Remastered, the Dark Brotherhood's next contract, "Scheduled for Execution," takes you back to the Imperial City Prison—your starting point. This unusual quest offers a unique opportunity to revisit familiar territory, but with
 Pokemon Pocket: Fighting-Type Mass Outbreak GuideApr 29, 2025 am 08:05 AM
Don't stress about your first ranked season in Pokémon TCG Pocket! The upcoming Fighting-type Mass Outbreak event is much more relaxed and offers a great opportunity to acquire powerful Fighting-type Pokémon to bolster your deck for the next season.
 Oblivion Remastered: Ulterior Motives Quest WalkthroughApr 29, 2025 am 08:04 AM
Uncover the Necromancer Conspiracy: A Guide to Oblivion's "Ulterior Motives" Quest This chapter of the Mages' Guild questline in The Elder Scrolls IV: Oblivion Remastered delves deeper into the necromancer threat in Tamriel. Following the
 Roblox: Fisch - How To Get And Use The Brick Built RodApr 29, 2025 am 08:03 AM
Roblox Fisch's LEGO event brings a ton of new content, including unique LEGO-style fish, baits and new quest lines. At the center of the event are building blocks, the special fishing rods necessary to complete the Brickford Lego Book and capture Studolodon. Although the appearance is brightly colored and full of toys, this fishing rod is a real and powerful tool, and obtaining it is the first step to conquer the event. Here's how to get this tool, its advantages, and other useful tips and information. How to get a fishing rod built by building blocks To obtain a fishing rod built by building blocks, you need to start the quest line of the LEGO activity. Head to Moosewood Island in the first sea area and look for those standing on a large Lego ship
 Roblox: Fisch - How To Catch The StudolodonApr 29, 2025 am 08:02 AM
In Roblox Fisch, the Studolodon is a particularly elusive fish required for the Brickford Lego bestiary. Unlike other LEGO event fish, it's not found in standard LEGO pools; you must participate in the Studolodon Hunt. The Studolodon Hunt is a recur


Hot AI Tools

Undresser.AI Undress
AI-powered app for creating realistic nude photos

AI Clothes Remover
Online AI tool for removing clothes from photos.

Undress AI Tool
Undress images for free

Clothoff.io
AI clothes remover

Video Face Swap
Swap faces in any video effortlessly with our completely free AI face swap tool!

Hot Article
Hot Tools

EditPlus Chinese cracked version
Small size, syntax highlighting, does not support code prompt function

SublimeText3 Chinese version
Chinese version, very easy to use

WebStorm Mac version
Useful JavaScript development tools

ZendStudio 13.5.1 Mac
Powerful PHP integrated development environment

SublimeText3 Mac version
God-level code editing software (SublimeText3)

