


macOS default shell switched to Zsh: Complete Guide
When starting your Mac, it may be surprising to see a prompt to switch the default interactive shell from Bash to Zsh. However, this is just one way Apple adapts and develops, aiming to provide users with a better shell experience.
The advantage of macOS is that users do not have to be limited to any particular shell. Whether you are a big fan of Bash or are interested in Zsh, the choice is always in your hands.
This guide will provide you with a clear explanation. We will explain step by step the reason behind this change and, more importantly, we will guide you on how to do so that you can choose the shell with confidence.
The meaning of "default interactive shell is now Zsh"
Warning message "Default interactive shell is now Zsh" indicates that macOS's Terminal has switched from Bash to Zsh. If you don't use Terminal often, don't worry. But for the average user, while this is a noteworthy shift, it hardly changes how you typically interact in Terminal.
Why does this warning message appear?
This warning message is to remind you of the underlying changes in macOS. The main reasons for this warning are as follows:
- Transition from Bash to Zsh: Apple decided to switch the default Unix shell in its Terminal from Bash to Zsh. This change enhances security and provides updated features such as interactive autocomplete, theme-friendly prompts, and path extensions.
- User Perception: It ensures that ordinary Terminal users understand the system's default settings, even if the overall user experience remains basically the same.
- Software Consistency: As the software continues to evolve, such notifications help bridge the gap between the old and current versions.
Is Zsh good for your Mac?
Zsh (also known as Z shell) was built on Bash, which was once the preferred shell for macOS. Given its rich functionality, using Zsh instead of Bash is usually the best choice. To further enhance the experience, we recommend that you introduce a framework for Zsh that customizes how you handle settings, plugins, and appealing themes.
What to do after seeing the message "Default interactive shell is now Zsh"
For some Mac users, encountering this message can be confusing. But, don't worry. Next, we will guide you the steps you can take after seeing this message:
- How to switch from Zsh to Bash
- How to switch to Bash using Homebrew
- How to hide the "default interactive shell is now Zsh" and continue using Bash
How to switch from Zsh to Bash
Luckily, switching between Zsh and Bash is very simple. To switch from Zsh to Bash, type chsh -s /bin/bash in your Terminal. After restarting, the new session will use Bash by default.
The following are the steps to change Zsh to Bash:
- Open the Apple Menu and select System Preferences.
- Navigate to "Users and Groups".
- Right-click on your username and select Advanced Options.
- If prompted, please enter your password and confirm.
- Find the "Login shell" drop-down menu and select
/bin/bash. - Press OK and turn off System Preferences.


How to switch to Bash using Homebrew
To switch to a new shell (such as Bin/Bash), add its name to the shell file and save it. This step ensures that your computer knows that you can use the shell. You can think of it as a safety net to prevent you from accidentally selecting content that may cause problems.
The following are detailed instructions for switching Zsh to Bash using Homebrew:
- Start Terminal.
- Enter
xcode-select --installand press Enter. When prompted, click Install and wait patiently for the process to complete. - To start the Homebrew installation, enter
/bin/bash -c "$(curl -fsSL https://raw.githubusercontent.com/Homebrew/install/HEAD/install.sh)"and press Enter. This may take some time, please wait. - If you receive a warning
/opt/homebrew/binis not in your PATH, please copy its recommended commands and paste them into Terminal as recommended by Homebrew. Use Enter to confirm. - Finally, run
brew update && brew install bash && sudo chsh -s /usr/local/bin/bash $(whoami)to update and build your new Bash shell.
Using Homebrew (the popular package manager for macOS), you can easily install newer versions of bash and set it as your default shell.

How to hide the "default interactive shell is now Zsh" and continue using Bash
For those who appreciate Zsh's advanced features but are still loyal to Bash, there is a way to mute the default shell notifications. After integrating a specific code snippet (export BASH_SILENCE_DEPRECATION_WARNING=1) into a configuration file (e.g. ~/.bash_profile, ~/.profile, or ~/.bashrc), you can easily use Bash instead of Zsh on your Mac.
The following are the steps to cancel the warning and continue using Bash in logical order:
- Start Terminal on your Mac.
- To mute the notification, type and execute the following command:
touch ~/.bash_profile && echo "export BASH_SILENCE_DEPRECATION_WARNING=1" >> ~/.bash_profile. - If the warning still exists, you may need to adjust another configuration file. Simply replace
~/.bash_profilewith~/.profileor~/.bashrcin the command and run it again.

Summary
Switching between Zsh and Bash can feel a little overwhelmed at first. So our team explores how to mute annoying notifications and makes some tweaks to adopt the shell of your choice.
However, there are more broad aspects here. In addition to updates and settings, it is important to keep your Mac continuously maintained. This is where MacKeeper's memory cleaner comes into play. By managing your Mac's memory and saying goodbye to time-consuming processes, you can not only fix the issues, but also prevent new issues.
If you find this guide helpful, don't forget to check out our other expert guide on Zsh denied permission on Mac and checking the health of SSD on Mac for more insights and solutions.
The above is the detailed content of The Default Interactive Shell Is Now Zsh: How to Remove It on Mac?. For more information, please follow other related articles on the PHP Chinese website!

 MacOS Sequoia is Compatible with These MacsMay 12, 2025 am 10:50 AM
macOS Sequoia (macOS 15): A Comprehensive Guide to Compatibility macOS Sequoia, Apple's latest operating system, boasts exciting new features like iPhone mirroring, enhanced window tiling, AI-powered Safari and Mail, a dedicated Passwords app, and u
 How to Fix Cellular Data Not Working on iOS 18 with Apps or iPhoneMay 12, 2025 am 10:49 AM
Many iPhone users upgrading to iOS 18 have reported cellular data issues with various apps. Streaming music, podcasts, and social media content may fail when using cellular data, even if Wi-Fi is unavailable. This problem, widely discussed in Apple
 How to Run Llama LLM on Mac, LocallyMay 12, 2025 am 10:40 AM
Meta's Llama large language model (LLM) offers a powerful alternative to cloud-based options like ChatGPT. Unlike its counterparts, Llama allows for local execution on your computer, granting offline access and seamless integration into personal wor
 MacOS Sequoia is Available to Download NowMay 12, 2025 am 10:27 AM
Apple officially released macOS Sequoia, which is now available for download for all Mac users! Sequoia, version number macOS 15.0, is named after the famous Giant Sequoia and National Park, California, where Apple is headquartered. macOS Sequoia brings many exciting new features to the Mac, most notably iPhone mirroring, which allows you to control your iPhone with your cursor and conveniently drag and drop files and photos between devices. Other new features include: standalone password app, more convenient window tiling, new wallpapers and screen savers, "Focus Mode" in Safari
 How to Scroll-to-Top with Dynamic Island on iPhone 16, iPhone 15, & iPhone 14 ProMay 12, 2025 am 10:18 AM
The iPhone's "Back to Top" gesture is useful: Easily deal with dynamic islands iPhones have long provided a convenient “back to top” gesture: Just tap the top of the screen to quickly get back to the top of long text, email, or web pages. However, iPhone models equipped with Dynamic Island, such as the iPhone 14 Pro, iPhone 15 and iPhone 16 series, make this gesture slightly tricky. The Dynamic Island is located at the top of the screen and integrates a camera, microphone, and real-time information display for various applications (such as music playback, timer, or navigation). The problem is that when users habitually touch the top of the screen, it is easy to accidentally touch the dynamic island, thereby accidentally switching to the dynamic island.
 MacOS Sequoia 15 Release Candidate Available to Download NowMay 12, 2025 am 10:17 AM
macOS Sequoia 15 release candidate is now available! Apple has released the macOS Sequoia 15 release candidate (RC) to Mac users involved in developers and public beta programs. At the same time, users of qualified device can also download iOS 18 RC, iPadOS 18 RC, watchOS 11 RC, tvOS 18 RC and visionOS 2 RC. If you have been waiting for the RC version or want to get the first to experience the version that will be released next Monday, you can now install macOS Sequoia RC through the developer beta or public beta program. Apple
 How to Stop Apple Music from Opening on Mac RandomlyMay 12, 2025 am 10:01 AM
Many Mac users find that the Apple Music app will open randomly and even play music without any action. This behavior of Apple Music randomly opening and playing music is very annoying to many Mac users. This article will explain why Apple Music is open randomly and provides four different solutions. Why does Apple Music open randomly? There are two main reasons why Apple Music apps are opened randomly on Mac: Unexpected keyboard or touch bar input: Inadvertent pressing of keyboard media buttons (such as play/pause, back/forward buttons) may cause Apple M to be
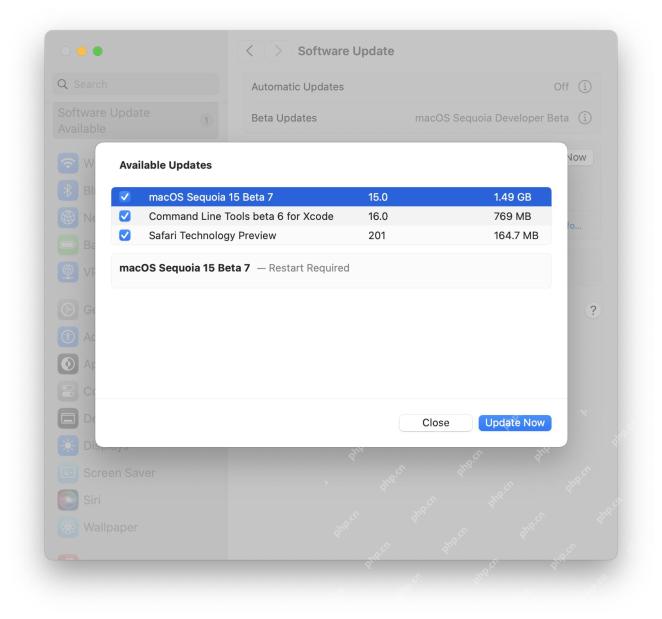 MacOS Sequoia 15 Beta 7 Available for TestingMay 12, 2025 am 09:43 AM
macOS Sequoia 15 Beta 7 and iOS 18 Beta 7 Now Available for Testing Apple has released the seventh beta versions of its upcoming operating systems, including macOS Sequoia 15, iOS 18, iPadOS 18, watchOS 11, tvOS 18, and visionOS 2. The macOS Sequoi


Hot AI Tools

Undresser.AI Undress
AI-powered app for creating realistic nude photos

AI Clothes Remover
Online AI tool for removing clothes from photos.

Undress AI Tool
Undress images for free

Clothoff.io
AI clothes remover

Video Face Swap
Swap faces in any video effortlessly with our completely free AI face swap tool!

Hot Article
Hot Tools

Safe Exam Browser
Safe Exam Browser is a secure browser environment for taking online exams securely. This software turns any computer into a secure workstation. It controls access to any utility and prevents students from using unauthorized resources.

ZendStudio 13.5.1 Mac
Powerful PHP integrated development environment

Notepad++7.3.1
Easy-to-use and free code editor

VSCode Windows 64-bit Download
A free and powerful IDE editor launched by Microsoft

MinGW - Minimalist GNU for Windows
This project is in the process of being migrated to osdn.net/projects/mingw, you can continue to follow us there. MinGW: A native Windows port of the GNU Compiler Collection (GCC), freely distributable import libraries and header files for building native Windows applications; includes extensions to the MSVC runtime to support C99 functionality. All MinGW software can run on 64-bit Windows platforms.

