
Home >Technology peripherals >It Industry >Learn Git with Bitbucket Cloud
Learn Git with Bitbucket Cloud

- Lisa KudrowOriginal
- 2025-02-17 09:27:09363browse

This article was sponsored by Bitbucket. Thank you for supporting the sponsors who make SitePoint possible.
Objective
Learn the basics of Git with this space themed tutorial.
Mission Brief
Your mission is to learn the ropes of Git by completing the tutorial and tracking down all your team’s space stations. Commands covered in this tutorial:
- git clone, git config, git add, git status, git commit, git push, git pull, git branch, git checkout, and git merge
Create a Git Repository
As our new Bitbucket space station administrator, you need to be organized. When you make files for your space station, you’ll want to keep them in one place and shareable with teammates, no matter where they are in the universe. With Bitbucket, that means adding everything to a repository. Let’s create one!
- Some fun facts about repositories
- You have access to all files in your local repository, whether you are working on one file or multiple files.
- You can view public repositories without a Bitbucket account if you have the URL for that repository.
- Each repository belongs to a user account or a team. In the case of a user account, that user owns the repository. In the case of a team, that team owns it.
- The repository owner is the only person who can delete the repository. If the repository belongs to a team, an admin can delete the repository.
- A code project can consist of multiple repositories across multiple accounts but can also be a single repository from a single account.
- Each repository has a 2 GB size limit, but we recommend keeping your repository no larger than 1 GB.
Step 1. Create the repository
Initially, the repository you create in Bitbucket is going to be empty without any code in it. That’s okay because you will start adding some files to it soon. This Bitbucket repository will be the central repository for your files, which means that others can access that repository if you give them permission. After creating a repository, you’ll copy a version to your local system—that way you can update it from one repo, then transfer those changes to the other.

Do the following to create your repository:
- From Bitbucket, click Repositories > Create repository button at the top of the page.

The system displays the Create a new repository page. Take some time to review the dialog’s contents. With the exception of the Repository type, everything you enter on this page you can later change.
- Enter BitbucketStationLocations for the Name field. Bitbucket uses this Name in the URL of the repository. For example, if the user the_best has a repository called awesome_repo, the URL for that repository would be https://bitbucket.org/the_best/awesome_repo.
- For Access level, leave the This is a private repository box checked. A private repository is only visible to you and those you give access to. If this box is unchecked, everyone can see your repository.
- Pick Git for the Repository type. Keep in mind that you can’t change the repository type after you click Create repository.
- Click Create repository. Bitbucket creates your repository and displays its Overview page.


Step 2. Explore your new repository
Take some time to explore the repository you have just created. You should be on the repository’s Overview page:

Click items on the Navigation menu to see what is behind each one. To view the shortcuts available to navigate these items, press the ? key on your keyboard.
When you click the Commits option on the menu bar, you find that you have no commits because you have not created any content for your repository. Your repository is private and you have not invited anyone to the repository, so the only person who can create or edit the repository’s content right now is you, the repository owner.
Copy Your Git Repository and Add Files
Now that you have a place to add and share your space station files, you need a way to get to it from your local system. To set that up, you want to copy the Bitbucket repository to your system. Git refers to copying a repository as “cloning” it. When you clone a repository, you create a connection between the Bitbucket server (which Git knows as origin) and your local system.

You are about to use a whole bunch of Git and non-Git commands from a terminal. If you’ve never used the command line before, learn where to find it at The Command Line Crash Course.
Step 1. Clone your repository to your local system
Open a browser and a terminal window from your desktop. After opening the terminal window, do the following:
-
Navigate to your home (~) directory.
$ cd ~
As you use Bitbucket more, you will probably work in multiple repositories. For that reason, it’s a good idea to create a directory to contain all those repositories.
-
Create a directory to contain your repositories.
$ cd ~
-
From the terminal, update the directory you want to work in to your new repos directory.
$ mkdir repos
- From Bitbucket, go to your BitbucketStationLocations repository.
-
Click Clone.
The system displays a pop-up clone dialog. By default, the clone dialog sets the protocol to HTTPS or SSH, depending on your settings. For the purposes of this tutorial, don’t change your default protocol.
- Copy the highlighted clone command.
- From your terminal window, paste the command you copied from Bitbucket and press Return.
- Enter your Bitbucket password when the terminal asks for it. If you created an account by linking to Google, use your password for that account.
If you experience a Windows password error:
- In some versions of Microsoft Windows operating system and Git you might see an error similar to the one in the following example.
Windows clone password error example$ cd ~/repos
- If you get this error, enter the following at the command line:
$ git clone https://emmap1@bitbucket.org/emmap1/bitbucketstationlocations.git Cloning into 'bitbucketspacestation'... fatal: could not read Password for 'https://emmap1@bitbucket.org': No such file or directory
- Then go back to step 4 and repeat the clone process. The bash agent should now prompt you for your password. You should only have to do this once.
At this point, your terminal window should look similar to this:
$ git config --global core.askpass
You already knew that your repository was empty right? Remember that you have added no source files to it yet.
- In some versions of Microsoft Windows operating system and Git you might see an error similar to the one in the following example.
-
List the contents of your repos directory and you should see your bitbucketstationlocations directory in it.
$ cd ~/repos
 $ git clone https://emmap1@bitbucket.org/emmap1/bitbucketstationlocations.git Cloning into 'bitbucketstationlocations'... Password warning: You appear to have cloned an empty repository.

Congratulations! You’ve cloned your repository to your local system.
Step 2. Add a file to your local repository and put it on Bitbucket
With the repository on your local system, it’s time to get to work. You want to start keeping track of all your space station locations. To do so, let’s create a file about all your locations.
-
Go to your terminal window and navigate to the top level of your local repository.
$ ls
-
Enter the following line into your terminal window to create a new file with content.
$ cd ~/repos/bitbucketstationlocations/
If the command line doesn’t return anything, it means you created the file correctly!
-
Get the status of your local repository. The git status command tells you about how your project is progressing in comparison to your Bitbucket repository.
At this point, Git is aware that you created a new file, and you’ll see something like this:
$ echo "Earth's Moon" >> locations.txt
The file is untracked, meaning that Git sees a file not part of a previous commit. The status output also shows you the next step: adding the file.
-
Tell Git to track your new locations.txt file using the git add command. Just like when you created a file, the git add command doesn’t return anything when you enter it correctly.
$ cd ~
The git add command moves changes from the working directory to the Git staging area. The staging area is where you prepare a snapshot of a set of changes before committing them to the official history.
-
Check the status of the file.
$ mkdir repos
Now you can see the new file has been added (staged) and you can commit it when you are ready. The git status command displays the state of the working directory and the staged snapshot.
-
Issue the git commit command with a commit message, as shown on the next line. The -m indicates that a commit message follows.
$ cd ~/repos
The git commit takes the staged snapshot and commits it to the project history. Combined with git add, this process defines the basic workflow for all Git users.
Up until this point, everything you have done is on your local system and invisible to your Bitbucket repository until you push those changes.
Learn a bit more about Git and remote repositories
- Git’s ability to communicate with remote repositories (in your case, Bitbucket is the remote repository) is the foundation of every Git-based collaboration workflow.
- Git’s collaboration model gives every developer their own copy of the repository, complete with its own local history and branch structure. Users typically need to share a series of commits rather than a single changeset. Instead of committing a changeset from a working copy to the central repository, Git lets you share entire branches between repositories.
- You manage connections with other repositories and publish local history by “pushing” branches to other repositories. You see what others have contributed by “pulling” branches into your local repository.
-
Go back to your local terminal window and send your committed changes to Bitbucket using git push origin master. This command specifies that you are pushing to the master branch (the branch on Bitbucket) on origin (the Bitbucket server).
You should see something similar to the following response:
$ git clone https://emmap1@bitbucket.org/emmap1/bitbucketstationlocations.git Cloning into 'bitbucketspacestation'... fatal: could not read Password for 'https://emmap1@bitbucket.org': No such file or directory
Your commits are now on the remote repository (origin).
- Go to your BitbucketStationLocations repository on Bitbucket and click the Commits item on the menu bar.
- You should see a single commit on your repository. Bitbucket combines all the things you just did into that commit and shows it to you. You can see that the Author column shows the value you used when you configured the Git global file ( ~/.gitconfig).
- Click the Source option.
You should see that you have a single source file in your repository, the locations.txt file you just added.


Remember how the repository looked when you first created it? It probably looks a bit different now.
Pull Changes From Your Git Repository on Bitbucket Cloud
Next on your list of space station administrator activities, you need a file with more details about your locations. Since you don’t have many locations at the moment, you are going to add them right from Bitbucket.
Step 1. Create a file in Bitbucket
To add your new locations file, do the following:
- From your BitbucketStationLocations repository, click Source to open the source directory. Notice you only have one file, locations.txt, in your directory.
- From the Source page, click New file in the top right corner. This button only appears after you have added at least one file to the repository.
A page for creating the new file opens, as shown in the following image.
- Enter stationlocations in the filename field.
- Select HTML from the Syntax mode list.
- Add the following HTML code into the text box:
$ cd ~
- Click Commit. The Commit message field appears with the message:
$ mkdir repos
- Click Commit under the message field.


You now have a new file in Bitbucket! You are taken to a page with details of the commit, where you can see the change you just made:

If you want to see a list of the commits you’ve made so far, click the Commits link on the left side.
Step 2. Pull changes from a remote repository
Now we need to get that new file into your local repository. The process is pretty straight forward, basically just the reverse of the push you used to get the locations.txt file into Bitbucket.
To pull the file into your local repository, do the following:
- Open your terminal window and navigate to the top level of your local repository.
$ cd ~
- Enter the git pull --all command to pull all the changes from Bitbucket. (In more complex branching workflows, pulling and merging all changes might not be appropriate .) Enter your Bitbucket password when asked for it. Your terminal should look similar to the following:
$ mkdir repos
The git pull command merges the file from your remote repository (Bitbucket) into your local repository with a single command.
- Navigate to your repository folder on your local system and you’ll see the file you just added.

Fantastic! With the addition of the two files about your space station location, you have performed the basic Git workflow (clone, add, commit, push, and pull) between Bitbucket and your local system.
Use a Git Branch to Merge a File
Being a space station administrator comes with certain responsibilities. Sometimes you’ll need to keep information locked down, especially when mapping out new locations in the solar system. Learning branches will allow you to update your files and only share the information when you’re ready.
Branches are most powerful when you’re working on a team. You can work on your own part of a project from your own branch, pull updates from Bitbucket, and then merge all your work into the main branch when it’s ready. Our documentation includes more explanation of why you would want to use branches.
A branch represents an independent line of development for your repository. Think of it as a brand-new working directory, staging area, and project history. Before you create any new branches, you automatically start out with the main branch (called master). For a visual example, this diagram shows the master branch and the other branch with a bug fix update.

Step 1. Create a branch and make a change
Create a branch where you can add future plans for the space station that you aren’t ready to commit. When you are ready to make those plans known to all, you can merge the changes into your Bitbucket repository and then delete the no-longer-needed branch.
It’s important to understand that branches are just pointers to commits. When you create a branch, all Git needs to do is create a new pointer—it doesn’t create a whole new set of files or folders. Before you begin, your repository looks like this:

To create a branch, do the following:
- Go to your terminal window and navigate to the top level of your local repository using the following command:
$ cd ~
- Create a branch from your terminal window.
$ mkdir repos
This command creates a branch but does not switch you to that branch, so your repository looks something like this:
The repository history remains unchanged. All you get is a new pointer to the current branch. To begin working on the new branch, you have to check out the branch you want to use.
-
Checkout the new branch you just created to start using it.
$ cd ~/repos
The git checkout command works hand-in-hand with git branch. Because you are creating a branch to work on something new, every time you create a new branch (with git branch), you want to make sure to check it out (with git checkout) if you’re going to use it. Now that you’ve checked out the new branch, your Git workflow looks something like this:
- Search for the bitbucketstationlocations folder on your local system and open it. You will notice there are no extra files or folders in the directory as a result of the new branch.
- Open the stationlocations file using a text editor.
- Make a change to the file by adding another station location:
$ git clone https://emmap1@bitbucket.org/emmap1/bitbucketstationlocations.git Cloning into 'bitbucketspacestation'... fatal: could not read Password for 'https://emmap1@bitbucket.org': No such file or directory
- Save and close the file.
- Enter git status in the terminal window. You will see something like this:
$ git config --global core.askpass
Notice the On branch future-plans line? If you entered git status previously, the line was on branch master because you only had the one master branch. Before you stage or commit a change, always check this line to make sure the branch where you want to add the change is checked out.
- Stage your file.
$ cd ~/repos
 $ git clone https://emmap1@bitbucket.org/emmap1/bitbucketstationlocations.git Cloning into 'bitbucketstationlocations'... Password warning: You appear to have cloned an empty repository.
- Enter the git commit command in the terminal window, as shown with the following:
$ ls
With this recent commit, your repository looks something like this:
Now it’s time to merge the change that you just made back into the master branch.


Step 2. Merge your branch: fast-forward merging
Your space station is growing, and it’s time for the opening ceremony of your Mars location. Now that your future plans are becoming a reality, you can merge your future-plans branch into the main branch on your local system.
Because you created only one branch and made one change, use the fast-forward branch method to merge. You can do a fast-forward merge because you have a linear path from the current branch tip to the target branch. Instead of “actually” merging the branches, all Git has to do to integrate the histories is move (i.e., “fast-forward”) the current branch tip up to the target branch tip. This effectively combines the histories, since all of the commits reachable from the target branch are now available through the current one.

This branch workflow is common for short-lived topic branches with smaller changes and are not as common for longer-running features.
To complete a fast-forward merge do the following:
-
Go to your terminal window and navigate to the top level of your local repository.
$ cd ~
- Enter the git status command to be sure you have all your changes committed and find out what branch you have checked out.
$ mkdir repos
- Switch to the master branch.
$ cd ~/repos
- Merge changes from the future-plans branch into the master branch. It will look something like this:
$ git clone https://emmap1@bitbucket.org/emmap1/bitbucketstationlocations.git Cloning into 'bitbucketspacestation'... fatal: could not read Password for 'https://emmap1@bitbucket.org': No such file or directory
You’ve essentially moved the pointer for the master branch forward to the current head and your repository looks something like the fast forward merge above.
- Because you don’t plan on using future-plans anymore, you can delete the branch.
$ git config --global core.askpass
When you delete future-plans, you can still access the branch from master using a commit id. For example, if you want to undo the changes added from future-plans, use the commit id you just received to go back to that branch.
- Enter git status to see the results of your merge, which show that your local repository is one ahead of your remote repository. It will look something like this:
$ cd ~/repos
 $ git clone https://emmap1@bitbucket.org/emmap1/bitbucketstationlocations.git Cloning into 'bitbucketstationlocations'... Password warning: You appear to have cloned an empty repository.
Here’s what you’ve done so far:
- Created a branch and checked it out
- Made a change in the new branch
- Committed the change to the new branch
- Integrated that change back into the main branch
- Deleted the branch you are no longer using.
Next, we need to push all this work back up to Bitbucket, your remote repository.
Step 3. Push your change to Bitbucket
You want to make it possible for everyone else to see the location of the new space station. To do so, you can push the current state of your local repository to Bitbucket.
This diagram shows what happens when your local repository has changes that the central repository does not have and you push those changes to Bitbucket.

Here’s how to push your change to the remote repository:
- From the repository directory in your terminal window, enter git push origin master to push the changes. It will result in something like this:
$ cd ~
- Click the Overview page of your Bitbucket repository, and notice you can see your push in the Recent Activity stream.
- Click Commits and you can see the commit you made on your local system. Notice that the change keeps the same commit id as it had on your local system.
You can also see that the line to the left of the commits list has a straight-forward path and shows no branches. That’s because the future-plans branch never interacted with the remote repository, only the change we created and committed.
- Click Branches and notice that the page has no record of the branch either.
- Click Source, and then click the stationlocations file. You can see the last change to the file has the commit id you just pushed.
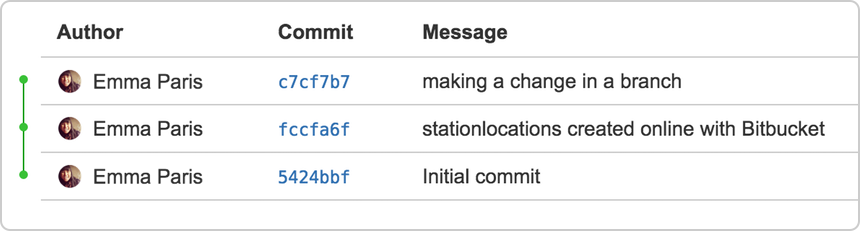
- Click the file history list to see the changes committed for this file, which will look similar to the following figure.

You are done!
Not sure you will be able to remember all the Git commands you just learned? No problem. Bookmark our basic Git commands page so that you can refer to it when needed.
The above is the detailed content of Learn Git with Bitbucket Cloud. For more information, please follow other related articles on the PHP Chinese website!
Related articles
See more- Making mobile phones like making cars: Meizu has changed! Finally taking off?
- Luxshare Precision acquires iPhone 16 Pro Max assembly rights, performance will grow significantly
- Apple's augmented reality headset is risky: It may become a gamble in the company's history
- Apple authorized service centers face response time and parts cost issues, hurting competitiveness
- Technical challenges and resource constraints: Apple AR glasses face difficulties