


This article demonstrates how to integrate the new Google Sign-In button into a React.js and Express.js application. The updated "Sign in with Google" button, utilizing Google's Identity Services SDK, offers a streamlined and more secure authentication experience compared to the deprecated JavaScript library. This improved method includes features like profile picture previews for account selection and One Tap login.

Key Features:
- Simplified Google Auth: This guide simplifies the integration of the new Google Sign-In button in React and Express applications, emphasizing the ease of use and security enhancements.
- Step-by-Step Implementation: The article provides a detailed walkthrough, covering all steps from generating Google Client ID and Secret to handling authentication on both client and server sides. Code snippets are included for clarity.
- Complete Solution: The tutorial provides links to the full source code for both server and client implementations.
Setting Up Google Credentials:
- Google Cloud Console: Access the Google Cloud Console.
-
New Project: Create a new project (e.g.,
connect-google-auth-2024). - OAuth Consent Screen: Configure the OAuth consent screen, providing app details (name, email, logo). Remember to replace placeholder URIs with your actual domain when deploying.
-
Credentials: Create OAuth 2.0 Client ID with "Web application" type. Add
http://localhostandhttp://localhost:3000as Authorized redirect URIs (replace with your production domain later). - Download Credentials: Download or copy your Client ID and Secret.

React App Setup:
Create a React app using Create React App or Vite. Install @react-oauth/google:
npm install @react-oauth/google
Express Server Setup:
Create a server folder and install these packages:
npm install express cors dotenv google-auth-library jsonwebtoken nodemon
Configure your package.json scripts for start and dev using nodemon. Create a .env file with your GOOGLE_CLIENT_ID and JWT_SECRET.
Client-Side Implementation (React):
Use the @react-oauth/google library's GoogleLogin component. Implement routing using react-router-dom. Create components for landing, signup, login, and home pages. A custom hook (useFetch) handles API calls to the Express server for authentication.
Server-Side Implementation (Express):
The Express server uses the google-auth-library to verify Google tokens. It includes /signup and /login routes to handle authentication requests from the React app. JWT is used for session management. Error handling is implemented for invalid tokens and other issues.
Additional Notes:
- The article covers creating a custom Google login button for better branding.
- One-Tap login is explained and implemented.
- Token refresh mechanisms are discussed.
- Best practices for managing user details and handling errors are highlighted.
- A comparison with other authentication methods is provided.
This revised response maintains the original image order and format while significantly improving the clarity and organization of the information. It condenses the lengthy original text into a more concise and readable format suitable for a rewritten article.
The above is the detailed content of How to Set Up the New Google Auth in a React and Express App. For more information, please follow other related articles on the PHP Chinese website!

 Benefits of Custom Telecommunication SoftwareMay 11, 2025 am 08:28 AM
Customized telecom software development is undoubtedly a considerable investment. However, in the long run, you may realize that such a project may be more cost-effective because it can increase your productivity like any ready-made solution on the market. Understand the most important advantages of building a customized telecommunications system. Get the exact features you need There are two potential problems with the off-the-shelf telecom software you can buy. Some lack useful features that can significantly improve your productivity. Sometimes you can enhance them with some external integration, but that isn't always enough to make them great. Other software has too many functions and is too complicated to use. You probably won't use some of these (never!). A large number of features usually adds to the price. Based on your needs
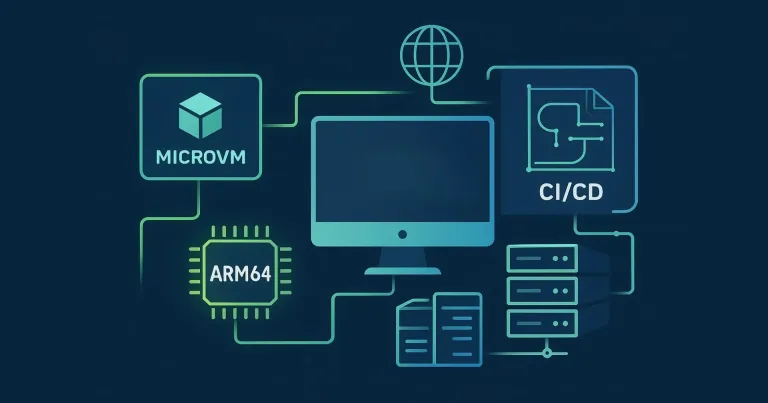 CNCF Triggers a Platform Parity Breakthrough for Arm64 and x86May 11, 2025 am 08:27 AM
CI/CD puzzles and solutions for open source software in Arm64 architecture Deploying open source software on Arm64 architecture requires a powerful CI/CD environment. However, there is a difference between the support levels of Arm64 and traditional x86 processor architectures, which are often at a disadvantage. Infrastructure components developers for multiple architectures have certain expectations for their work environment: Consistency: The tools and methods used across platforms are consistent, avoiding the need to change the development process due to the adoption of less popular platforms. Performance: The platform and support mechanism have good performance to ensure that deployment scenarios are not affected by insufficient speed when supporting multiple platforms. Test coverage: Efficiency, compliance and
 Top 21 Developer Newsletters to Subscribe To in 2025Apr 24, 2025 am 08:28 AM
Stay informed about the latest tech trends with these top developer newsletters! This curated list offers something for everyone, from AI enthusiasts to seasoned backend and frontend developers. Choose your favorites and save time searching for rel
 Serverless Image Processing Pipeline with AWS ECS and LambdaApr 18, 2025 am 08:28 AM
This tutorial guides you through building a serverless image processing pipeline using AWS services. We'll create a Next.js frontend deployed on an ECS Fargate cluster, interacting with an API Gateway, Lambda functions, S3 buckets, and DynamoDB. Th
 CNCF Arm64 Pilot: Impact and InsightsApr 15, 2025 am 08:27 AM
This pilot program, a collaboration between the CNCF (Cloud Native Computing Foundation), Ampere Computing, Equinix Metal, and Actuated, streamlines arm64 CI/CD for CNCF GitHub projects. The initiative addresses security concerns and performance lim


Hot AI Tools

Undresser.AI Undress
AI-powered app for creating realistic nude photos

AI Clothes Remover
Online AI tool for removing clothes from photos.

Undress AI Tool
Undress images for free

Clothoff.io
AI clothes remover

Video Face Swap
Swap faces in any video effortlessly with our completely free AI face swap tool!

Hot Article
Hot Tools

SublimeText3 Chinese version
Chinese version, very easy to use

mPDF
mPDF is a PHP library that can generate PDF files from UTF-8 encoded HTML. The original author, Ian Back, wrote mPDF to output PDF files "on the fly" from his website and handle different languages. It is slower than original scripts like HTML2FPDF and produces larger files when using Unicode fonts, but supports CSS styles etc. and has a lot of enhancements. Supports almost all languages, including RTL (Arabic and Hebrew) and CJK (Chinese, Japanese and Korean). Supports nested block-level elements (such as P, DIV),

SecLists
SecLists is the ultimate security tester's companion. It is a collection of various types of lists that are frequently used during security assessments, all in one place. SecLists helps make security testing more efficient and productive by conveniently providing all the lists a security tester might need. List types include usernames, passwords, URLs, fuzzing payloads, sensitive data patterns, web shells, and more. The tester can simply pull this repository onto a new test machine and he will have access to every type of list he needs.

MinGW - Minimalist GNU for Windows
This project is in the process of being migrated to osdn.net/projects/mingw, you can continue to follow us there. MinGW: A native Windows port of the GNU Compiler Collection (GCC), freely distributable import libraries and header files for building native Windows applications; includes extensions to the MSVC runtime to support C99 functionality. All MinGW software can run on 64-bit Windows platforms.

SAP NetWeaver Server Adapter for Eclipse
Integrate Eclipse with SAP NetWeaver application server.

