


Creating a server with TypeScript using Node.js and Express is a good alternative to using JavaScript because it makes it easier to manage complex applications and helps when you need to collaborate with a distributed team of developers.
TypeScript offers benefits like:
- Improved code strength and clarity when static typing
- Enhanced collaboration and project scalability
- Advanced tooling
- IDE support
- Broad compatibility
All of these benefits make TypeScript a great choice for a smoother development experience, especially in evolving projects.
In this article, we’ll explore a beginner-friendly way to configure TypeScript in an Express app, as well as gain an understanding of the fundamental constraints that accompany it. To follow along, you should have:
- Node.js ≥ v18.x installed in your local development environment
- Access to a package manager like npm, pnpm, or Yarn
- Basic familiarity with Node.js and Express
Check out the GitHub repository for the source code; the main branch has the TypeScript project, and the JavaScript branch has the JavaScript version.
Creating a package.json file
Start by creating a new directory in your local development environment, and within it, use npm’s initializer command to create a package.json file. If you use a package manager other than npm, consider adhering to the init command provided by that specific package manager:
mkdir ts-node-expresscd ts-node-express/npm init -y
When initializing a package.json file in this manner, the --yes or -y flag utilizes the default settings configured by npm, bypassing the repeated questions asking for project details. The resulting package.json file might look similar to the one shown in the following image:
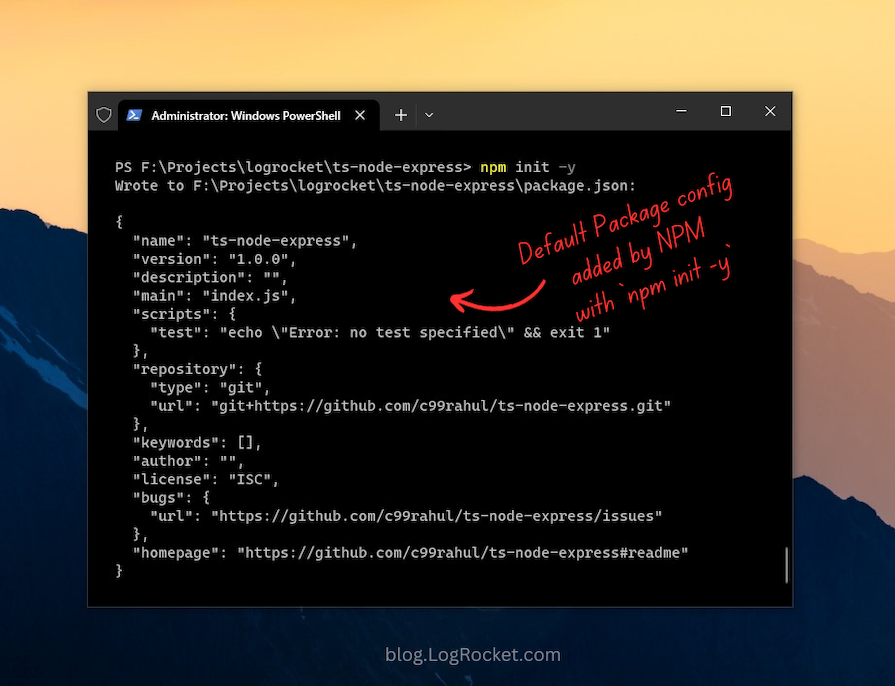
Because the entry point of our application will be src/index.js, which we will address in the upcoming sections, you should update the main field in the package.json file from index.js to src/index.js:
{
  "name": "ts-node-express",
  "version": "1.0.0",
  "description": "",
  "main": "src/index.js",
  "scripts": {
    "test": "echo "Error: no test specified" && exit 1"
  },
  ...}
Creating a minimal server with Express
After initializing the package.json file, add the Express and DotEnv packages to the project. In the terminal window, run the following command, where npm i is an alias to npm install:
npm i express dotenv
The DotEnv package is used to read environment variables from a .env file. Instead of hardcoding environment-specific variables directly into the app, include them all in this file and utilize the DotEnv package to manage them.
For instance, to specify the port number for your server, create a file named .env in the root of the project directory. Inside this file, define an environment variable for PORT and set its value to 3000. Consider adding more environment-specific variables in this file in the future as needed:
# Add all of the environmental variables here instead of # embedding them directly in the app and utilize them # with the `DotEnv` package.PORT=3000
Then, create a directory called src at the project’s root to organize our application source files. Add a new file named index.js to it and populate it with the following code, including the previously defined environmental variable:
// src/index.jsconst express = require('express');const dotenv = require('dotenv');dotenv.config();const app = express();const port = process.env.PORT;app.get('/', (req, res) => {
  res.send('Express   TypeScript Server');});app.listen(port, () => {
  console.log(`[server]: Server is running at http://localhost:${port}`);});
The above code covers the essential steps for setting up a minimal Express server using plain JavaScript. For a more detailed explanation, refer to the documented version of this snippet.
To start the server, execute the command node src/index.js in the terminal. This will execute the code that we just added to the index.js file and should start a new server, as illustrated below:
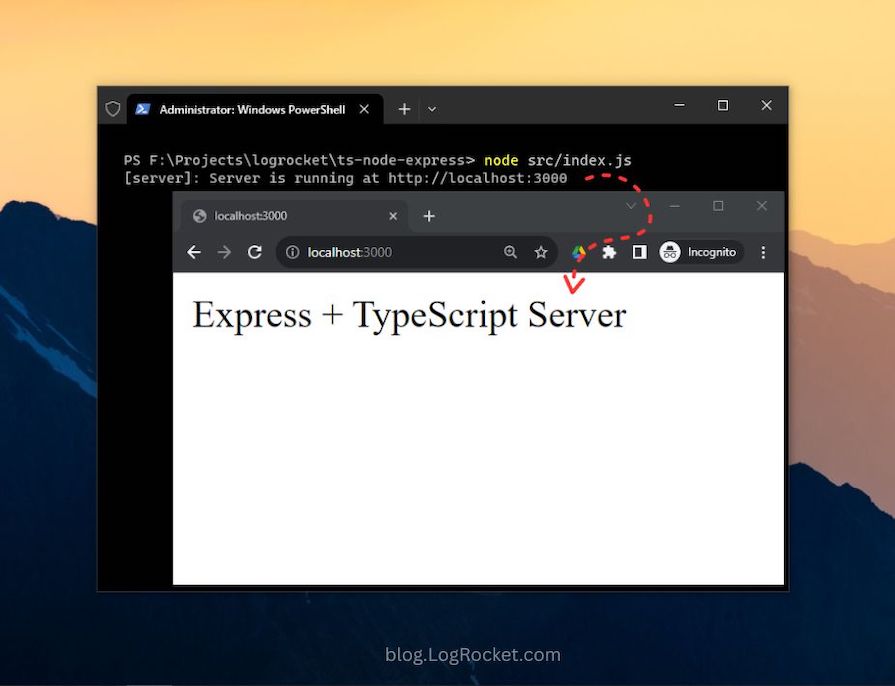
The Express server is now up and running, offering a foundational setup for development with Express on Node.js. Next, let’s enhance it by incorporating TypeScript in the next section.
Installing TypeScript
We will begin by installing TypeScript as a development dependency. Additionally, we’ll install the @types declaration packages for Express and Node.js, which offer type definitions in the form of declaration files.
Declaration files, typically denoted with the .d.ts extension, serve as predefined modules that outline the structure of JavaScript values or the types present for the TypeScript compiler. These declaration files are available for libraries originally written in JavaScript, not TypeScript.
The DefinitelyTyped GitHub repository maintains the TypeScript type definitions for direct use in Node.js and other JavaScript projects, sparing you the effort of defining these types from scratch. To incorporate types or declaration files for a specific library or module, seek packages starting with the @types namespace.
Launch the terminal and install the packages described above using the following command:
npm i -D typescript @types/express @types/node
The -D, or --dev, flag directs the package manager to install these libraries as development dependencies.
Installing these packages will add a new devDependencies object to the package.json file, featuring version details for each package, as shown below:
{
  ...
  "devDependencies": {
    "@types/express": "^5.0.0",
    "@types/node": "^22.7.4",
    "typescript": "^5.6.2"
  },
  ...}
Generating the TypeScript configuration file: tsconfig.json
Every TypeScript project utilizes a configuration file to manage various project settings. The tsconfig.json file, which serves as the TypeScript configuration file, outlines these default options and offers the flexibility to modify or customize compiler settings to suit your needs.
The tsconfig.json file is usually placed at the project’s root. To generate this file, use the following tsc command, initiating the TypeScript Compiler:
npx tsc --init
Once you execute this command, you’ll notice the tsconfig.json file is created at the root of your project directory. This file contains the default compiler options, as depicted in the image below:
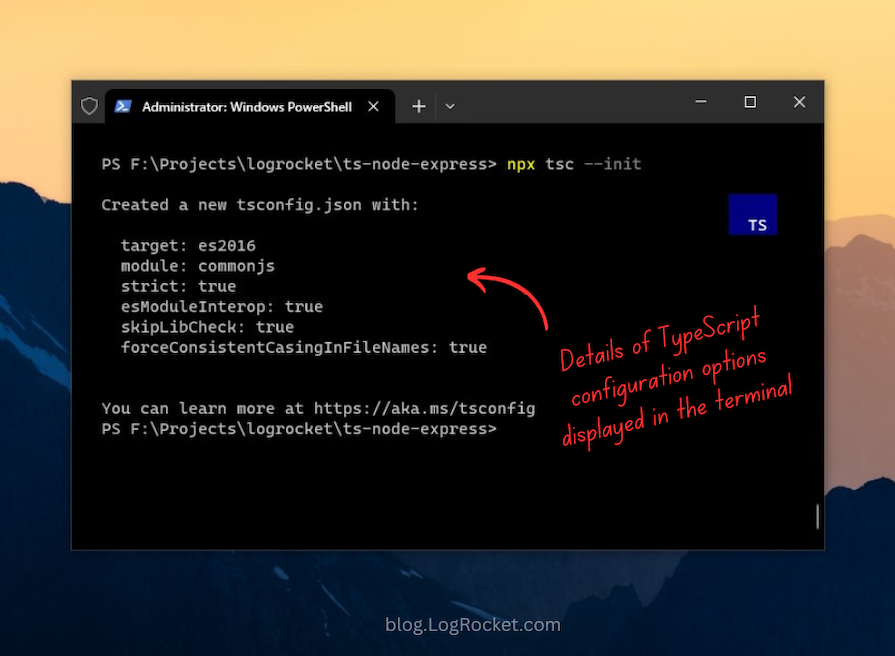
Upon opening the tsconfig.json file, you’ll notice several other commented-out compiler options. Among all of these options, compilerOptions is a mandatory field that must be specified. Here’s a summary of all the default options that belong inside the compilerOptions field:
- target: Enables the specification of the target JavaScript version that the compiler will output
- module: Facilitates the utilization of a module manager in the compiled JavaScript code. CommonJS is supported and is a standard in Node.js
- strict: Toggles strict type-checking protocols
- esModuleInterop: Enables the compilation of ES6 modules to CommonJS modules
- skipLibCheck: When set to true, bypasses the type checking of default library declaration files
- forceConsistentCasingInFileNames: When set to true, enforces case-sensitive file naming
One crucial option you will need to enable is outDir, which determines the destination directory for the compiled output. Locate this option in the tsconfig.json file and uncomment it.
By default, the value of this option is set to the project’s root. Change it to dist, as shown below:
{
  "compilerOptions": {
    ...
    "outDir": "./dist"
    ...
  }}
While there are probably other configuration options you can add to the TypeScript compiler, the options above are basic specifications that can help you get started.
You should now update the main field in the package.json file to dist/index.js because the TypeScript code will compile from the src directory to dist.
The above is the detailed content of How to set up TypeScript with Node.js and Express. For more information, please follow other related articles on the PHP Chinese website!

 JavaScript in Action: Real-World Examples and ProjectsApr 19, 2025 am 12:13 AM
JavaScript's application in the real world includes front-end and back-end development. 1) Display front-end applications by building a TODO list application, involving DOM operations and event processing. 2) Build RESTfulAPI through Node.js and Express to demonstrate back-end applications.
 JavaScript and the Web: Core Functionality and Use CasesApr 18, 2025 am 12:19 AM
The main uses of JavaScript in web development include client interaction, form verification and asynchronous communication. 1) Dynamic content update and user interaction through DOM operations; 2) Client verification is carried out before the user submits data to improve the user experience; 3) Refreshless communication with the server is achieved through AJAX technology.
 Understanding the JavaScript Engine: Implementation DetailsApr 17, 2025 am 12:05 AM
Understanding how JavaScript engine works internally is important to developers because it helps write more efficient code and understand performance bottlenecks and optimization strategies. 1) The engine's workflow includes three stages: parsing, compiling and execution; 2) During the execution process, the engine will perform dynamic optimization, such as inline cache and hidden classes; 3) Best practices include avoiding global variables, optimizing loops, using const and lets, and avoiding excessive use of closures.
 Python vs. JavaScript: The Learning Curve and Ease of UseApr 16, 2025 am 12:12 AM
Python is more suitable for beginners, with a smooth learning curve and concise syntax; JavaScript is suitable for front-end development, with a steep learning curve and flexible syntax. 1. Python syntax is intuitive and suitable for data science and back-end development. 2. JavaScript is flexible and widely used in front-end and server-side programming.
 Python vs. JavaScript: Community, Libraries, and ResourcesApr 15, 2025 am 12:16 AM
Python and JavaScript have their own advantages and disadvantages in terms of community, libraries and resources. 1) The Python community is friendly and suitable for beginners, but the front-end development resources are not as rich as JavaScript. 2) Python is powerful in data science and machine learning libraries, while JavaScript is better in front-end development libraries and frameworks. 3) Both have rich learning resources, but Python is suitable for starting with official documents, while JavaScript is better with MDNWebDocs. The choice should be based on project needs and personal interests.
 From C/C to JavaScript: How It All WorksApr 14, 2025 am 12:05 AM
The shift from C/C to JavaScript requires adapting to dynamic typing, garbage collection and asynchronous programming. 1) C/C is a statically typed language that requires manual memory management, while JavaScript is dynamically typed and garbage collection is automatically processed. 2) C/C needs to be compiled into machine code, while JavaScript is an interpreted language. 3) JavaScript introduces concepts such as closures, prototype chains and Promise, which enhances flexibility and asynchronous programming capabilities.
 JavaScript Engines: Comparing ImplementationsApr 13, 2025 am 12:05 AM
Different JavaScript engines have different effects when parsing and executing JavaScript code, because the implementation principles and optimization strategies of each engine differ. 1. Lexical analysis: convert source code into lexical unit. 2. Grammar analysis: Generate an abstract syntax tree. 3. Optimization and compilation: Generate machine code through the JIT compiler. 4. Execute: Run the machine code. V8 engine optimizes through instant compilation and hidden class, SpiderMonkey uses a type inference system, resulting in different performance performance on the same code.
 Beyond the Browser: JavaScript in the Real WorldApr 12, 2025 am 12:06 AM
JavaScript's applications in the real world include server-side programming, mobile application development and Internet of Things control: 1. Server-side programming is realized through Node.js, suitable for high concurrent request processing. 2. Mobile application development is carried out through ReactNative and supports cross-platform deployment. 3. Used for IoT device control through Johnny-Five library, suitable for hardware interaction.


Hot AI Tools

Undresser.AI Undress
AI-powered app for creating realistic nude photos

AI Clothes Remover
Online AI tool for removing clothes from photos.

Undress AI Tool
Undress images for free

Clothoff.io
AI clothes remover

Video Face Swap
Swap faces in any video effortlessly with our completely free AI face swap tool!

Hot Article
Hot Tools

MantisBT
Mantis is an easy-to-deploy web-based defect tracking tool designed to aid in product defect tracking. It requires PHP, MySQL and a web server. Check out our demo and hosting services.

VSCode Windows 64-bit Download
A free and powerful IDE editor launched by Microsoft

SublimeText3 Linux new version
SublimeText3 Linux latest version

SAP NetWeaver Server Adapter for Eclipse
Integrate Eclipse with SAP NetWeaver application server.

Dreamweaver CS6
Visual web development tools

