Home >Web Front-end >JS Tutorial >HTML Canvas Made Simple: A Guide for Beginners.
HTML Canvas Made Simple: A Guide for Beginners.
- Mary-Kate OlsenOriginal
- 2024-12-20 13:38:10763browse
Table of Contents
- Introduction
- Getting Started
- Drawing basics
- Adding Text
- Conclusion and Next Steps
? Introduction
HTML

The use of
Use Cases of HTML
- Drawing shapes and lines: It can draw shapes, patterns and lines including adding of colors and gradients to the objects.
- Animation and interaction: The objects created by
can be animated and also user interactions - Images Manipulation: This can used to resizing or cropping images.
- Game graphics: It is also used by game developer to create beautiful game user interfaces
- Data visualization: It is for the creation of graphs and charts.
?Get Started
The HTML
First we have to create an index.html file and include the
<!doctype html>
   <html lang="en">
     <head>
       <meta charset="UTF-8" />
       <meta name="viewport" content="width=device-width, initial-scale=1.0" />
       <title>HTML Canvas Example</title>
     </head>
     <body>
       <canvas>


<p>Then we add a script tag so we can define the behavior of the object.<br>
</p>

<pre class="brush:php;toolbar:false"><!doctype html>
   <html lang="en">
     <head>
       <meta charset="UTF-8" />
       <meta name="viewport" content="width=device-width, initial-scale=1.0" />
       <title>HTML Canvas Example</title>
     </head>
     <body>
       <canvas>


<p>Wowu !!! We get the output.</p>

<p><img src="/static/imghwm/default1.png" data-src="https://img.php.cn/upload/article/000/000/000/173467309470040.jpg" class="lazy" alt="HTML Canvas Made Simple: A Guide for Beginners."></p>

<p>Looking at the structure of the code. We define canvas wrapper having an id attribute, this is can only be done by id and not class because of uniqueness which is used to reference the canvas with the id name.<br>
To access this we need to retrieve the node created in the Document Object Model(DOM) by using the getElementById("myCanvas") and have access to it using the getContext("2d") method.</p>

<p>This method make us to have access to different drawing methods like</p>
- fillRect(x, y, width, height): This method is to draw a filled rectangle at a position(x, y) with a specified width and height.
- fillStyle = colorName: It is a property to set the color for the object. It could be a colorname, RGB or hex code for the object.
Other methods are:
- strokeRect(x, y, width, height): This method to to make a outline stroke on the rectangle, this may be used independently or combined with fillStyle and fillRect(x, y, width, height).
- clearRect(x, y, width, height): to clear the rectangle by making it transparent.

? Drawing basics
Different shapes and lines can be drawn using some specific methods depending on the object.
1. Path:
Examples are line, wavy line, zigzag e.t.c

For creating a line, the following method needs to be set up:
- beginPath(): This method is to start a new path for a drawing.
- moveTo(x, y): This is to move the drawing to the specified points.
- lineTo(x, y): This is to draw from the current position to the specified points.
- stroke(): This is to draw the line.

2. Rectangle and Square
- Rectangle

- Square

These following methods are used in creating a rectangle or square:
- fillRect: this method is for create rectangle and square only.
- clearRect(x, y, width, height): this method is to clear rectangle hence making it transparent.
- strokeRect(x, y, width, height): is used to create an outline rectangle or square.
- fillStyle: this is used to fill the container of the rectangle or square.
- strokeStyle: this method is for add stroke color to an outline rectangle.
- roundRect(x, y, width, height, radii): this method is for creating round border rectangle.
3. Circle

These following methods are used in creating a circle:
- beginPath(): this method to begin a path.
- arc(x, y, radius, startAngle, endAngle, anticlockwise): this is for to create circle where x and y is for center coordinate of the center, radius is the radius of the circle, startAngle and endAngle which is an angle for the circle.
4. Polygon
To create a polygon, you need to determine the sides of the shape, it could be a triangle(3 sides), pentagon (5 sides), hexagon(6 sides) or decagon (10 sides).

These following methods are used in creating a circle:
- beginPath(): this method is to create a new shape.
- closePath(): this method is to end the shape.
- cx: its value for the center of x co-ordinates.
- cy: its value specifies the center for y co-ordinates.
- radius: radius of the shape.
To get the angle, you have to calculate with this formula by dividing the circle into two;
angle = 2π/ n
where π is 3.14; n is the number of sides. You also have to minus π/2 to get the position of the shape top to bottom.


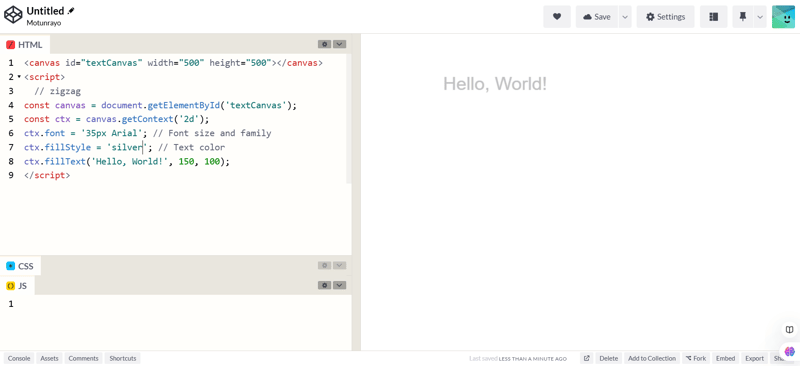
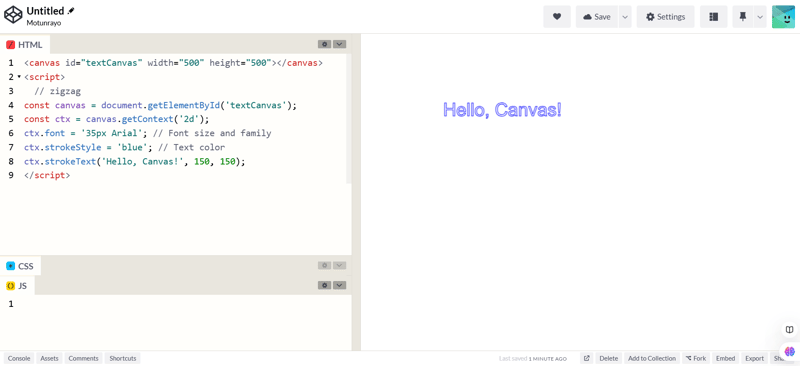
? Text with

To create text, the following methods are used:
- font: to specify font size and font family.
- fillStyle: this is to add color to the text.
- fillText: this draws a filled text.
- strokeText: this draws an outline text
- createLinearGradient or createRadialGradient: to add gradients to the text
- textAlign: to set the text horizontally

Conclusion
Using HTML
Connect with me
For more articles on web development. Follow me on Linkedin and X
Linkedin X
The above is the detailed content of HTML Canvas Made Simple: A Guide for Beginners.. For more information, please follow other related articles on the PHP Chinese website!
Related articles
See more- An in-depth analysis of the Bootstrap list group component
- Detailed explanation of JavaScript function currying
- Complete example of JS password generation and strength detection (with demo source code download)
- Angularjs integrates WeChat UI (weui)
- How to quickly switch between Traditional Chinese and Simplified Chinese with JavaScript and the trick for websites to support switching between Simplified and Traditional Chinese_javascript skills

