Games with dedicated controller button and and key remapping are becoming more and more common, and Call of Duty: Black Ops 6 comes with more than 100 different keybind options for keyboard and mouse. You can also remap every button if you're using a controller to cater to your preference or accessibility reasons. It's easy to do, and it's a welcome dedication to the huge Call of Duty audience's various needs.

The best keybinds will thus be those that make the game faster, easier, and more comfortable to control. Historically, there have been controller and keyboard and mouse setups that excel at making players' lives easier, and you'll discover some today.
How To Rebind Keys And Remap Controller Buttons

Accessing the keybinds and controller button mapping settings is fairly simple. PC players will have additional options they can tweak, meaning more screens to navigate through, but once your each the binding menus, changing things is straightforward.
First, open the main menu. Then, select Quick Settings to open the settings screen and navigate to either Keyboard and Mouse or Controller, depending on your control scheme.
For keyboard and mouse players, go to the Keybinds tab at the top let of your screen, underneath the "Keyboard & Mouse" heading.
From there, you can select a pre-built preset or customize each key by selecting the bind and pressing the Delete key to clear it, then inputting your new bind.

Controller players should navigate down to the Controller settings menu, directly beneath the Quick Settings tab. Open the Button Layout menu, accessible form the Inputs section.

The Edit Button Layout screen lets you choose between a preset or remap each action to whichever button on the controller you want. Navigate to the button you want to change, press the bottommost face button, and then whichever button you want to map the action to.
Best Keyboard And Mouse Keybinds

There are more than 100 different keybinds you can change in Black Ops 6, but only a few dozen you'll use regularly. It's a good idea to familiarize yourself with every function you can rebind, but the following changes can help optimize your gameplay for the basics.
|
Keybind |
Default Bind |
Updated Bind |
|---|---|---|
|
Prone/Dive |
Left Control | Z or X (will need to rebind Push to Talk or Field Upgrade) |
|
Crouch/Slide |
C | Left Control (will need to rebind Prone/Dive) |
|
Next Weapon |
Mouse Wheel Up/Down | 1 and/or 2 |
|
Melee/Finishing Move/Body Shield |
V | A Side Mouse Button (if available) |
|
Lethal Equipment |
E | G |
|
Tactical Equipment |
Q | F |
|
Interact |
F | E |
|
Ground Vehicle - Previous Seat |
No bind | Left Control |
|
Air Vehicle - Previous Seat |
No Bind | Left Control |
|
Scoreboard - Enable Cursor |
Right Mouse | Q |
This new keybinds setup is designed to accommodate players familiar with other titles that use different binds for things like Prone, Crouch, etc. The defaults are fine for PC Call of Duty veterans, but there are enough other FPS titles out there with Prone linked to X and Crouch to Left Control that it bears noting in this context.
The Next Weapon and Melee bind changes are to ensure your fingers remain on the most important controls — those for moving and shooting — while still offering easy access to their functions.
The remaining changes are optimizations for finger movement distance, helping you stay close to WASD while still having smooth transitions for your equipment, interactions, and so on.
Best Controller Setup

A controller is a less complicated control scheme than a keyboard and mouse. As such, there are only so many ways to alter the button layout without completely redefining how the game feels on the sticks. For that reason, you'll find two possible layouts here: one simple rebind and one more complicated.
Black Ops 6 has seven pre-built controller layouts based on setups players have historically favored. Start with one of those and adjust as necessary.
Simple Controller Remap
The simplest controller button layout change you can make is to change from Default to Tactical, a swap that's almost as old as the Call of Duty series itself. The process is simple:
- Change Melee to pressing the right stick
- Change Stance/Slide/Dive to Circle to the rightmost face button (the set of four buttons on the right side of your controller)
In practice, the Tactical setup helps with you go prone during a firefight more easily (doing a drop shot), and you can do so accidentally if you grip the controller too tightly. A panicked drop shot has saved the life of many a player over Call of Duty's history.
More Complex Controller Setup

The following, more complicated rebind is an extension of Tactical, maintaining stance change on the right stick and melee on the rightmost face button. The other changes account for moving the aim down sight button for players who prefer to keep their index finger on the bumpers and middle finger on the triggers.
|
Default Bind | Updated Bind | |||||||||||||||||||||
|---|---|---|---|---|---|---|---|---|---|---|---|---|---|---|---|---|---|---|---|---|---|---|---|
| Change Stance/Slide/Dive | Right Face Button | Pressing Right Stick | |||||||||||||||||||||
| Melee | Pressing Right Stick | Right Face Button | |||||||||||||||||||||
| Aim Down Sight | Left Trigger | Right Bumper | |||||||||||||||||||||
| Lethal Equipment | Right Bumper | Left Trigger | |||||||||||||||||||||
| Mark Location/Ping Wheel | D-pad Up | D-pad Left | |||||||||||||||||||||
| Fire Mode/Emotes and Spray Menu | D-pad Left | D-pad Up |
All Default Keybinds On Keyboard And Mouse
Controllers have far fewer potential etsups, so we've cataloged all the default bindings here.
|
Bind Name |
Default Bind |
|---|---|
|
Jump/Stand Mantle |
Bottom Face Button |
|
Change Stance/Slide/Dive |
Right Face Button |
|
Interact/Reload |
Left Face Button |
|
Switch Weapon/Armor Plate |
Top Face Button |
|
Fire Weapon |
Right Trigger |
|
Aim Down Sight |
Left Trigger |
|
Lethal Equipment |
Right Bumper |
|
Tactical Equipment |
Left Bumper |
|
Sprint/Tactical Sprint/Focus |
Press Left Stick |
|
Melee/Finishing Move/Body Shield |
Press Right Stick |
|
Mark Location/Ping Wheel |
D-pad Up |
|
Cycle Scorestreaks/Inventory |
D-pad Down |
|
Fire Mode/Emotes and Sprays Menu |
D-pad Left |
|
Scorestreaks/Gobblegums |
D-pad Right |
Thanks to the additional options possible on keyboard and mouse, there are dozens of individual bindings. We've cataloged all the default options here.
|
Bind Type |
Bind Name |
Default Bind |
Default Alt Bind |
||||||||||||||||
|---|---|---|---|---|---|---|---|---|---|---|---|---|---|---|---|---|---|---|---|
|
On-Foot Movement Keybinds |
Move Forward | W | N/A | ||||||||||||||||
| Move Backward | S | N/A | |||||||||||||||||
| Move Left | A | N/A | |||||||||||||||||
| Move Right | D | N/A | |||||||||||||||||
| Auto Move Forward | H | N/A | |||||||||||||||||
| Jump/Stand/Mantle | Space Bar | N/A | |||||||||||||||||
| Prone/Dive | Left Control | N/A | |||||||||||||||||
| Change Stance/Slide/Dive | Side Mouse Button | N/A | |||||||||||||||||
| Crouch/Slide | C | N/A | |||||||||||||||||
| Sprint/Tactical Sprint/Focus | Left Shift | N/A | |||||||||||||||||
|
On-Foot Movement Advanced Keybinds |
Walk | N/A | N/A | ||||||||||||||||
| Sprint | N/A | N/A | |||||||||||||||||
| Tactical Sprint | N/A | N/A | |||||||||||||||||
| Open Parachute | Space Bar | N/A | |||||||||||||||||
| Cut Parachute | C | Left Control | |||||||||||||||||
| Stance Up | N/A | N/A | |||||||||||||||||
| Stance Down | N/A | N/A | |||||||||||||||||
| Slide | N/A | N/A | |||||||||||||||||
| Dive | N/A | N/A | |||||||||||||||||
| Mantle | N/A | N/A | |||||||||||||||||
| Last Stand Give Up | C | Space Bar | |||||||||||||||||
| Change Camera Side | N/A | N/A | |||||||||||||||||
| Switch to 3rd Person View | J | N/A | |||||||||||||||||
| Parachute Free Look | Q | N/A | |||||||||||||||||
| Center View | N/A | N/A | |||||||||||||||||
| Look Up | N/A | N/A | |||||||||||||||||
| Look Down | N/A | N/A | |||||||||||||||||
| Look Left | N/A | N/A | |||||||||||||||||
| Look Right | N/A | N/A | |||||||||||||||||
|
On-Foot Combat Keybinds |
Fire Weapon | Left Mouse | N/A | ||||||||||||||||
| Aim Down Sight | RIght Mouse | N/A | |||||||||||||||||
| Reload | R | N/A | |||||||||||||||||
| Next Weapon | Scroll Wheel Down | 2 | |||||||||||||||||
| Weapon Mount | T | N/A | |||||||||||||||||
| Fire Mode | B | N/A | |||||||||||||||||
| Melee/Finishing Move/Body Shield | V | Side Mouse | |||||||||||||||||
| Lethal Equipment | E | N/A | |||||||||||||||||
| Tactical Equipment | Q | N/A | |||||||||||||||||
| Field Upgrade | X | N/A | |||||||||||||||||
| Armor Plate/Drop Item | G | N/A | |||||||||||||||||
| Interact | F | N/A | |||||||||||||||||
|
On-Foot Combat Advanced Keybinds |
Previous Weapon | Scroll Wheel Up | 1 | ||||||||||||||||
| Interact/Reload | N/A | N/A | |||||||||||||||||
| Focus | N/A | N/A | |||||||||||||||||
| Change Zoom/Scope Actions | N/A | N/A | |||||||||||||||||
| Switch to First Weapon | N/A | N/A | |||||||||||||||||
| Switch to Second Weapon | N/A | N/A | |||||||||||||||||
| Switch to Melee Weapon | N/A | N/A | |||||||||||||||||
| Weapon Inspect | I | N/A | |||||||||||||||||
| Body Shield | N/A | N/A | |||||||||||||||||
| Finishing Move | N/A | N/A | |||||||||||||||||
| Detonate C4 | N/A | N/A | |||||||||||||||||
| Thermal Vision/Flashlight | N | N/A | |||||||||||||||||
| Scorestreak 1 | 3 | N/A | |||||||||||||||||
| Scorestreak 2 | 4 | N/A | |||||||||||||||||
| Scorestreak 3 | 5 | N/A | |||||||||||||||||
| Scorestreak 4 (Extra) | 6 | N/A | |||||||||||||||||
| Last Earned Scorestreak | K | Vehicle Keybinds - Ground Vehicle Movement | W | N/A | |||||||||||||||
| Move Backward | S | N/A | |||||||||||||||||
| Turn Left | A | N/A | |||||||||||||||||
| Turn Right | D | N/A | |||||||||||||||||
| Drift/Handbrake | Space Bar | N/A | |||||||||||||||||
| Lean Forward | C | N/A | |||||||||||||||||
| Lean Backward | Left Shift | N/A | |||||||||||||||||
| Next Seat | X | N/A | |||||||||||||||||
| Previous Seat | N/A | N/A | |||||||||||||||||
| Auto Drive Forward | H | N/A | |||||||||||||||||
| Center Camera/Free Look | Q | N/A | |||||||||||||||||
| Jump | E | Side Mouse 5 | |||||||||||||||||
| Boost | Left Shift | N/A | |||||||||||||||||
|
Ground Vehicle Combat |
Fire/Detonate | Left Mouse | N/A | ||||||||||||||||
| Zoom | Right Mouse | N/A | |||||||||||||||||
| Previous Weapon | Mouse Wheel Up | 1 | |||||||||||||||||
| Next Weapon | Mouse Wheel Down | 2 | |||||||||||||||||
| Lean Out/Lean In | V | Side Mouse 4 | |||||||||||||||||
| Climb on Roof | T | N/A | |||||||||||||||||
| Horn | G | N/A | |||||||||||||||||
|
Air Vehicle - Movement |
Move Forward | W | N/A | ||||||||||||||||
| Move Backward | S | N/A | |||||||||||||||||
| Turn Left | A | N/A | |||||||||||||||||
| Turn Right | D | N/A | |||||||||||||||||
| Ascend | Space Bar | N/A | |||||||||||||||||
| Descend | C | Left Control | |||||||||||||||||
| Next Seat | X | N/A | |||||||||||||||||
| Previous Seat | N/A | N/A | |||||||||||||||||
| Auto Fly Forward | Air Vehicle - Combat | Left Mouse | N/A | ||||||||||||||||
| Zoom | Right Mouse | N/A | |||||||||||||||||
| Use Flares | Q | N/A | |||||||||||||||||
| Previous Weapon | Scroll Wheel Up | 1 | |||||||||||||||||
| Next Weapon | Scroll Wheel Down | 2 | |||||||||||||||||
| Horn | G | N/A | |||||||||||||||||
|
Missile Scorestreaks |
Missile Fire/Detonate | Left Mouse | N/A | ||||||||||||||||
| Missile Boost | Left Shift | N/A | |||||||||||||||||
| Slow Down Missile | Right Mouse | N/A | |||||||||||||||||
|
Overlay Keybinds |
Scoreboard | Tab | N/A | ||||||||||||||||
| Enable Cursor (Press Show More to Change) | Right Mouse | N/A | |||||||||||||||||
| Map | M | Caps Lock | |||||||||||||||||
| Ping | Middle Mouse | N/A | |||||||||||||||||
| Text Chat (Last Used Channel) | Return | N/A | |||||||||||||||||
| Text Chat (Match Channel, press Show More) | N/A | N/A | |||||||||||||||||
| Text Chat (Team Channel, press Show More) | N/A | N/A | |||||||||||||||||
| Text Chat (Party Channel, press Show More) | N/A | N/A | |||||||||||||||||
| In-Game Statistics | ` | N/A | |||||||||||||||||
|
Overlay Advanced Keybinds - Map |
Center Map | V | Side Mouse Button 4 | ||||||||||||||||
| Toggle Legend | B | N/A | |||||||||||||||||
| Zoom In | Mouse Wheel Up | = | |||||||||||||||||
| Zoom Out | Mouse Wheel Down | - | |||||||||||||||||
| Overlay Ping | Middle Mouse | N/A | |||||||||||||||||
| Delete Pings | T | N/A | |||||||||||||||||
|
Overlay Advanced Keybinds - Ping |
Ping Wheel | Left Alt | N/A | ||||||||||||||||
| Danger Ping | N/A | N/A | |||||||||||||||||
|
Overlay Advanced Keybinds - Emotes and Spray |
Emotes/Sprays Menu | U | Num Pad 5 | ||||||||||||||||
| Emote 1 | Num Pad 2 | N/A | |||||||||||||||||
| Emote 2 | Num Pad 4 | N/A | |||||||||||||||||
| Emote 3 | Num Pad 6 | N/A | |||||||||||||||||
| Emote 4 | Num Pad 8 | N/A | |||||||||||||||||
| Spray 1 | Num Pad 1 | N/A | |||||||||||||||||
| Spray 2 | Num Pad 3 | N/A | |||||||||||||||||
| Spray 3 | Num Pad 7 | N/A | |||||||||||||||||
| Spray 4 | Num Pad 9 | N/A | |||||||||||||||||
|
Overlay Advanced Keybinds - Loadout Selection |
Change to Loadout 1 | N/A | N/A | ||||||||||||||||
| Change to Loadout 2 | N/A | N/A | |||||||||||||||||
| Change to Loadout 3 | N/A | N/A | |||||||||||||||||
| Change to Loadout 4 | N/A | N/A | |||||||||||||||||
| Change to Loadout 5 | N/A | N/A | |||||||||||||||||
| Change to Loadout 6 | N/A | N/A | |||||||||||||||||
| Change to Loadout 7 | N/A | N/A | |||||||||||||||||
| Change to Loadout 8 | N/A | N/A | |||||||||||||||||
| Change to Loadout 9 | N/A | N/A | |||||||||||||||||
| Change to Loadout 10 | N/A | N/A | |||||||||||||||||
|
Menu Action |
Launcher Menu | F1 | N/A | ||||||||||||||||
| Social Menu | F2 | O | |||||||||||||||||
| Settings Menu | F3 | N/A | |||||||||||||||||
| Loadout Menu | F6 | N/A | |||||||||||||||||
| Push to Talk | Z | N/A | |||||||||||||||||
|
Menu Advanced Keybinds - Shortcuts |
Dismiss Menus | F4 | N/A | ||||||||||||||||
| Mute Microphone | F11 | N/A | |||||||||||||||||
| Mute Sound | F11 | N/A | |||||||||||||||||
| Disconnect from Channel | F9 | N/A | |||||||||||||||||
| Settings Quick Search | F | N/A | |||||||||||||||||
| Keyboard Preview | P | N/A | |||||||||||||||||
| Notification Quick Action | F5 | N/A | |||||||||||||||||
| Dismiss Notification | Backspace | N/A | |||||||||||||||||
|
Menu Advanced Keybinds - Navigation |
Unbind Key | Delete | N/A | ||||||||||||||||
| Confirm Selection | Space | N/A | |||||||||||||||||
| Bad | Side Mouse 4 | N/A | |||||||||||||||||
| Navigate to Prevoius Tab | Q | N/A | |||||||||||||||||
| Navigate to Next Tab | E | N/A | |||||||||||||||||
| Navigate Up | W | Up Arrow | |||||||||||||||||
| Navigate Down | S | Down Arrow | |||||||||||||||||
| Navigate Left | A | Left Arrow | |||||||||||||||||
| Navigate Right | D | Right Arrow | |||||||||||||||||
| Navigate Next | Tab | N/A | |||||||||||||||||
| Open Contextual Menu | Left Alt | N/A | |||||||||||||||||
| Side Navigation Pips | 4 | N/A | |||||||||||||||||
|
Menu Advanced Keybinds - Menu Action |
Menu Action 1 | R | Menu Action 2 | 5 | Menu Action 3 | 1 | Menu Action 4 | 2 | Menu Action 5 | 3 | Menu Action 6 | B | Menu Action 7 | C | Menu Action 8 | G | Menu Action 9 | T |
The above is the detailed content of Call Of Duty: Black Ops 6 - Best Keybinds. For more information, please follow other related articles on the PHP Chinese website!
 Clair Obscur: Expedition 33 - Best Maelle BuildApr 26, 2025 am 06:10 AM
In Clair Obscur: Expedition 33, Maelle quickly establishes herself as a formidable damage dealer. Her pivotal role in various strategies throughout the campaign is solidified in Act 3 with the acquisition of her ultimate abilities, making her the ex
 The Hundred Line: Last Defense Academy - Complete Teammate GuideApr 26, 2025 am 06:09 AM
Mastering Teamwork in The Hundred Line: Last Defense Academy Your success in The Hundred Line: Last Defense Academy hinges on effectively utilizing your diverse team. While lineup choices are often predetermined, understanding each teammate's streng
 Clair Obscur: Expedition 33 - Best Sciel BuildApr 26, 2025 am 06:08 AM
In Shadow Maze: Expedition 33, Sciel's fighting style is quite challenging. Her rhythmic combat style requires precise control of the AP, which makes her less flexible at critical moments than other players, but with the right equipment, she can become a terrifying output and excellent support role. Later in the game, Sciel will become an indispensable member of the team, especially in the boss battle. Whether it is healing, gain or output, she is competent and has many other skills. Sciel Best Weapons and Properties Sciel has many excellent weapon options, but the most practical one is the Bourgelon, which can be obtained and upgraded by hunting giant Bourgeons on the mainland. This is a
 Oblivion Remastered: Best Ranged BuildApr 26, 2025 am 06:04 AM
In the Elder Scrolls series, stealth archers are probably the most popular build genre. This build originated in Skyrim, which uses stealth mechanics and illusion magic to enhance the power of bows and arrows and attack targets in the shadows. This is a fast, high damage and easy to get started build. With The Elder Scrolls IV: Annihilation Remake, the iconic stealth archer can now be reproduced in Selodir. The changes in bow and arrow battles and talent balance make Stealth Archers an excellent choice for passing the new game. Today, we will explore how to create the most powerful ranged build in Annihilation, using stealth mechanics and bows to create the ultimate archer. Build Overview Advantages and Disadvantages High damage output, easy to use, very good in the game
 Clair Obscur: Expedition 33 - Best Monoco BuildApr 26, 2025 am 06:03 AM
Monoco, the powerhouse of Clair Obscur: Expedition 33, boasts more skills than any other character, making optimal build customization crucial. His versatility allows for diverse party roles, but strategic specialization is key. This guide focuses o
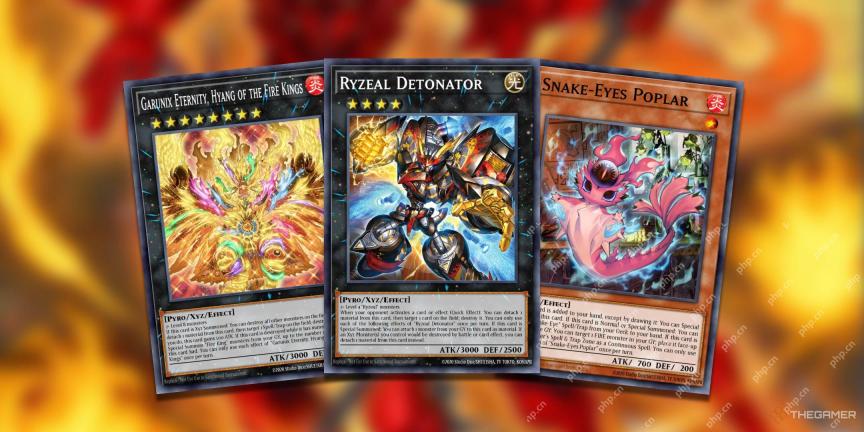 Yu-Gi-Oh! Duel Links: How To Unlock Every GX CharacterApr 26, 2025 am 04:02 AM
Yu-Gi-Oh! Duel Links: Unlock Every GX Character! This guide helps you unlock all the GX characters in Yu-Gi-Oh! Duel Links, whether you're a seasoned duelist or just starting out. Collect cards, build decks, and face off against iconic characters l
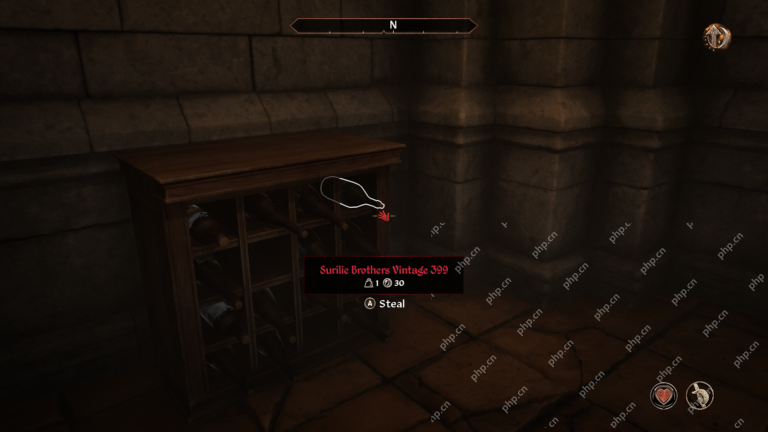 Oblivion Remastered Independent Thievery GuideApr 26, 2025 am 02:05 AM
Having joined the Thieves Guild in Oblivion Remastered, it's time to put your skills to the test. The Independent Thievery quest requires you to steal valuable items and sell them to a fence in Bruma. However, many homes in Cyrodiil, even affluent o
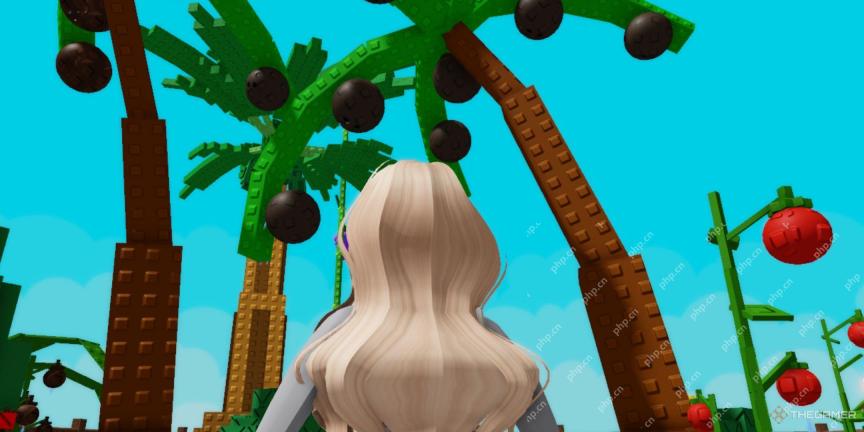 Roblox: Creatures Of Sonaria - How To Get Mushrooms FastApr 26, 2025 am 02:04 AM
Guide to the best ways to get mushrooms quickly in Sonaria's Creature in Roblox games Sonaria's Creature is an ambitious Roblox game that takes you into a world full of creatures of all sizes and sizes. In the process of survival, exploration and ultimately thriving, you will be able to obtain more of the main currency—mushrooms. This guide will cover the best ways to quickly get mushrooms in Roblox's Sonaria's Creature, which aren't too boring. Once you master these methods, you will quickly get a large amount of mushrooms! We will also learn what you can do after you get the mushrooms. How to get mushrooms Best to get mushrooms (called Shrooms) in Sonaria's Creature


Hot AI Tools

Undresser.AI Undress
AI-powered app for creating realistic nude photos

AI Clothes Remover
Online AI tool for removing clothes from photos.

Undress AI Tool
Undress images for free

Clothoff.io
AI clothes remover

Video Face Swap
Swap faces in any video effortlessly with our completely free AI face swap tool!

Hot Article

Hot Tools

SublimeText3 English version
Recommended: Win version, supports code prompts!

VSCode Windows 64-bit Download
A free and powerful IDE editor launched by Microsoft

PhpStorm Mac version
The latest (2018.2.1) professional PHP integrated development tool
WebStorm Mac version
Useful JavaScript development tools

Dreamweaver CS6
Visual web development tools


