


Creating a utility to generate 100 MongoDB collections, each populated with 1 million random documents, and deploying it on Kubernetes involves several steps. This guide walks through the process, from setting up a Kubernetes environment to generating the collections and deploying the job in a dedicated namespace.
1. Setting Up Your Kubernetes Environment
Ensure you have a Kubernetes cluster (such as GKE, EKS, AKS, or Minikube) and configure kubectl to connect to it.
2. Create a Dedicated Namespace
To keep this deployment isolated, create a namespace called my-lab:
kubectl create namespace my-lab
kubectl get ns my-lab
3. Deploy MongoDB on Kubernetes
Create a Persistent Volume (PV)
Create a mongo-pv.yaml file to define a persistent volume for MongoDB data:
apiVersion: v1
kind: PersistentVolume
metadata:
  name: mongo-pv
  namespace: my-lab
spec:
  capacity:
    storage: 10Gi
  accessModes:
    - ReadWriteOnce
  hostPath:
    path: /data/mongo
Apply the PV:
kubectl apply -f mongo-pv.yaml
Create a Persistent Volume Claim (PVC)
Define a persistent volume claim in mongo-pvc.yaml:
apiVersion: v1
kind: PersistentVolumeClaim
metadata:
  name: mongo-pvc
  namespace: my-lab
spec:
  accessModes:
    - ReadWriteOnce
  resources:
    requests:
      storage: 10Gi
Apply the PVC:
kubectl apply -f mongo-pvc.yaml
Create a MongoDB Deployment
Define the MongoDB deployment and service in mongo-deployment.yaml:
apiVersion: apps/v1
kind: Deployment
metadata:
  name: mongo
  namespace: my-lab
spec:
  replicas: 1
  selector:
    matchLabels:
      app: mongo
  template:
    metadata:
      labels:
        app: mongo
    spec:
      containers:
        - name: mongo
          image: mongo:latest
          ports:
            - containerPort: 27017
          env:
            - name: MONGO_INITDB_ROOT_USERNAME
              value: "root"
            - name: MONGO_INITDB_ROOT_PASSWORD
              value: "password"
          volumeMounts:
            - name: mongo-storage
              mountPath: /data/db
      volumes:
        - name: mongo-storage
          persistentVolumeClaim:
            claimName: mongo-pvc
---
apiVersion: v1
kind: Service
metadata:
  name: mongo
  namespace: my-lab
spec:
  type: ClusterIP
  ports:
    - port: 27017
      targetPort: 27017
  selector:
    app: mongo
Apply the deployment:
kubectl apply -f mongo-deployment.yaml
4. Connect to MongoDB
Verify the MongoDB deployment by connecting to it:
kubectl exec -it <mongo-pod-name> -n my-lab -- mongosh -u root -p password
</mongo-pod-name>
5. Verify Persistence
Scale down and then back up the MongoDB deployment to ensure data persists:
kubectl scale deployment mongo --replicas=0 -n my-lab
kubectl scale deployment mongo --replicas=1 -n my-lab
6. Create a Python Utility for Collection Generation
Using Python, define a script to create collections and populate them with random documents:
import random
import string
import pymongo
from pymongo import MongoClient

def random_string(length=10):
    return ''.join(random.choices(string.ascii_letters + string.digits, k=length))

def create_collections_and_populate(db_name='mydatabase', collections_count=100, documents_per_collection=1_000_000):
    client = MongoClient('mongodb://root:password@mongo:27017/')
    db = client[db_name]

    for i in range(collections_count):
        collection_name = f'collection_{i+1}'
        collection = db[collection_name]
        print(f'Creating collection: {collection_name}')

        bulk_data = [{'name': random_string(), 'value': random.randint(1, 100)} for _ in range(documents_per_collection)]
        collection.insert_many(bulk_data)
        print(f'Inserted {documents_per_collection} documents into {collection_name}')

if __name__ == "__main__":
    create_collections_and_populate()
7. Dockerize the Python Utility
Create a Dockerfile to containerize the Python script:
FROM python:3.9-slim

WORKDIR /app
COPY mongo_populator.py .
RUN pip install pymongo

CMD ["python", "mongo_populator.py"]
Build and push the image to a container registry:
docker build -t <your-docker-repo>/mongo-populator:latest .
docker push <your-docker-repo>/mongo-populator:latest
</your-docker-repo></your-docker-repo>
8. Create a Kubernetes Job
Define a job in mongo-populator-job.yaml to run the collection generation script:
apiVersion: batch/v1
kind: Job
metadata:
  name: mongo-populator
  namespace: my-lab
spec:
  template:
    spec:
      containers:
        - name: mongo-populator
          image: <your-docker-repo>/mongo-populator:latest
          env:
            - name: MONGO_URI
              value: "mongodb://root:password@mongo:27017/"
      restartPolicy: Never
  backoffLimit: 4
</your-docker-repo>
Apply the job:
kubectl apply -f mongo-populator-job.yaml
9. Verify Collection Generation
After the job completes, connect to MongoDB to examine the data:
kubectl exec -it <mongo-pod-name> -n my-lab -- mongosh -u root -p password
</mongo-pod-name>
In MongoDB:
use mydatabase
show collections
db.collection_9.find().limit(5).pretty()
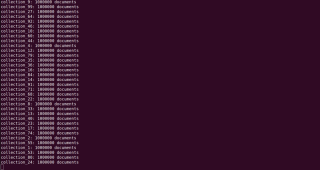
db.getCollectionNames().forEach(function(collection) {
var count = db[collection].countDocuments();
print(collection + ": " + count + " documents");
});
Each collection should contain 1 million documents, confirming that the data generation job was successful.
The above is the detailed content of Deploying a MongoDB Collection Generator on Kubernetes. For more information, please follow other related articles on the PHP Chinese website!

 Merging Lists in Python: Choosing the Right MethodMay 14, 2025 am 12:11 AM
TomergelistsinPython,youcanusethe operator,extendmethod,listcomprehension,oritertools.chain,eachwithspecificadvantages:1)The operatorissimplebutlessefficientforlargelists;2)extendismemory-efficientbutmodifiestheoriginallist;3)listcomprehensionoffersf
 How to concatenate two lists in python 3?May 14, 2025 am 12:09 AM
In Python 3, two lists can be connected through a variety of methods: 1) Use operator, which is suitable for small lists, but is inefficient for large lists; 2) Use extend method, which is suitable for large lists, with high memory efficiency, but will modify the original list; 3) Use * operator, which is suitable for merging multiple lists, without modifying the original list; 4) Use itertools.chain, which is suitable for large data sets, with high memory efficiency.
 Python concatenate list stringsMay 14, 2025 am 12:08 AM
Using the join() method is the most efficient way to connect strings from lists in Python. 1) Use the join() method to be efficient and easy to read. 2) The cycle uses operators inefficiently for large lists. 3) The combination of list comprehension and join() is suitable for scenarios that require conversion. 4) The reduce() method is suitable for other types of reductions, but is inefficient for string concatenation. The complete sentence ends.
 Python execution, what is that?May 14, 2025 am 12:06 AM
PythonexecutionistheprocessoftransformingPythoncodeintoexecutableinstructions.1)Theinterpreterreadsthecode,convertingitintobytecode,whichthePythonVirtualMachine(PVM)executes.2)TheGlobalInterpreterLock(GIL)managesthreadexecution,potentiallylimitingmul
 Python: what are the key featuresMay 14, 2025 am 12:02 AM
Key features of Python include: 1. The syntax is concise and easy to understand, suitable for beginners; 2. Dynamic type system, improving development speed; 3. Rich standard library, supporting multiple tasks; 4. Strong community and ecosystem, providing extensive support; 5. Interpretation, suitable for scripting and rapid prototyping; 6. Multi-paradigm support, suitable for various programming styles.
 Python: compiler or Interpreter?May 13, 2025 am 12:10 AM
Python is an interpreted language, but it also includes the compilation process. 1) Python code is first compiled into bytecode. 2) Bytecode is interpreted and executed by Python virtual machine. 3) This hybrid mechanism makes Python both flexible and efficient, but not as fast as a fully compiled language.
 Python For Loop vs While Loop: When to Use Which?May 13, 2025 am 12:07 AM
Useaforloopwheniteratingoverasequenceorforaspecificnumberoftimes;useawhileloopwhencontinuinguntilaconditionismet.Forloopsareidealforknownsequences,whilewhileloopssuitsituationswithundeterminediterations.
 Python loops: The most common errorsMay 13, 2025 am 12:07 AM
Pythonloopscanleadtoerrorslikeinfiniteloops,modifyinglistsduringiteration,off-by-oneerrors,zero-indexingissues,andnestedloopinefficiencies.Toavoidthese:1)Use'i


Hot AI Tools

Undresser.AI Undress
AI-powered app for creating realistic nude photos

AI Clothes Remover
Online AI tool for removing clothes from photos.

Undress AI Tool
Undress images for free

Clothoff.io
AI clothes remover

Video Face Swap
Swap faces in any video effortlessly with our completely free AI face swap tool!

Hot Article
Hot Tools

Atom editor mac version download
The most popular open source editor

SublimeText3 English version
Recommended: Win version, supports code prompts!

Zend Studio 13.0.1
Powerful PHP integrated development environment

mPDF
mPDF is a PHP library that can generate PDF files from UTF-8 encoded HTML. The original author, Ian Back, wrote mPDF to output PDF files "on the fly" from his website and handle different languages. It is slower than original scripts like HTML2FPDF and produces larger files when using Unicode fonts, but supports CSS styles etc. and has a lot of enhancements. Supports almost all languages, including RTL (Arabic and Hebrew) and CJK (Chinese, Japanese and Korean). Supports nested block-level elements (such as P, DIV),

Dreamweaver Mac version
Visual web development tools

