


For Gold And Glory is a quest you'll find on the beautiful, exotic Rivain Coast of Dragon Age: The Veilguard. It's where the Lords of Fortune, including Taash set up their base, though Taash is not mandatory for this mission. It sees you recovering supplies for the Antivan Crows on behalf of the Lords of Fortune.
However, it's less about finding the supplies and more about defeating the Antaam who are guarding them at various locations. For this reason, we suggest taking Taash and Lucanis. Both have a narrative link to the quest, but also their Fire and Necrotic damage is highly effective against the foes you fight, and they can trigger Detonations via combos too. It's like Rook might as well not even be there...
Taash is mostly there as it's their home, but they are useful in a fight. As long as its not Bellara, whose Electric Abilities are Resisted by Antaam, you're fine.
Defeat The Antaam

The first set of Antaam you face are a trio. There are two Valotaar, which are just brutes, and God-Touched Valotarr, who is the same but with harder hitting strikes. Deflect their attacks and use Necrotic Abilities to make short work of them. A bigger issue is the Taaralok, who makes the trio into a quartet, and is a ranged Antaam with Armor.
Taaralok is mostly a nuisance. He can disrupt your fight against the three thugs going face to face while keeping his distance. Using Taash's Fire Abilities, any Rook Abilities that destroy Armor, and Charged Heavy attacks, you should rush the Taaralok first. If you're too far away, ranged headshots will also work.
Defeat The Reaver

Once you have dealt enough damage to the God-Touched Valotaar, a Reaver appears. This becomes the biggest threat and it is imperative you get rid of the Taaralok so you can focus on the Reaver. It charges around the arena with unstoppable, devastating attacks and you will need to dodge quickly.
When the Reaver appears, you need to focus on thinning out the herd. Taking down a Reaver takes a while, so you don't want other enemies getting in the way. Since the Reaver is predictable (it follows you and charges), keep moving and doge inwards or outward to avoid it, and take out the other Antaam.
When you have the Reaver alone, using Taash's Abilities to apply Burning will help you whittle it down while attacking when it takes rare breaks - just get ready to dodge again afterwards. Search the Crow bodies in the corner when the fight is over to discover the second location, where the supply cache (and more Antaam) are waiting.
Find The Supply Cache

Head through the ruins and follow the marker as they lead you across the ledge and outside to the the shore, then dip back in and vault over the wall. Follow the passage outside and to slide down the hill to the next combat arena.
If you have unlocked the Dragon Beach Fast Travel Beacon, you can also just use this.
You'll interrupt the Antaam performing some pest control on the local wildlife, which clues you into the new form of Antaam you'll be fighting: Anadar. These have flamethrowers, though they remain resistant to Electric damage, not Fire, so Taash can still eviscerate them.
How To Defeat The Anadar

Rush the closest Anadar to you as you enter with a Charged Heavy attack. Keep hitting it with regular Heavy attacks until the Armor goes down - these enemies take a while to get their flamethrower ready, so you can drop this one before it starts. Once the Armor is down, it will soon be Staggered, where you can perform a Takedown.
That then leaves you with two Anadar and one Valotaar, but the Anadar's flamethrowers give them such large coverage that they should be the priority. Taash can take down their Armor (ideally with a combo with Lucanis), just be aware that if you rush them, you need to dodge quickly if the other one arrives.
The arena here is large enough that you should keep your distance where you can, especially as the Anadar have a much greater reach. Abilities and ranged attacks will help, although Armor are best dealt with by Charged Heavy attacks, so you may need to risk it when an opening appears.
Recover The Supplies

After all of the enemies have been cleared out, head to the back of the arena and climb up the rocks. Continue along the river until the steps, then jump to the podium with the log on it. Go along the branch and continue around left until you reach the Clifftops.
Drop down, then head around to the waterfall and find a note in the pool at the bottom. This sends you to your final location, where you'll need to go away from the waterfall and around the cliff you just jumped off, back to the river and the podium with the branch. This time, go up and go right.
This takes you to some castle ruins, so make your way through and head out the exit on the right at back, up the stairs to the zipline. Take the zipline across to the Warden Castle, and inside you will fight your penultimate wave of Antaam.

You will face four Valotaar, including some with hammers that charge. However, they should be dealt with in the same away as before, with Necrotic Abilities and Burning condition, as well as Heavy attacks and Takedowns when Staggered.
Defeat Penshanek The Blood Eater

Head through the Castle Ruins, out into the rocky walls and around the corner at the back (it can be tough to see in the dark, but run to the back wall then turn left). Outside, you will face the final boss of the quest: Penshanek the Blood Eater.
At first glance, Penshanek is not too difficult. It has no Armor or Barrier, just a very chunky health bar, so powerful Necrotic Abilities and any high-damage or status inflicting Abilities work well too. The issue is how crowded things are.
The Castle Bailey area is more cramped than Rivain's other spaces, and Penshanek has two Anadar, a Valotaar, and a Taaralok helping him. Take out the Taaralok first with Charged ranged attacks and Abilities, then focus on eroding the Anadar Armors with Detonation, and rush the Valotaar with Heavy attacks.
Any Abilities with a large Area of Effect will be very useful here.
When that's done, think of Penshanek as a big Valotar. Dodge away when he glows red, and drive in with Heavy attacks to Stagger quickly. When that's done, free the Antivan Crow locked up in the corner and the quest will be complete.
The above is the detailed content of Dragon Age: The Veilguard - For Gold And Glory Walkthrough. For more information, please follow other related articles on the PHP Chinese website!

 Wordle Answer And Hints - April 15 2025 Solution #1,396Apr 14, 2025 pm 08:14 PM
Ready to conquer today's Wordle challenge? Boost your skills and try today's puzzle in hard mode! Need a little assistance? We've got your back. All solutions and letters remain hidden to prevent accidental spoilers. We offer helpful clues to guide
 NYT Connections Answers And Hints - April 15, 2025 Solution #674Apr 14, 2025 pm 08:13 PM
Solve today's New York Times Connections puzzle with these helpful hints! Need a little assistance to keep your winning streak alive? We've got you covered, from subtle clues to the complete answers. Below, you'll find hints for each category, prog
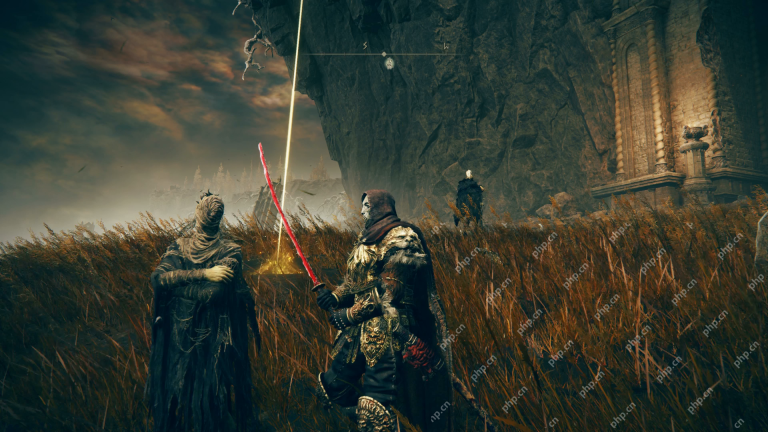 Elden Ring Shadow of Erdtree Miquella's Followers guideApr 14, 2025 pm 08:10 PM
Elden Ring's "Snow Mountain Shadow" Mikaela Followers' Mission Guide: Detailed Explanation of the Ending and Rewards Spoiler warning ahead! This article contains spoilers of the Mikaela follower mission in "Snow Mountain Shadow" DLC and the Enil Ilim incident, which belongs to the late game content. Mikara's followers come from every corner of the Shadowland in "Eldon Ring of Far: Shadow of Snow Mountain". They each have different motives, but they all respect Mikara. However, certain events in the game will change all this, your actions as a fading person will affect which followers will appear later and what their goals are. Will they help you, or will they try to kill you? While we provide a separate guide to NPCs and their personal missions in Shadow of Snow Mountain,
 Elden Ring Alexander quest: How do you complete Iron Fist Alexander's questline?Apr 14, 2025 pm 08:07 PM
Elden Ring: The Complete Mission Guide for Iron Fist Alexander Update: We have added some details and simplified this page to help you with the task of Iron Fist Alexander. In Elden Far Ring, Alexander's mission will take you with this adorable big tin (with arms and legs) to the end of the journey, literally. When they first met, he was likely stuck in the ground and needed your help. You can meet him for the first time in Storm Hills, but as the story progresses and you beat the boss together, Iron Fist Alexander will move around the Middle Continent and even the Red Mane Castle. To view this content, enable targeted cookies. How to complete the mission of Alexander of Iron Fist How to open in a storm hill


 Roblox: Hunters - Weapons Tier ListApr 14, 2025 pm 12:04 PM
Picking the right weapon will determine your effectiveness in the dungeons of Roblox's Hunters. Even though the game doesn't feature a wide variety of weapon types, players have a few options to choose from. And if you want to learn w
 The First Berserker: Khazan - Transcendental Sword WalkthroughApr 14, 2025 pm 12:02 PM
The Transcendental Sword is one of the key side missions in The First Berserker: Khazan. If you are hoping to clear the game with the best ending, you'll need to work your way through it. While it isn't the largest mission in the game, it is loaded w


Hot AI Tools

Undresser.AI Undress
AI-powered app for creating realistic nude photos

AI Clothes Remover
Online AI tool for removing clothes from photos.

Undress AI Tool
Undress images for free

Clothoff.io
AI clothes remover

AI Hentai Generator
Generate AI Hentai for free.

Hot Article
Hot Tools

MantisBT
Mantis is an easy-to-deploy web-based defect tracking tool designed to aid in product defect tracking. It requires PHP, MySQL and a web server. Check out our demo and hosting services.

Atom editor mac version download
The most popular open source editor

SublimeText3 Linux new version
SublimeText3 Linux latest version

DVWA
Damn Vulnerable Web App (DVWA) is a PHP/MySQL web application that is very vulnerable. Its main goals are to be an aid for security professionals to test their skills and tools in a legal environment, to help web developers better understand the process of securing web applications, and to help teachers/students teach/learn in a classroom environment Web application security. The goal of DVWA is to practice some of the most common web vulnerabilities through a simple and straightforward interface, with varying degrees of difficulty. Please note that this software

mPDF
mPDF is a PHP library that can generate PDF files from UTF-8 encoded HTML. The original author, Ian Back, wrote mPDF to output PDF files "on the fly" from his website and handle different languages. It is slower than original scripts like HTML2FPDF and produces larger files when using Unicode fonts, but supports CSS styles etc. and has a lot of enhancements. Supports almost all languages, including RTL (Arabic and Hebrew) and CJK (Chinese, Japanese and Korean). Supports nested block-level elements (such as P, DIV),

