
 System TutorialWindows SeriesHow to install Win11 IPX protocol Tutorial on how to add IPX network protocol to Win11
How to install Win11 IPX protocol Tutorial on how to add IPX network protocol to Win11

Question: How to add IPX protocol in Windows 11 to play LAN games? Brief explanation: IPX protocol is an essential component for LAN online games. This article will guide you step-by-step through the advanced network settings of Windows 11 to add the IPX protocol. Guided reading: Continue reading this article and follow the detailed steps provided by PHP editor Youzi to easily add the IPX network protocol on Windows 11 to solve the problem of blocked online games.
Tutorial on how to add IPX network protocol to Win11
1. First, right-click the [Network Icon] in the lower right corner of the taskbar, and then select [Network and Internet Settings].
2. In the settings window, on the left sidebar, click [Network and Internet], and on the right click [Advanced network settings (view all network adapters, network reset)].

3. Under related settings, click [More Network Adapter Options].

4. In the network connection window, select the local connection, then click [right-click], and select [Properties] in the menu item that opens.

5. In the network connection properties window, click [Install] at the bottom.

6. Select the network function type window, select [Protocol], and then click [Add].
7. Select the network protocol window, select [Reliable Multicast Protocol], and then click [Have Disk].

8. From the disk installation window, click [Browse] to find the prepared driver assistance, then select the corresponding system version, and then click [OK].
The above is the detailed content of How to install Win11 IPX protocol Tutorial on how to add IPX network protocol to Win11. For more information, please follow other related articles on the PHP Chinese website!

 With More Expensive PC Hardware, It's Time to be Happy With What You've GotApr 14, 2025 am 06:01 AM
Current market conditions make upgrading computer hardware a costly endeavor. High prices and low supply, driven by factors like tariffs and the massive demand from AI data centers, create a challenging environment for hardware enthusiasts. However
 How to Customize Your Windows 11 NotificationsApr 14, 2025 am 04:05 AM
Detailed explanation of Windows 11 notification settings: Create a personalized notification experience Windows 11 integrates the Notification Center into the calendar, and although it takes some time to adapt, the frequency of notifications has not changed. If you are tired of the constantly popping up system updates and useless application notifications, this article will guide you to customize Windows 11 notifications and optimize your workflow. Global notification settings Almost all notification-related options are located in Settings in Windows 11. Step 1: Click the "Start" menu and select "Settings" (or press "Windows I"). Step 2: Select System in the left sidebar. Step 3: Click "Notification" to access all notification options.
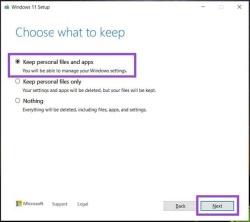 How to Reinstall Windows 11 Without Losing Apps and FilesApr 13, 2025 pm 08:01 PM
Reinstalling Windows 11: Preserve Your Apps and Files A severely corrupted Windows 11 system may necessitate a complete operating system reinstall. While a typical USB/CD installation wipes the OS partition, potentially losing data, this guide demon
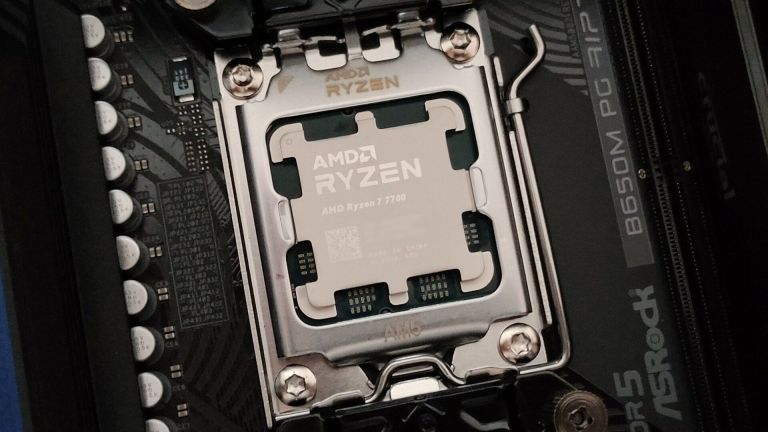 Got an AMD CPU and Aren't Using PBO? You're Missing OutApr 12, 2025 pm 09:02 PM
Unlocking Ryzen's Potential: A Simple Guide to Precision Boost Overdrive (PBO) Overclocking your new PC can seem daunting. While performance gains might feel elusive, leaving potential untapped is even less appealing. Fortunately, AMD Ryzen processo
 Bought a New Gaming PC? Don't Make These Infuriating MistakesApr 12, 2025 am 06:10 AM
Setting up a new gaming PC is thrilling, but even tech experts can make costly mistakes. Here are some common pitfalls to avoid for a smooth gaming experience. 1. Using the Motherboard's Display Output Instead of Your GPU A frequent tech support que
 Microsoft's Next Windows API Change Will Break Some AppsApr 12, 2025 am 06:07 AM
Microsoft's upcoming alteration to the Windows API will render certain applications non-functional. A GitHub search indicates that a limited number of smaller projects utilize the affected maps API, including an openHAB client and an unofficial Poké
 Microsoft 365 Service Outage Locks Family Subscribers Out of Office AppsApr 12, 2025 am 06:06 AM
Microsoft 365 Family service disruption impacts Office suite access. A widespread outage affecting Microsoft 365 Family subscribers has left many unable to access Office applications. Microsoft acknowledges the problem, but a resolution may take se
 5 Windows Settings to Change to Improve Laptop Battery LifeApr 12, 2025 am 06:04 AM
Is your Windows laptop battery draining faster than you'd like? Don't worry, you can significantly extend its life with a few simple tweaks to Windows' built-in power management features. Here's how to maximize your laptop's battery life on a singl


Hot AI Tools

Undresser.AI Undress
AI-powered app for creating realistic nude photos

AI Clothes Remover
Online AI tool for removing clothes from photos.

Undress AI Tool
Undress images for free

Clothoff.io
AI clothes remover

AI Hentai Generator
Generate AI Hentai for free.

Hot Article
Hot Tools

PhpStorm Mac version
The latest (2018.2.1) professional PHP integrated development tool

MantisBT
Mantis is an easy-to-deploy web-based defect tracking tool designed to aid in product defect tracking. It requires PHP, MySQL and a web server. Check out our demo and hosting services.

WebStorm Mac version
Useful JavaScript development tools

Notepad++7.3.1
Easy-to-use and free code editor

MinGW - Minimalist GNU for Windows
This project is in the process of being migrated to osdn.net/projects/mingw, you can continue to follow us there. MinGW: A native Windows port of the GNU Compiler Collection (GCC), freely distributable import libraries and header files for building native Windows applications; includes extensions to the MSVC runtime to support C99 functionality. All MinGW software can run on 64-bit Windows platforms.

