WPS is an office software that contains a variety of functions. Many users edit forms in the software. Because the content is relatively important, they want to set up password encryption for protection. For many novices, they have no idea how to operate it. Only then can the setting be successful. In response to this problem, today's software tutorial will teach you how to set up table encryption for WPS. It only takes a few simple steps to set up successfully. Follow the editor's steps and take a look at the detailed steps.

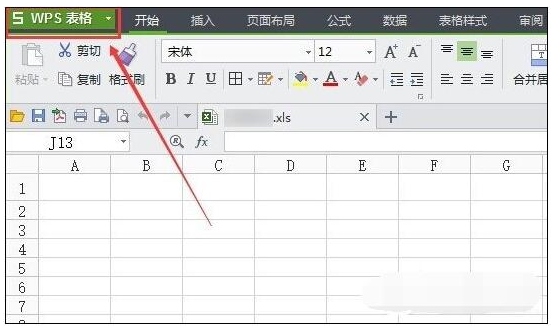
How to set up table encryption in WPS 1. Find the WPS table file where you want to set the password, double-click to open it, after opening, you can see a WPS table icon in the upper left corner of the WPS table, we click on it.

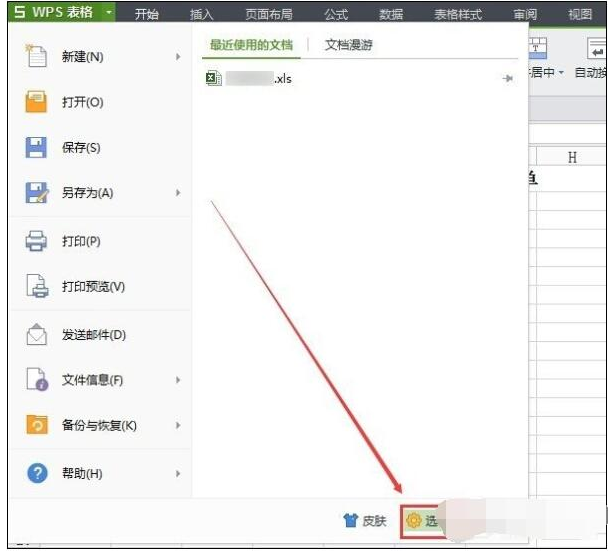
2. After clicking the WPS form button, in the pop-up dialog box, we select the options icon in the lower right corner.

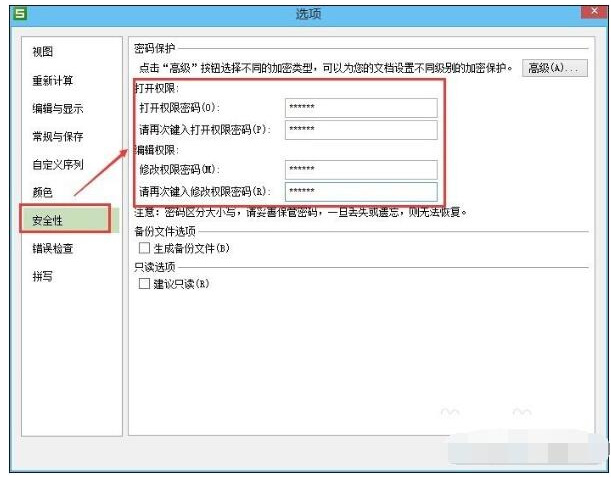
3. In the pop-up options dialog box, we click to select the
Security option on the left navigation, and open the
Security on the right You can see
Password Protection on the page. We can set
Open permissions and
Edit permissions under
Password Protection. We enter the WPS password we want to set once, and then click
OK in the lower right corner.

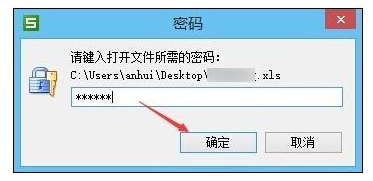
Note: After setting up WPS password protection, we need to save the WPS document. 4. After setting the WPS protection password, the password dialog box will pop up the next time we open the WPS document. This is the password to open WPS. After entering the WPS password, click OK to open WPS safely.

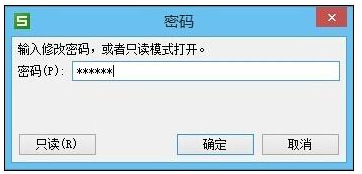
5. After safely opening the WPS-protected document, a password dialog box will pop up. This is the password for WPS editing verification. We can enter the password and click OK, or directly click on the lower left corner to open protected WPS documents read-only.

The above is the detailed content of How to set up table encryption in WPS WPS table password encryption setting method. For more information, please follow other related articles on the PHP Chinese website!

