Home >Software Tutorial >Computer Software >How to remove a line from the header in Word How to delete the horizontal line in the header in Word
How to remove a line from the header in Word How to delete the horizontal line in the header in Word
- 王林Original
- 2024-08-28 13:08:021113browse
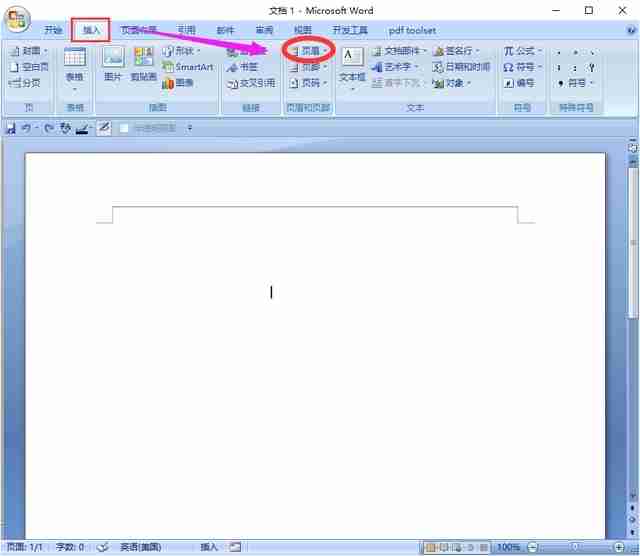
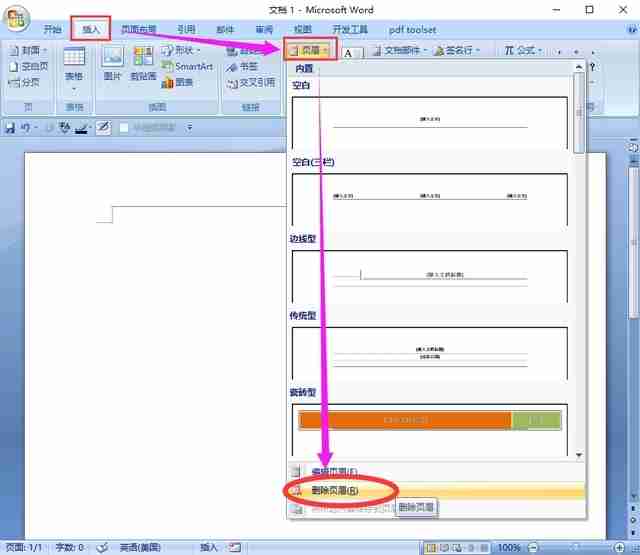
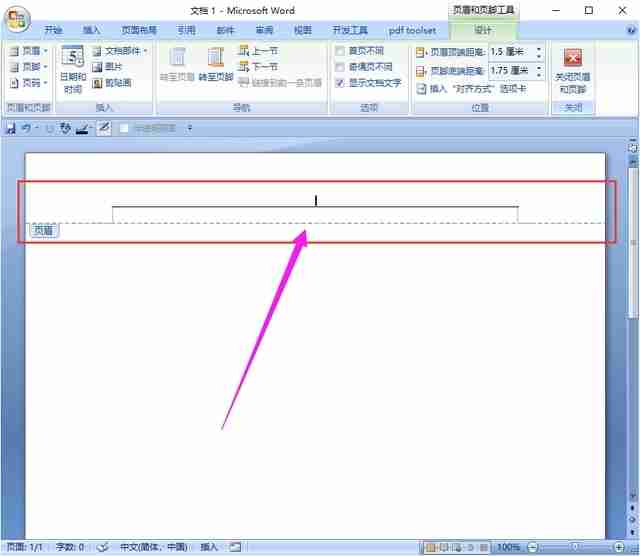
During the office process, I found that after adding a header to a Word document, a horizontal line appeared, which looked very ugly. Is there any way to delete this header horizontal line? This horizontal line is the horizontal line under the header. After setting the header, such a horizontal line will appear. If you don't want it, you can delete the horizontal line under the header as follows. Specific methods/steps: 1. Open the Word document and you will see a horizontal line displayed at the top of the page.


The above is the detailed content of How to remove a line from the header in Word How to delete the horizontal line in the header in Word. For more information, please follow other related articles on the PHP Chinese website!

