
Home >Software Tutorial >Computer Software >How to set strikethrough thickness in InDesign
How to set strikethrough thickness in InDesign

- WBOYWBOYWBOYWBOYWBOYWBOYWBOYWBOYWBOYWBOYWBOYWBOYWBOriginal
- 2024-08-19 18:32:33941browse
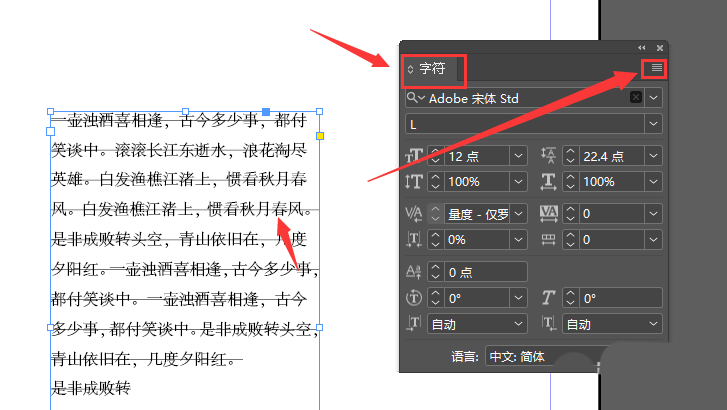
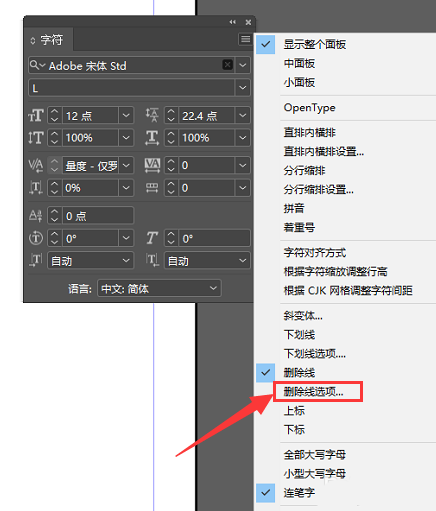
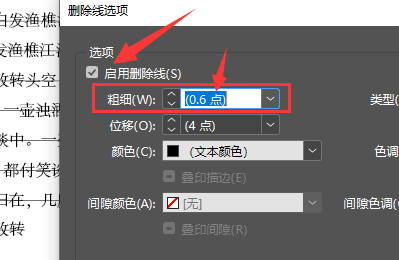
InDesign is a tool specially used for typesetting and editing of various printed materials. It can produce very beautiful graphic designs by using printed fonts and images. Here the editor will give you a detailed introduction to the method of setting the strikethrough thickness in InDesign. Friends who need it can take a look. Setting method: 1. Double-click to open the software, select the added text content, and click the "More Settings" icon in the upper right corner of the "Character" panel on the right.
The above is the detailed content of How to set strikethrough thickness in InDesign. For more information, please follow other related articles on the PHP Chinese website!