Home >System Tutorial >Windows Series >How to Monitor Your Data Usage on Windows 11
How to Monitor Your Data Usage on Windows 11
- PHPzOriginal
- 2024-06-18 22:47:39757browse
Monitoring your data usage on Windows can be beneficial if you're on a metered connection or worried about exceeding data caps. This allows you to adjust your usage patterns to ensure you're using your data effectively. Here's how.
Use Task Manager to Keep an Eye on Data Usage
In Task Manager, you can monitor how much data the apps on your computer use in real time. This can help you see which programs are consuming too much bandwidth or slowing down the network.
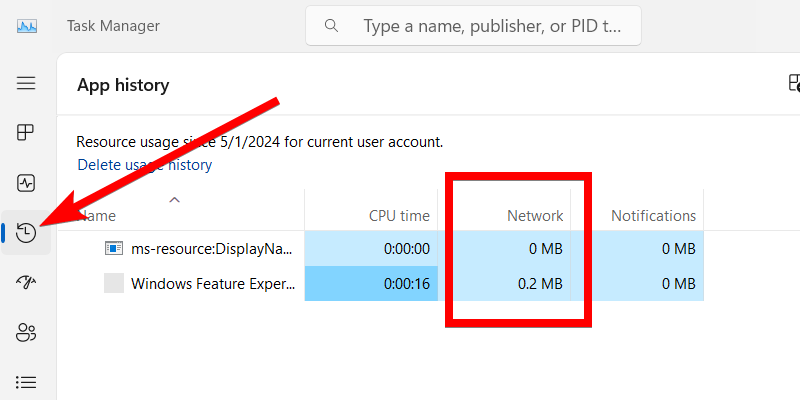
To track these usage statistics in Task Manager, right-click the Taskbar and select “Task Manager” in the menu.

In Task Manager, select the “App History” tab on the left-side menu. You'll see the usage statistics of the apps running on your computer on the right. Look at the Network column to see how much data (in MB) they're using.
Monitor Your Data Usage With Advanced Network Settings
If you have limited data or your ISP charges you extra for exceeding your data cap, you can monitor your overall usage in Advanced Network Settings.
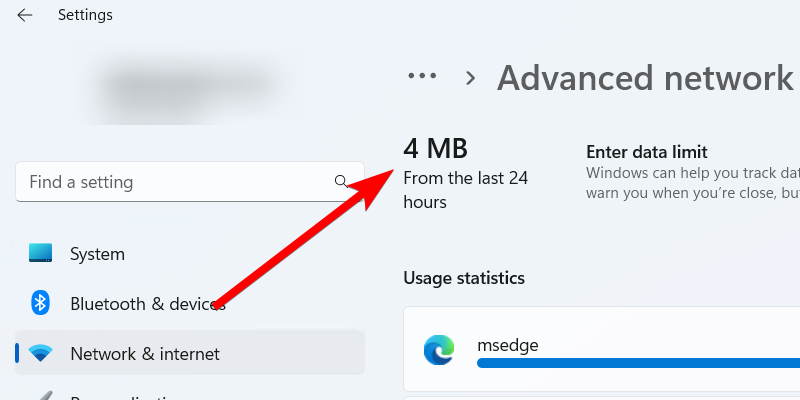
To do that, press Win+i to open the Settings app. Then, head to Network and Internet > Advanced Network Settings > Data Usage. You will see your total data usage in the top left of the right panel.
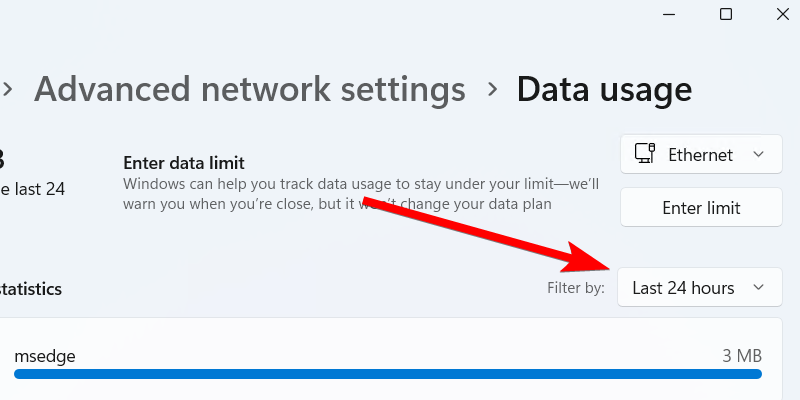
You can choose the period to check the statistics by clicking the “Filter By” drop-down in the top right. You can choose between 24 Hours, 7 Days, and 30 Days.
You'll also be able to see the data usage statistics of the apps and services on this screen. The best part is you can set a data usage limit by clicking the “Enter Limit” button in the top right.
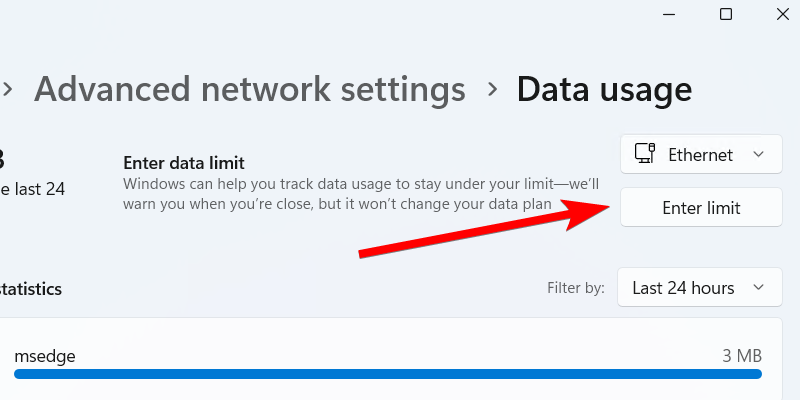
Set the “Limit Type” by choosing between “Daily,” “Weekly,” “Monthly,” “Onetime,” and “Unlimited.” Next, set when the limit should reset or expire. Then, enter the data limit and click the “Save” button.
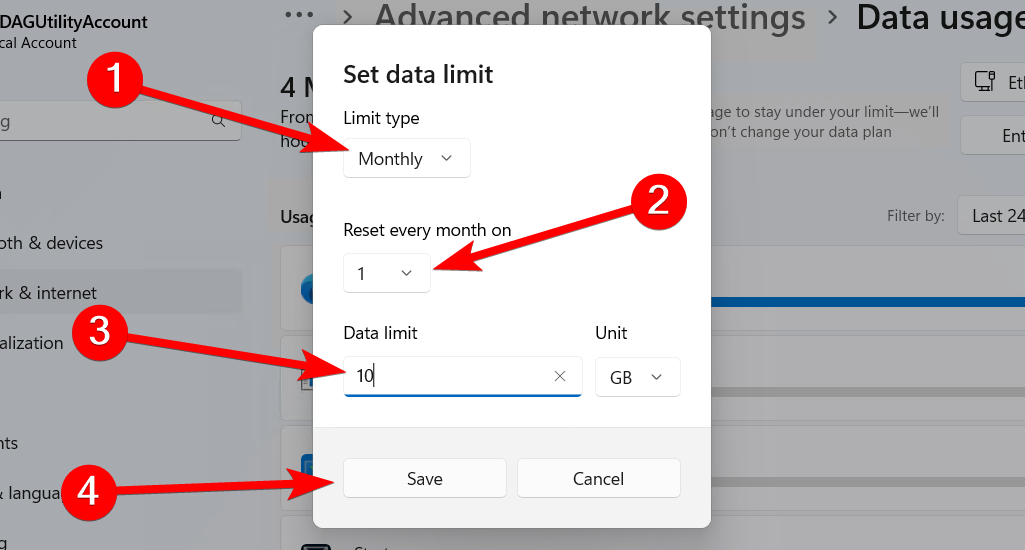
This is not a hard cap on data usage that Windows will enforce, but you will be warned when you reach your limit. This will allow you to act based on your data plan.
Check Your Data Usage Using the Resource Monitor
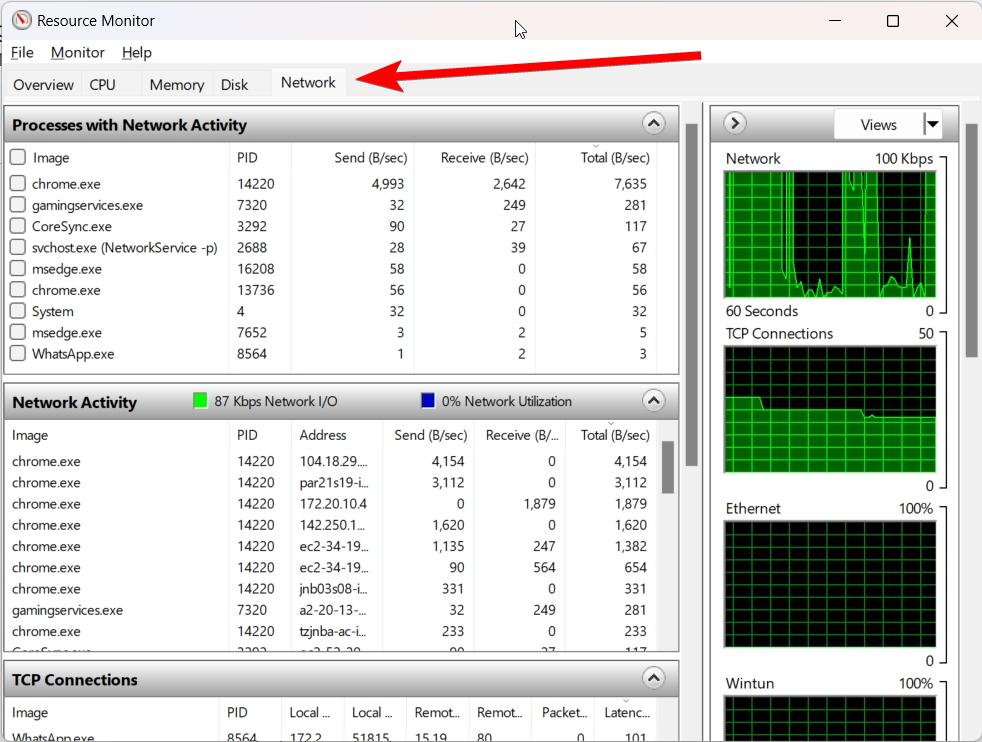
You can also check data usage statistics of apps, processes, and services in the Resource Monitor. To do that, open the Start Menu and type resource monitor. Click “Resource Monitor” in the search results to launch it.
Select the “Network” tab to see how your computer's running apps and processes are using the network resources.
Monitor Your Data Usage With NetworkUsageView
Another handy utility you can use to monitor data usage on your computer is NetworkUsageView. It gets this information every hour from SRUDB.dat, which is stored on your Windows computer. This file stores important information about how apps, programs, and services are utilizing resources on your PC, including network resources.
NetworkUsageView is not a built-in Windows utility and can help when Task Manager and advanced network settings aren't working as they should. It is also a portable utility, meaning you don't need to install it to use it.
To use NetworkUsageView, download it from the NirSoft website. You will need to extract the archive to access the executable. Then, double-click the “NetworkUsageView.exe” file to launch the program.
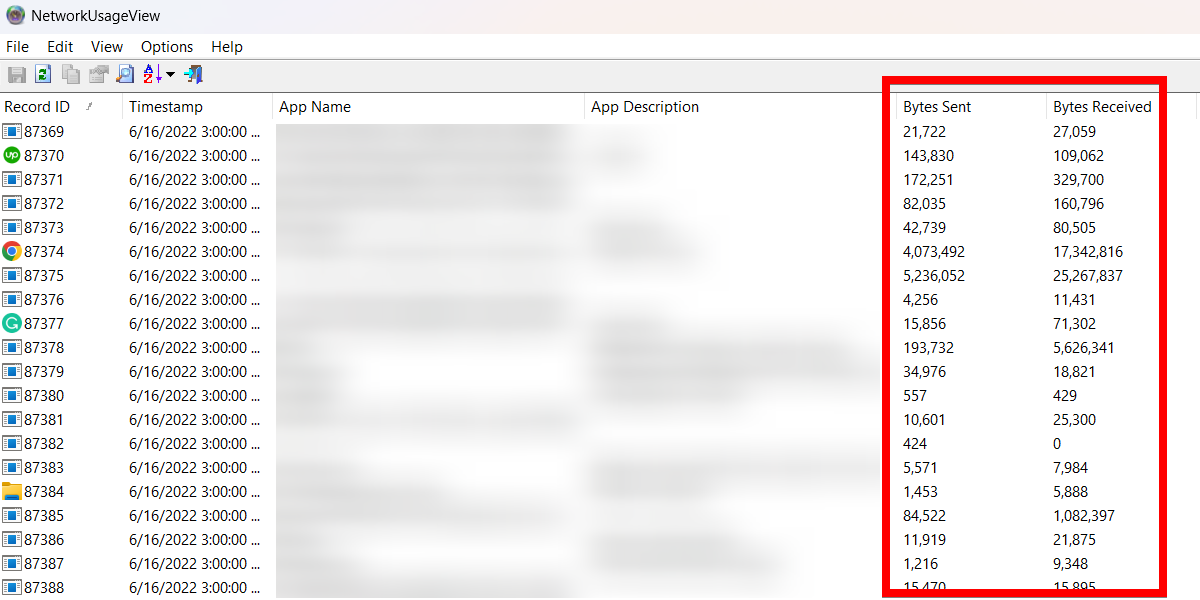
You should now be able to see the data usage statistics you need, including bytes sent and bytes received.
Checking your data usage goes beyond just helping you avoid exceeding your data cap or seeing which apps are hogging the bandwidth. It can also help catch sudden spikes in usage that can signal malware activity and other network-related problems.
Now you know which tools you need to make informed decisions about your data needs or troubleshoot data-related network problems.
The above is the detailed content of How to Monitor Your Data Usage on Windows 11. For more information, please follow other related articles on the PHP Chinese website!
Related articles
See more- How to solve the problem of Windows 7 desktop rotating 90 degrees
- How to forcefully terminate a running process in Win7
- Win11 Build 25336.1010 preview version released today: mainly used for testing operation and maintenance pipelines
- Win11 Beta preview Build 22621.1610/22624.1610 released today (including KB5025299 update)
- Fingerprint recognition cannot be used on ASUS computers. How to add fingerprints? Tips for adding fingerprints to ASUS computers

