Home >Software Tutorial >Computer Software >How to set the number of rows per page in wps? How to set the number of rows per page in wps
How to set the number of rows per page in wps? How to set the number of rows per page in wps
- PHPzOriginal
- 2024-06-18 17:47:36446browse
WPSThe software is loved by many users because of its powerful and practical functions. Some users who do a lot of operations do not know much about it, especially how to set each page in the document. The number of rows, then how to set the number of rows per page in wps? Let this site carefully introduce to users the method of setting the number of rows per page in WPS.
How to set the number of rows per page in wps
1. The user opens the wps software on the computer and comes to the editing page of the document file to make settings.

2. Then click Page Options in the menu bar at the top of the page, and the relevant tabs will be displayed. The user clicks the small arrow icon in the lower right corner of the text direction option.

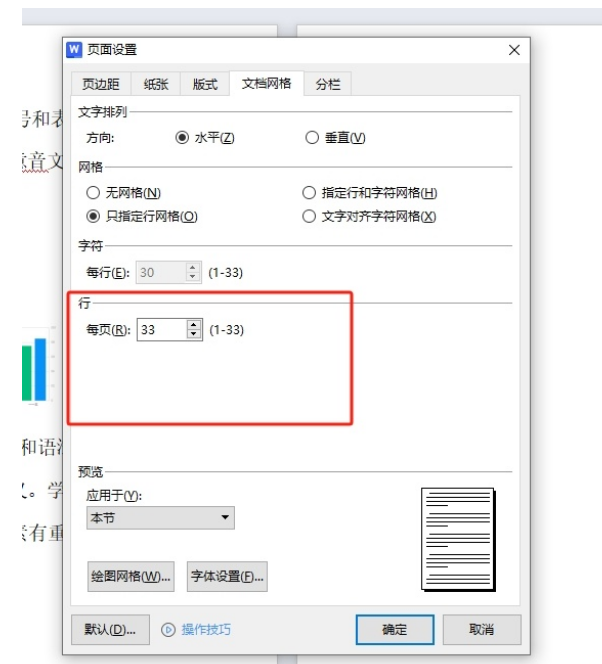
3. Entering the page settings window, the user switches the tab to the document grid tab to make settings.

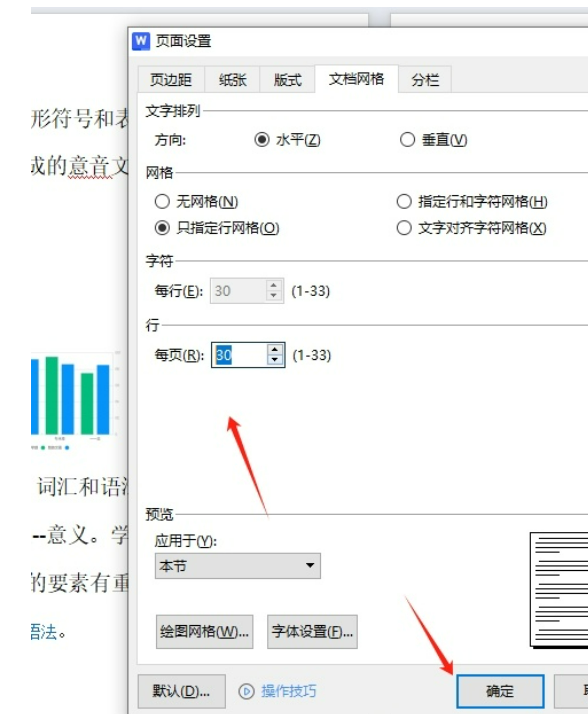
4. Now enter the page setting window. The user can set the number of rows to be displayed on each page in the row section to solve the problem.

5. After completing the above operations, the user can directly press the OK button in the lower right corner of the window.

6. When returning to the editing page, the user will find that the number of rows on each page has changed, as shown in the figure.

The above is the detailed content of How to set the number of rows per page in wps? How to set the number of rows per page in wps. For more information, please follow other related articles on the PHP Chinese website!

