
Home >Software Tutorial >Computer Software >How to set up contact grouping in Outlook_How to set up contact grouping in Outlook
How to set up contact grouping in Outlook_How to set up contact grouping in Outlook

- WBOYWBOYWBOYWBOYWBOYWBOYWBOYWBOYWBOYWBOYWBOYWBOYWBOriginal
- 2024-06-07 19:44:39488browse
Have you ever encountered the problem of confusing contact management and difficulty in quickly finding the contacts you need? Don’t worry, PHP editor Xinyi has brought you a solution! Today, we’ll take a closer look at how to create and manage contact groups in Microsoft Outlook, allowing you to easily categorize and organize your contacts and quickly access important information. Read on for step-by-step guides and practical tips to get your contact management organized!
1. First enter your outlook mailbox, and then click [Contacts] below.

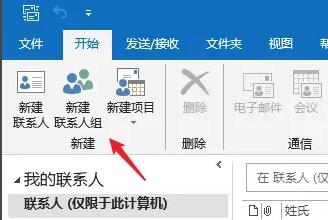
2. Then click [New Contact Group] in the menu in the upper left corner.
3. Customize a contact group in the name.

4. Then click [Add Member] to add the contact.

5. After opening the window, hold down [ctrl+shift] to select the contacts you want to add.

6. Click [Member] again and select [OK].

7. Finally, when everything is done, click [Save and Close] in the upper left corner.

The above is the detailed content of How to set up contact grouping in Outlook_How to set up contact grouping in Outlook. For more information, please follow other related articles on the PHP Chinese website!