Home >Software Tutorial >Computer Software >A simple way to create chamfers in C4D
A simple way to create chamfers in C4D
- WBOYWBOYWBOYWBOYWBOYWBOYWBOYWBOYWBOYWBOYWBOYWBOYWBOriginal
- 2024-06-07 11:56:07881browse
Want to add chamfers to your 3D model, but don’t know where to start? Don’t worry, PHP editor Shinichi brings you a simple method to create chamfers in C4D. This tutorial will guide you step by step and teach you how to use C4D’s chamfering tool to easily create chamfering effects. Read on to learn the secrets to creating great chamfers that will make your 3D models even better.
Start the C4D software and create a cubic object on the view; the object is now in parametric mode.

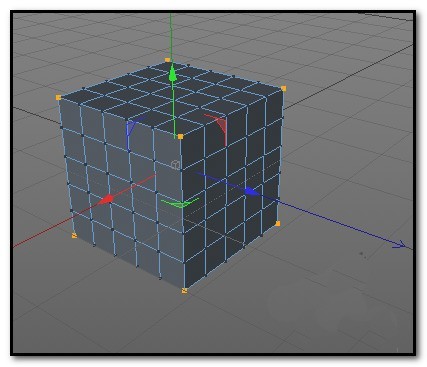
In the properties panel, click on the object option, add segments to the cube, and set X, Y, and Z to 5 each. Press the C key to convert the cube into a polygon object. Press NB again to switch to scene shading (line).


Select point mode here on the left; we want to select the points of the cube, so we must switch to point mode before operation. Select the Live Selection Tool, hold down the SHIFT key, and select all 8 corner points of the cube. The SHIFT key must be held down to operate continuous selection points.

After all 8 points are selected, right-click the mouse and click: Chamfer in the pop-up menu. Or press the shortcut key: MS. At this time, the mouse brings up a chamfer icon


In the chamfer property panel, set the subdivision to 2; click and hold the view with the mouse and drag to the right. Make the offset value around 39. At this time, the eight corners of the cube have a chamfer effect.
The above is the detailed content of A simple way to create chamfers in C4D. For more information, please follow other related articles on the PHP Chinese website!

