

 Computer TutorialsTroubleshootingComputer assembly solution with multiple screens in one machine?
For computer users who want to realize multiple screens in one machine, it is crucial to choose the appropriate assembly solution. PHP editor Strawberry has compiled a variety of feasible solutions for everyone, covering different needs and budgets. Whether you're looking to expand your workspace, enhance your entertainment experience, or increase productivity, you'll find the right solution in the details below.

One computer multi-screen assembly solution?
A traditional multi-screen computer refers to a complete system that implements one host and multiple monitors for simultaneous multi-screen display. It is usually connected with an HDMI cable or a VGA cable and generally includes a host, multiple (LCD ) monitor, multi-screen monitor stand, and matching keyboard and mouse, etc. A set of keyboard and mouse enables quick switching, and each screen displays and runs its own program completely independently.
How to assemble a multi-screen computer?
It depends on how many monitors you need. Generally speaking, 3 or 4 should be enough for stock trading. First, you need the following hardware configuration.
1. N monitors. If you need a few screens, buy a few monitors. The sizes are best the same.
2. Graphics card. A graphics card that supports multi-screen display is required. Most of today's graphics cards have 4 interfaces. Pay attention to the interface matching the display.
3. Multi-screen monitor stand. Recommend the King of Cost-Effectiveness Lege monitor stand. There are 2, 3, 4 and 6 screen brackets.
4. System settings. Under Windows system, press win+P key combination, and then select extended display.
Laptop multi-screen assembly solution?
Solution:
1. Take a micro-connector, which is the blue wire that connects the unit to the monitor. Plug one end into the monitor and the other end into the laptop micro-connector;
2. Right-click properties and select screen resolution;
3. There are four options in multi-monitor, 1 is to copy these displays, 1 is to extend the display, and 1 is only on the 1st Display, 1 is only displayed on No. 2, No. 1 represents the notebook, and No. 2 represents the monitor;
4. After selecting to copy these displays, click the "OK" button to save;
5. Select extended display and confirm to save;
6. Select display No. 1;
7. Select display No. 2;
What is the best way to assemble a computer and upgrade it?
The best way to assemble a computer upgrade depends on your needs and budget. The following are some common upgrade options:
1. Replace the GPU: If you need to improve the gaming performance of your computer, you can consider replacing the graphics card. Choosing the graphics card that's right for you needs to consider factors like budget, gaming needs, and compatibility with other parts of your computer.
2. Replace the CPU: If you need to improve the computing performance of your computer, you can consider replacing the CPU. It should be noted that replacing the CPU may require replacing other components such as the motherboard and memory, so the overall cost needs to be considered.
3. Replace the memory: If your computer has insufficient memory, consider adding more memory modules. It should be noted that the memory module must be compatible with the computer motherboard, and the frequency and capacity of the existing memory module must match the new memory module.
4. Replace the solid-state drive: If you need to improve the startup speed and response speed of your computer, you can consider replacing the solid-state drive. It should be noted that the capacity of the solid-state drive must be the same as or larger than the original mechanical hard drive.
5. Replace the power supply: If you need to replace the graphics card or other high-power components, you may need to replace the power supply. It should be noted that the power of the power supply must meet the needs, and a reliable brand of power supply must be purchased.
It should be noted that when upgrading your computer, you need to consider factors such as compatibility, power consumption, and heat dissipation between various components. If you are not sure how to upgrade your computer, it is recommended to seek help from professionals or experienced friends.
What are needed to assemble a multi-screen stock trading computer?
Motherboard: ASUS P5KPL-AM SE (integrated graphics card, sound card, network card)
CPU: Inter5300 (Core 2 Duo) Hard drive: Seagate 7200 250G Memory: Jinbang 2G (lifetime replacement)
The rest: chassis, power supply (buy point), optical drive, keyboard and mouse, monitor (800~900 yuan for 19-inch LCD monitor) reference price is about 2,700
How to assemble a computer display?
1. The base of monitors purchased online is generally separated from the monitor. After docking the base and the monitor, screw the bolts to the connection between the base and the monitor according to the hole positions.
2. Then find the connection port and power cord location of the monitor, then tighten the connection between the monitor bracket and the monitor to complete the fixing of the monitor bracket.
3. Find the interface cable of the monitor, take out the protective cover, and connect the monitor interface and the interface cable.
4. Find the interface cable of the monitor, take out the protective cover, and connect the monitor interface and the interface cable.
5. After connecting, connect the monitor power cord to the power source, then connect the cable to the same port on the computer, turn on the computer, and see the screen loading to confirm that the display connection is completed effectively.
How thick is the findx screen after replacing it?
findxAfter replacing the screen. It is slightly thicker than the original original screen by about one or two millimeters. Because the assembled screen is an LCD backlight screen. So it is thicker than the original screen.
itx assembly solution?
金河田N2S
All aluminum, all holes, no screws, the ITX box holds the M board and ATX power supply! It’s only 23cm*33cm, not much larger than an A4 sheet.
The configuration order is as follows (including quotation):
CPU: Intel 9400F 6 cores are enough for 1000,
Motherboard: ASRock B365M-itx can be plugged into M2 solid state 700,
Memory: Ship Avenger 3000 8*2 500,
Graphics card: GALAXY 1660SUPER standard cooling, mid-range level 1700,
Hard drive: 512G C2000 PRO 500,
Radiator: Cooler Master Sea Devil 120 water-cooled 300,
Chassis: Jinhetian N2S 260,
Power supply: Jintek VP450, 220,
GALAXY 1660super general,
Cooler Master Sea Devil 120
Are you tired of assembling computer monitors?
It’s not too tiring to assemble a computer display screen. Because assembling a computer display is not a physical job, but a skill job. Sit down on the chair and place the parts on the table. You can install these computer monitors and accessories.
Mini NAS assembly solution?
When assembling a mini NAS, first choose a small NAS case to make sure it can accommodate the required hard drives and motherboard. Then choose a motherboard and CPU that meet your needs, usually a low-power, high-performance processor and enough memory. The next step is to choose a suitable hard drive. You can choose SSD to speed up reading and writing, and consider storage capacity and data backup needs. After installing the hardware, install the appropriate operating system and NAS management software according to your needs. Finally, connect power, network, and external devices, and perform necessary setup and testing. After completing the above steps, you can assemble a fully functional mini NAS.
The above is the detailed content of Computer assembly solution with multiple screens in one machine?. For more information, please follow other related articles on the PHP Chinese website!

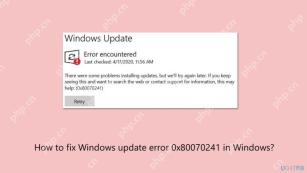 How to fix Windows update error 0x80070241 in Windows?Apr 16, 2025 am 12:00 AM
Windows Update failures do occur and can be due to a variety of reasons at the update or upgrade stage. Such failures can be annoying if they result in system u
 How to fix KB5055612 fails to install in Windows 10?Apr 15, 2025 pm 10:00 PM
Windows updates are a critical part of keeping the operating system stable, secure, and compatible with new software or hardware. They are issued on a regular b
 Game_Ship.exe Error in COD Warzone & Black Ops 6, Proven TipsApr 15, 2025 pm 08:06 PM
The Call of Duty series (including Black Ops 6, Warzone and Modern Warfare 3) may crash with game_ship.exe errors during the game. This article will guide you step by step how to resolve this crash problem with some methods. Black Ops 6, Warzone and Modern Warfare 3 continue to crash: game_ship.exe error It is reported that when playing these games, you often encounter game_ship.exe errors. You can find many complaints about this crash problem on Steam or Reddit. On your computer screen, the errors displayed may vary from game to game, for example: DirectX Error: DirectX
 How to Save Pictures on Google Drive? Follw the Guide Below!Apr 15, 2025 pm 08:04 PM
Google Drive: Your Cloud Photo Storage Solution Google Drive offers secure and reliable cloud storage for your valuable files, including photos, videos, and documents. This guide details several ways to upload your photos to Google Drive, covering bo
 Expert Guide to Finding Blue Prince Save File Location EasilyApr 15, 2025 pm 08:01 PM
Protecting Your Blue Prince Progress: Finding and Backing Up Save Files Knowing the location of your Blue Prince save files is crucial for protecting your game progress. This guide explains how to locate these files and create backups to prevent dat
 How to fix RESULT_CODE_MISSING_DATA error in Chrome and Edge?Apr 15, 2025 pm 08:00 PM
Google Chrome and Microsoft Edge, both founded on the Chromium engine, are leading browsers in Windows 11 because of their performance and integration of online
 Wanderstop Stuck on Loading Screen/Not Loading: Try 6 SolutionsApr 15, 2025 pm 06:02 PM
Troubleshooting Wanderstop Loading Issues: Effective Solutions Wanderstop, like many games, can experience issues such as freezing on the loading screen, crashing, or low FPS. This guide provides several solutions to resolve the loading screen proble
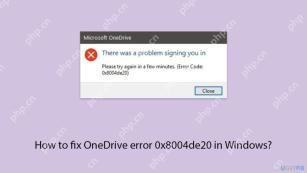 How to fix OneDrive error 0x8004de20 in Windows?Apr 15, 2025 am 12:00 AM
Microsoft OneDrive is the default cloud storage for Windows users, depending on it for file syncing between devices and keeping important documents saved in the


Hot AI Tools

Undresser.AI Undress
AI-powered app for creating realistic nude photos

AI Clothes Remover
Online AI tool for removing clothes from photos.

Undress AI Tool
Undress images for free

Clothoff.io
AI clothes remover

AI Hentai Generator
Generate AI Hentai for free.

Hot Article
Hot Tools

SAP NetWeaver Server Adapter for Eclipse
Integrate Eclipse with SAP NetWeaver application server.

Dreamweaver CS6
Visual web development tools

Zend Studio 13.0.1
Powerful PHP integrated development environment

EditPlus Chinese cracked version
Small size, syntax highlighting, does not support code prompt function

MinGW - Minimalist GNU for Windows
This project is in the process of being migrated to osdn.net/projects/mingw, you can continue to follow us there. MinGW: A native Windows port of the GNU Compiler Collection (GCC), freely distributable import libraries and header files for building native Windows applications; includes extensions to the MSVC runtime to support C99 functionality. All MinGW software can run on 64-bit Windows platforms.

