


If you are struggling with Lenovo computer hardware installation, you are not alone. Many users have encountered difficulties when installing new hardware, which is why PHP editor Zimo today brings you a detailed guide on the Lenovo computer hardware installation steps. This article will guide you through the process step by step to ensure your hardware installation is completed smoothly.

Lenovo computer hardware installation steps?
Right-click My Computer--Properties--Hardware--Device Manager, then select an item, right-click, scan to detect hardware changes, and then the computer should prompt that new hardware is found, and then Wait for it to automatically search for the driver. If you have deleted the driver, just search for the driver online based on the model of your audio source hardware, and then install it.
How much does it cost to assemble computer hardware?
Intel i5 9400F six-core, 960 pieces of loose chips, ASUS B360M-PLUS GAMING motherboard, 649 pieces, ADATA 8G DDR4 2666 gaming Veyron, two pieces of 489 pieces, Kingston A1000 480G solid state drive, 499 pieces, Leadtek P1000 4G professional graphics card, 2700 yuan, Huntkey WD500K rated 500W power supply, 299 yuan, Jiuzhou Fengshen Xuanbing 400 radiator, 99 yuan, Xingulux chassis, 189 yuan, a total of 5900 yuan, because it is an i7 7700HQ notebook CPU, so it is for desktop use No, the i5 9400F six cores and six threads are as powerful as the i7 7700. The P1000 4G is a graphics card used in professional 3D, design, graphics, video editing, etc. If you are using it for work, you can assemble it according to these hardware,
Assembly and installation steps of bedside table?
1. The installation steps of assembling a bedside table require a certain amount of time and patience. 2. First, prepare all the parts and tools according to the instructions or drawings on the bedside table. Then, follow the instruction manual and assemble it step by step. Usually, you need to assemble the main structure of the bedside table first, including the bottom panel, side panels and top panel, etc., and then install accessories such as drawers and doors. During the assembly process, you need to pay attention to the position and direction of the parts to ensure stable and correct installation. 3. In addition, you need to pay attention to some details, such as using appropriate screwdrivers and wrenches to avoid over-tightening or loosening. During the assembly process, adjustments and adjustments can be made as needed to ensure the overall effect and functionality of the bedside table. The steps for assembling a bedside table can vary depending on the brand and model, so it's best to read the instructions carefully or seek professional advice before starting to assemble it. In addition, if you are not familiar with the assembly process or do not have enough time and ability, you can also consider asking a professional furniture installer to install it to ensure the quality and use effect of the bedside table.
Assemble cat cage installation steps diagram?
Buy 5 pieces of spray-painted iron mesh one meter by two meters, prepare some wire to tie it up, and tape to wrap the edges.
2. Install the size you want and use large iron shears to trim the iron mesh.
3. Install the iron mesh and use iron wire to connect the iron mesh on all sides. This is also the most time-consuming step. 4. The edges tied with iron wire are very sharp and can easily scratch the dog or yourself. You have to seal it with tape, which is also very time-consuming. 5. When taking initial shape, remember to leave a door open.
Computer hardware assembly process?
Basic steps for computer hardware assembly:
1. Disassemble the chassis, install the bottom plate and blank; install the power supply; fix the motherboard in the chassis;
2. Install the CPU in the CPU slot on the motherboard; fix the fan above the CPU; fix the hard drive in the case and connect the power supply; fix the optical drive in the case and connect the power supply; connect the hard drive and optical drive with the hard drive data cable Connect to the motherboard;
3. Insert the memory into the memory slot of the motherboard; Connect the monitor, insert the monitor's data cable into the AGP slot behind the motherboard; Connect the keyboard, insert the keyboard into the keyboard behind the motherboard socket; Connect the mouse and insert the mouse into the mouse socket behind the motherboard; Plug the audio cable of the speaker & headphone into the audio interface behind the motherboard;
4. Plug the network cable into the network card interface behind the motherboard; Turn on the computer to test the hardware ; After the test is correct, package the chassis.
Notes:
1. Purchase all accessories according to the configuration plan you have drawn up first. Usually, the configuration plan prepared in advance may not match the market supply situation, so the desired product cannot be purchased. At this time, adjustments have to be made according to the market supply situation. However, as long as the principle of obtaining the best performance-price ratio is followed, accurate adjustment results will be easily obtained within the established plan.
2. Check the appearance of each accessory to see if it is damaged, especially boxed products. Be sure to check whether there are traces of unpacking. For loose parts, pay attention to whether there are traces of disassembly or assembly. For products with surface Be especially careful with scratched parts, as they may cause instability in the computer's operation.
Laptop assembly machine installation steps?
Assembling Notebook Steps
我們應該先把顯示卡、記憶體、CPU安裝到主機板上,按照相關配件的說明書和卡槽,進行組裝,先把CPU、顯示卡、記憶體條用連接線把它們和主機板相互連接起來,這個過程中要照著說明書進行,保證線不會插錯位置,同時也保證筆記本能夠正常運作。線接好之後,根據主機板的卡槽和CPU、顯示卡、記憶體條的實際情況將它們固定在主機板上,固定過程是使用螺絲和螺絲起子進行的。
主機板上的配件安裝完成之後,將主機板上的其他接線接好,然後再放入筆記本的主機板凹槽處,用螺絲和螺絲起子進行固定。接下來是進行風扇的安裝,將風扇和主機板連接好,然後將風扇裝入外殼的通風口處,用螺絲固定。風扇安裝完畢後,筆記本外殼內部的安裝基本上完成,將帶有鍵盤的殼放入主機板上方,用螺絲固定後裝入鍵盤。此時我們進行硬碟的安裝,將電腦反過來放置,然後將硬碟裝入硬碟的凹槽,並將其和主機板連接好,再用螺絲固定。固定好之後,將保護硬碟部分的外殼安裝用螺絲固定,此後就是進行電源的安裝了,這一步很簡單,直接將電源裝入電源的凹槽就可以了。到這裡電腦就基本上安裝完畢了,如果中間不出意外的話,電腦現在就可以正常啟動了。
組裝電腦硬體都相容嗎?
是的,裝機的時候所選購的硬體都是考慮到了相容性,一般都會完美相容,只有極個別硬體可能會出現不相容的問題。
管線電插座安裝組裝步驟?
一、插座底盒清潔。插座安裝在木工油漆工等之後進行,而久置的底盒子難免堆積大量灰塵。安裝時先將開關插座底盒清潔,特別是將盒內的灰塵雜質清理乾淨,並用濕布將盒內殘存灰塵擦除。這樣做可預防特殊雜質影響電路使用的情形。
二、電源線處理。將盒內甩出的導線留出維修長度,然後削出線芯,注意不要碰傷線芯。將導線順時針方向盤繞在開關或插座對應的接線柱上,然後旋緊壓頭,要求線芯不得外露。
三、插座三線接線方法。火線接入開關2個孔中的一個A標記,再從另一個孔接出絕緣線接入下面的插座3個孔中的L孔內接牢。零線直接連接插座3個孔中的N孔內接牢。接地線直接連接插座3個孔中的E孔內接牢。若零線與接地線錯接,使用電器時會出現跳脫現象。
四、插座固定安裝。先將盒子內甩出的導線由塑膠台的出線孔中穿出,再把塑膠台緊貼於牆面用螺絲固定在盒子上。固定好後,將導線依各自的位置從開關插座的線孔中穿出,並依接線要求將導線壓牢。最後將開關或插座貼於塑膠台上,找正並用螺絲固定牢,蓋上裝飾板。
簡易衣櫃怎麼組裝簡易衣櫃安裝步驟?
1、安裝時櫃體正面向下,按下從左到右或從右到左開始安裝。
2、板件組裝安畢後,請確保櫃體對角線誤差在正負一毫米之內。
3、對角線測量完畢後,請在兩側板(旁板)上標示,要釘背板的層板或立板位置,以方便釘背板釘。
4、櫃體擺放到位後,請用水平尺,測量櫃體是否水平,如不水平,請調結到水平位置,常用方法為在櫃體下墊東西。
5、櫃體水平後,可依序安裝:掛衣桿、抽屜、門板或移門,伸縮衣鏡之後,依照要求來安裝把手。是不是很簡單,如果這樣還不會的話,那就找萬師傅安裝吧。
簡易衣櫃怎麼組裝,簡易衣櫃安裝步驟?
簡易衣櫃的組裝步驟如下:
根據安裝說明書,先將衣櫃各部位的組成做了解,因為每個部位採用的都是不同標誌,只有提前了解清楚,安裝起來才不容易出錯。
依照安裝說明書來搭建衣櫃的框架,先將它下部搭建好,再把衣櫃布給套進去,接著將上部結構安裝上去,並保證各個部位的牢固性。
最後將櫃體擺放到位,調整好衣櫃內部的佈局,使其能夠方便存放衣物。
簡易衣櫃的安裝步驟如下:
首先根據安裝說明書,對衣櫃各部位的組成做個了解,因為每個部位採用的都是不同標誌。
接著按照安裝說明書來搭建衣櫃的框架,先將它下部搭建好,再把衣櫃布給套進去。
最後將上部結構安裝上去,並保證各部位的牢固性,便可以使用了。
在安裝過程中需要注意以下事項:
先根據安裝說明書,對衣櫃各部位的組成做個了解,因為每個部位採用的都是不同標誌。
接著依照安裝說明書搭建衣櫃的框架,先將它下部搭建好,再把衣櫃布給套進去。
最後將上部結構安裝上去,並保證各部位的牢固性,便可以使用了。
常見問題及解決方法:
安裝時,櫃體應正面向下,然後按從左到右或從右到左開始安裝。
板件組裝安畢之後,請確保櫃體的對角線誤差在正負1MM之內。
對角線測量完畢後,請在兩側板上標示要釘背板的層板或立板位的置,以方便釘背板時釘。
櫃體擺放到位後,請用水平尺測量櫃體是否水平,如果不水平,請調結到水平的位置。
The above is the detailed content of Lenovo computer hardware installation steps?. For more information, please follow other related articles on the PHP Chinese website!

 Spotlight on How to Fix Taskbar Search Bar Blank Box on WindowsApr 19, 2025 pm 08:06 PM
Troubleshooting a Blank Windows 11/10 Taskbar Search Box A blank search bar in Windows 10 or 11 severely impacts usability. This guide offers solutions to resolve this common issue, preventing you from easily searching for apps and files. The Proble
 How to Fix Forever Skies Crashing? Try the 6 Effortless WaysApr 19, 2025 pm 08:01 PM
Encountering crashes in Forever Skies? This guide offers solutions to get your game running smoothly. We'll cover troubleshooting steps for crashes on startup and provide fixes for common causes. Forever Skies Crashes at Startup: Common Causes Fore
 Device Manager Is Blank or Not Showing Anything? Fix It NowApr 19, 2025 pm 06:02 PM
Troubleshooting a Blank Device Manager in Windows Device Manager, a crucial Windows utility for managing hardware, can sometimes fail to display any content. This issue, often caused by disabled services or registry permission problems, can lead to v
 Encountering Schedule I Slow Motion on PC? Resolve It Here!Apr 19, 2025 pm 06:01 PM
Solve the slow motion problem of "Schedule I" PC version and enjoy a smooth gaming experience! Many players encounter annoying slow motion problems while playing Schedule I on PC, and this article will provide the best solution. Quick navigation: Question: Schedule I Slow Motion Method 1: Disable Vertical Synchronization (VSync) Method 2: Run the game with a standalone graphics card Method 3: Update/uninstall the graphics card driver Method 4: Update DirectX Summarize Schedule I is a popular indie game where players make and sell drugs. Fans of Breaking Bad will especially like the game because it has a lot of tribute elements. The game is currently in the early stage of experience
 RuneScape: Dragonwilds Fatal Error? Try Those Five Ways!Apr 18, 2025 pm 08:06 PM
Encountering a fatal error in RuneScape: Dragonwilds? Many players experience this frustrating issue. This guide offers five potential solutions to get you back in the game! Troubleshooting RuneScape: Dragonwilds Fatal Errors RuneScape: Dragonwilds,
 Secure Your PC While Malware Found in Schedule 1 ModsApr 18, 2025 pm 08:04 PM
The popular 2025 game, Schedule 1, recently faced a malware scare. Two popular mods, Froggyp’s Increased Stack Size Limit and Backpack Mod Reupload, were discovered to contain Trojan viruses. The Schedule 1 subreddit issued a warning and the mods w
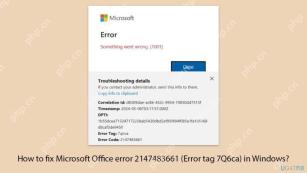 How to fix Microsoft Office error 2147483661 (Error tag 7Q6ca) in Windows?Apr 18, 2025 pm 08:00 PM
Microsoft Office remains to be among the most fundamental packages of software both for home and business use. From writing reports in Word, editing spreadsheet
 RuneScape Dragonwilds Black Screen on PC: Resolve It Here!Apr 18, 2025 pm 06:01 PM
RuneScape: Dragonwilds Black Screen Problem Solving Guide Many players encounter black screen problems when starting RuneScape: Dragonwilds, which causes the game to not run normally. Don't worry, this guide offers a variety of solutions to help you get back to the Dragon's Wilderness! RuneScape on PC: Dragonwilds black screen problem RuneScape: Dragonwilds is an open-world multiplayer online game spin-off that supports up to four-player teams, challenging dangerous environments full of dangerous creatures (especially dragons). Like other games, RuneScape: Dragonwilds has some malfunctions, such as black screen questions


Hot AI Tools

Undresser.AI Undress
AI-powered app for creating realistic nude photos

AI Clothes Remover
Online AI tool for removing clothes from photos.

Undress AI Tool
Undress images for free

Clothoff.io
AI clothes remover

Video Face Swap
Swap faces in any video effortlessly with our completely free AI face swap tool!

Hot Article
Hot Tools

SublimeText3 English version
Recommended: Win version, supports code prompts!

VSCode Windows 64-bit Download
A free and powerful IDE editor launched by Microsoft

SAP NetWeaver Server Adapter for Eclipse
Integrate Eclipse with SAP NetWeaver application server.

SublimeText3 Linux new version
SublimeText3 Linux latest version

Dreamweaver CS6
Visual web development tools

