

 Computer TutorialsTroubleshootingHow to assemble dining table and chairs? How to choose computer desks and chairs?
How to assemble dining table and chairs? How to choose computer desks and chairs?

In life, we often encounter the situation of assembling dining tables and chairs and purchasing computer tables and chairs, but for many people, these operations are not easy. How to assemble dining tables and chairs correctly to ensure stability and beauty? How to choose a suitable computer desk and chair to meet comfort and health requirements? Today, PHP editor Yuzai will answer these questions. The following detailed content will provide you with practical guidance to help you easily deal with these household problems.

How to assemble dining table and chairs?
Answer below: The exact steps for assembling a dining table and chairs may vary, depending on the product purchased and the manufacturer's instructions. Here are the general assembly steps:
1. Prepare tools: Usually you will need a screwdriver, a wrench and possibly other tools.
2. Read the instructions: Make sure you have read and understood the product assembly instructions. Each step and required tools are described in detail here.
3. Prepare the working area: Choose a spacious working area and clean its surface to ensure the stability and safety of the assembly.
4. Classify and organize parts: Classify parts according to type and function, and ensure that all parts are complete.
5. Assemble the table: Connect the various parts of the table together according to the instructions. This may involve attaching the legs to the tabletop, or using screws to secure the tabletop to a support structure.
6. Assemble the chair: Connect the various parts of the chair together according to the instructions. This may involve securing the chair legs to the seat, or the back to the seat.
7. Inspection and adjustment: After completing assembly, carefully check the connection and fixation of each component. Make sure all screws and connections are tight and that the table and chairs are stable.
8. Cleaning and Maintenance: Clean and maintain your new dining table and chairs to ensure long-term use. Use appropriate cleaning agents and methods according to manufacturer's recommendations.
Please note that the above steps are only a general guide and specific steps may vary by product and manufacturer. Always follow the specific directions in the product instructions and seek professional help as needed.
How to choose computer desks and chairs?
Generally speaking, the size of a home computer desk should enable people to maintain two basic vertical positions when sitting. The first is to keep the thighs and calves vertical when placing the two feet flat on the ground. . The second is that when the two arms hang down naturally, the upper arm and lower arm are basically vertical. At this time, the height of the tabletop should just touch the lower plane of the forearm. Only such a standard design can allow people to maintain correct sitting and writing postures. If the height of tables and chairs is unreasonable, it will directly affect people's sitting postures and cause great harm to the user's body. At the same time, the height of the space under the desk top should not be less than 580mm, and the width of the space should not be less than 520mm. The height and position of the computer desk are very important.
At present, the length of computer desks is generally 80, 100, 120, 150, 200CM, and the height is generally 75, 80CM. Most of the current computers have LCD monitors, so the heights are mostly 50, 60, 45CM. my country's national standard requires that the height difference between supporting tables and chairs should be controlled within 280 to 320CM. There are also relevant standards for the height of tables and chairs. Among them, the table height has four standards: 700, 720, 740, and 760mm, and the chair type has three standards: 400, 420, and 440mm. At the same time, we have also collected the sizes of different tables and chairs that are common in home life.
Usually there are three sizes of computer desks: 0.5*1, 0.6*1.2, 0.7*1.4 meters
General computers The table size is, 890*460*980mm
The desktop computer desk size is, 1400*500*760mm
The 1.2 meter computer desk size is, 1200*600*750*25mm
The size of the 1.4-meter computer desk is, 1400*600*750*25mm
The size of the 1.6-meter computer desk is, 1600*600*750*25mm
Assembly steps of Peppa Pig desk and chair ?
The assembly steps of Peppa Pig desk chair may vary depending on the specific product model and manufacturer. Generally speaking, the assembly steps need to follow the following basic steps:
1. Open the package: Check whether all accessories are complete and confirm the various parts of the desk and chair.
2. Assemble the desk: Follow the instructions on the instruction manual to assemble the various parts of the desk together. Common steps include connecting the desktop to the stand, installing drawers, etc.
3. Assemble the chair: Follow the instructions on the instruction manual to assemble the various parts of the chair together. Common steps include attaching chair legs to the seat, installing armrests, etc.
4. Secure desks and chairs: Fix desks and chairs in place to ensure they are stable and reliable.
5. Install accessories: If there are other accessories, such as drawers, pen holders, etc., install them according to the instructions in the manual.
6. Cleaning and Organizing: Clean desks and chairs and make sure no unnecessary parts or junk are left behind. Arrange your desk and chairs to make sure they are clean and tidy.
It should be noted that different product models and manufacturers may have different assembly steps and precautions, so please be sure to read the instructions carefully and follow the instructions. If you encounter difficulties or problems, you can contact the manufacturer or professionals for help.
How to buy computer tables, chairs and desks?
You can refer to the following principles when purchasing tables and chairs:
1. According to actual needs:
According to your actual needs, such as choosing the size according to the size of the room, such as choosing the style, color, etc. according to your own preferences.
2. Distinguish by value:
Expensive tables and chairs are generally very good, but that does not mean that cheap ones are not good. Do everything according to your ability and your own financial situation. Certainly.
3. Purchasing method:
If you don’t know which style to choose, you can first go to the furniture store to see the real thing, experience it in person, and compare from multiple brands.
In addition, you can also choose to purchase in the online store. Generally speaking, the price purchased in an online store is lower than the price purchased in a physical store.
How to assemble a computer motherboard?
Pick up the chassis and lay it flat, grab the handle of the chassis baffle with your hand, pull it back, and the chassis baffle will be taken out.
1. Prepare tools and materials: You need to prepare all the tools and materials needed to assemble a computer host. This includes the computer host itself, monitor, keyboard and mouse, power supply, hard drive, memory stick, processor and radiator,
2. Open the host box: First, you need to open the host box for subsequent steps installation work. Usually, you can use a screwdriver to turn the screws on the corners of the main case, and then open the main case.
3. Install the power supply: The power supply is an important part of the computer host.
How to assemble a philips computer?
Put the three major pieces together normally, stuff them into the main case, hang them on the Philips monitor, light them up, and it should be OK!
How to assemble a computer host?
Seven major steps:
1/7 step-by-step reading
Prepare tools and materials: You need to prepare all the tools and materials needed to assemble a computer host. This includes the computer host itself, monitor, keyboard and mouse, power supply, hard drive, memory stick, processor and radiator, motherboard, optical drive and other accessories.
2/7
Open the main chassis: First, you need to open the main chassis for subsequent installation work. Usually, you can use a screwdriver to turn the screws on the corners of the main case, and then open the main case.
3/7
Install the power supply: The power supply is an important part of the computer host. It is responsible for providing power to the computer host. You need to install the power supply inside the main case and connect it to the motherboard.
4/7
Install the motherboard: The motherboard is the core component of the computer host and is responsible for connecting all hardware devices. You need to install the motherboard inside the main case and connect it to the power supply and other hardware devices.
5/7
Install the memory stick: The memory stick is an important part of the computer host. It is responsible for storing data and speeding up the computer. You need to install the memory stick into the memory slot on the motherboard and make sure the memory stick is securely in place.
6/7
Install the processor and radiator: The processor is the core component of the computer host and is responsible for processing all instructions of the computer. The role of the heat sink is to help dissipate heat from the processor to prevent it from overheating. You need to install the processor into the processor socket on the motherboard and install the heat sink over the processor.
7/7
Install the hard disk and optical drive: The hard disk is an important part of the computer host and is responsible for storing data. The optical drive is an accessory of the computer host and is responsible for reading the data on the optical disc. You need to install the hard drive and optical drive in the hard drive cage or optical drive slot inside the main case and connect them to the motherboard.
How to assemble aco computer?
Step 1 of assembling a computer
The first is the installation of the chassis, which mainly involves unpacking the chassis and installing the power supply in the chassis, then installing the motherboard and installing the motherboard on the chassis motherboard , assemble the computer and then install the CPU, insert the required CPU into the motherboard processor socket, and install the cooling fan, assemble the memory module in the computer, and insert the memory module into the motherboard memory slot.
Assemble the computer step 2
The next step is to install the graphics card, select the appropriate slot according to the graphics card bus; assemble the computer and install the sound card. Most of the mainstream sound cards in the market now are sound cards with PCI slots; The installation of drives mainly focuses on the installation of hard disks, optical drives and floppy drives; then there is the assembly of the connections between the computer chassis and the motherboard, that is, various indicator lights and power switch wires. The connection of PC speakers, as well as the connection of power cables and data cables of hard disk, optical drive and floppy drive.
Step 3 of assembling a computer
The third step of assembling a computer is to close the chassis cover. Theoretically, after installing the host, you can close the chassis cover, but in order to avoid problems later For inspection, it is best not to cover it first, and then cover it after the system is installed. Then there is the installation of input devices. When assembling the computer, you also need to connect the keyboard and mouse to integrate with the host; the installation of output devices, that is, the installation of the monitor; and then Recheck each wiring connection and prepare for testing.
Step 4 of Assembling a Computer
Assemble the computer and power up the machine. If the monitor can display normally, it means that the initial installation has been correct. At this time, enter the BIOS for initial system settings. After completing the above steps of assembling the computer, the general hardware installation is basically completed, but to make the computer run, the following installation steps are required.
Step 5 of assembling a computer
The next step is to assemble the computer's partitioned hard drive and format the hard drive, and install the operating system, such as Windows 98 or Windows XP. After assembling the computer and installing the operating system, install drivers such as graphics card, sound card and other drivers; perform a 72-hour bake-in. If there is a hardware problem, it will be discovered during the 72-hour bake-in.
How to assemble a noc computer?
The steps to assemble a computer are as follows: 1. In the first step, open all the accessories and open the chassis.
2. The second step is to install the CPU and CPU fan, and place the memory module in the corresponding card slot.
3. In the third step, first install the motherboard foot nuts, and then place the motherboard into a stable chassis to secure it.
4. The fourth step is to arrange the cable according to the instruction manual.
5. The fifth step is to connect the power supply and the host assembly is completed.
6. The sixth step is to connect the host and the monitor. First connect the VGA cable to the monitor, and then fix the two screws at the back.
7. Step 7. After the fixation is completed, connect the other end of the VGA cable to the computer host.
8. The eighth step is to connect the power cord to the monitor, and the computer assembly process is basically completed.
How to assemble a computer mouse?
The steps are as follows:
1. First, prepare all the accessories of the wireless mouse, including: a wireless mouse, 2 batteries matching the wireless mouse, and a USB plug-in for the mouse.
2. The next step is to install the mouse battery. First, gently open the mouse cover. Note: Just lift it gently from the high-curved tail of the mouse. Do not lift it from the scroll wheel (left and right buttons) to avoid damaging the mouse.
3. After opening the mouse cover, you can see that there are two battery slots on the left and right inside. The above prompts the battery installation direction of the positive and negative poles. According to this prompt, insert the 2 batteries and install them.
4. After installing the battery, close the mouse cover.
5. Next, find the notebook USB socket and insert the USB plug-in for the mouse into it.
6. At this time, press the computer power button to turn on the computer. Then turn the mouse over, turn it on, and the prompt light will light up. Note: "I" means open, O means closed.
The above is the detailed content of How to assemble dining table and chairs? How to choose computer desks and chairs?. For more information, please follow other related articles on the PHP Chinese website!

 How to use Copilot Vision for free in Microsoft EdgeMay 09, 2025 am 10:32 AM
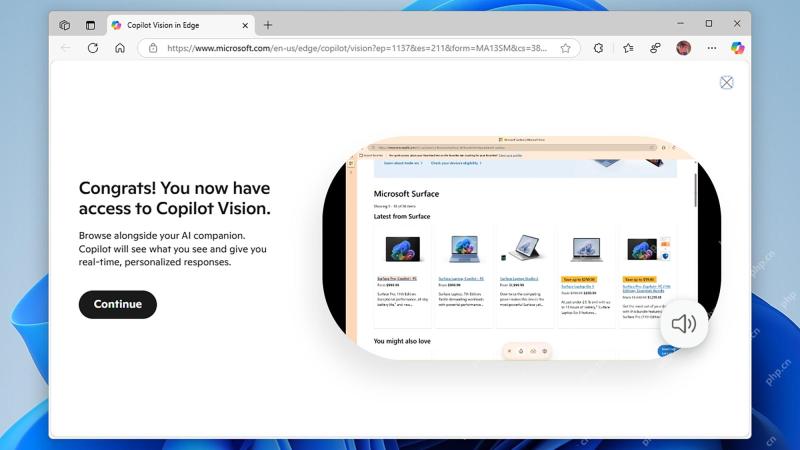
Staying current with all the new AI tools is a challenge. Many might even overlook readily available AI features. For instance, Copilot Vision is now free for all Microsoft Edge users – a fact easily missed if you don't regularly use Edge or haven't
 Discover Survival Machine Save File Location & Protect FilesMay 08, 2025 pm 08:10 PM
This guide shows you where to find and how to protect your Survival Machine game save files. Knowing the save file location is crucial for managing your game, troubleshooting issues, or adjusting settings. Finding Your Survival Machine Save Files Fo
 Effective Ways to Back up and Restore Windows CredentialsMay 08, 2025 pm 08:04 PM
This guide explains how to back up and restore Windows credentials, a crucial system mechanism for secure authentication and credential storage. We'll cover what credentials are, how to safeguard them, and recovery methods. What Are Windows Credenti
 Top 5 Proven Fixes for Sunderfolk out of Video MemoryMay 08, 2025 pm 08:02 PM
Solving Sunderfolk's Video Memory Issues: A Comprehensive Guide Sunderfolk, the engaging turn-based tactical RPG, can sometimes encounter video memory limitations. This guide provides solutions to resolve "Sunderfolk out of video memory" er
 How to fix backup error 0x81000019 in Windows?May 08, 2025 pm 08:00 PM
Windows has a built-in backup program that allows people to create system images and restore points. During this, however, some people find themselves facing th
 Among Us 3D Crashing/Not Launching: Check This Fresh GuideMay 08, 2025 pm 06:01 PM
Among Us 3D PC version failed or crashed? MiniTool provides you with practical solutions! Many players encounter startup failure, crash, black screen or KWS issues when playing Among Us 3D PC version. This article will provide several ways to help you solve these problems and improve game performance. Quick navigation: How to fix the failure or crash of the Among Us 3D PC version Summarize Among Us 3D is a 3D version of the popular multiplayer Among Us, which combines elements of teamwork and betrayal. Many players reported crashes, black screens or stuck in the initial interface when the game started. Please follow the steps below to try to resolve the issue one by one. How to fix Among
 NVIDIA OpenGL Driver Error Code 3 (Subcode 2/7), Quick Fix!May 07, 2025 pm 08:01 PM
NVIDIA OpenGL driver error code 3: Game operation obstacles and solutions On Windows 11/10 systems, NVIDIA OpenGL driver error code 3 may cause the game to fail to run. This article will provide a variety of ways to resolve error code 3 (subcode 2 or 7). OpenGL is an industry-standard graphical application programming interface (API) for rendering 3D and 2D graphics. NVIDIA supports OpenGL for its GPU to perform at its best. However, NVIDIA OpenGL driver error code 3 interrupts all operations, causing the game and video/image editing software to be unusable. The error message may be as follows: NVI
 How to fix Windows not booting after activating Secure Boot?May 07, 2025 pm 08:00 PM
Secure Boot is a built-in security function of newer UEFI firmware that helps make sure only trusted, digitally signed operating systems and bootloaders can boo


Hot AI Tools

Undresser.AI Undress
AI-powered app for creating realistic nude photos

AI Clothes Remover
Online AI tool for removing clothes from photos.

Undress AI Tool
Undress images for free

Clothoff.io
AI clothes remover

Video Face Swap
Swap faces in any video effortlessly with our completely free AI face swap tool!

Hot Article
Hot Tools

Safe Exam Browser
Safe Exam Browser is a secure browser environment for taking online exams securely. This software turns any computer into a secure workstation. It controls access to any utility and prevents students from using unauthorized resources.

SublimeText3 Mac version
God-level code editing software (SublimeText3)

mPDF
mPDF is a PHP library that can generate PDF files from UTF-8 encoded HTML. The original author, Ian Back, wrote mPDF to output PDF files "on the fly" from his website and handle different languages. It is slower than original scripts like HTML2FPDF and produces larger files when using Unicode fonts, but supports CSS styles etc. and has a lot of enhancements. Supports almost all languages, including RTL (Arabic and Hebrew) and CJK (Chinese, Japanese and Korean). Supports nested block-level elements (such as P, DIV),

Notepad++7.3.1
Easy-to-use and free code editor

WebStorm Mac version
Useful JavaScript development tools

