Django model
Django provides good support for various databases, including: PostgreSQL, MySQL, SQLite, and Oracle.
Django provides a unified calling API for these databases. We can choose different databases according to our business needs.
MySQL is the most commonly used database in web applications. In this chapter we will use Mysql as an example to introduce. You can go through the MySQL tutorial on this site Learn more about the basics of Mysql.
Database configuration
We find the DATABASES configuration item in the settings.py file of the project and modify its information to:
DATABASES = {
    'default': {
        'ENGINE': 'django.db.backends.mysql',
        'NAME': 'test',
        'USER': 'test',
        'PASSWORD': 'test123',
        'HOST':'localhost',
        'PORT':'3306',
    }
}
The above contains the database name and user The information is the same as the corresponding database and user settings in MySQL. Django connects to the corresponding database and user in MySQL based on this setting.
Define model
Create APP
Django stipulates that if you want to use a model, you must create an app. We use the following command to create a TestModel app:
python manage.py startapp TestModel
The directory structure is as follows:
HelloWorld
|-- TestModel
|   |-- __init__.py
|   |-- admin.py
|   |-- models.py
|   |-- tests.py
|   `-- views.py
We modify the TestModel/models.py file, the code is as follows:
# models.py
from django.db import models

class Test(models.Model):
    name = models.CharField(max_length=20)
The above classes The name represents the database table name and inherits models.Model. The fields in the class represent the fields (name) in the data table. The data types include CharField (equivalent to varchar) and DateField (equivalent to datetime). The max_length parameter limits the length.
Next, find the INSTALLED_APPS item in settings.py, as follows:
INSTALLED_APPS = (
    'django.contrib.admin',
    'django.contrib.auth',
    'django.contrib.contenttypes',
    'django.contrib.sessions',
    'django.contrib.messages',
    'django.contrib.staticfiles',
    'TestModel',               # 添加此项
)
Run python manage.py syncdb on the command line and see a few lines of "Creating table..." , your data table is created.
Creating tables ...
……
Creating table TestModel_test  #我们自定义的表
……
The structure of the table name is: app name_class name (such as: TestModel_test).
Note: Although we do not set a primary key for the table in models, Django will automatically add an id as the primary key.
Database operation
Next we add the testdb.py file in the HelloWorld directory and modify urls.py:
from django.conf.urls import *
from HelloWorld.view import hello
from HelloWorld.testdb import testdb

urlpatterns = patterns("",
        ('^hello/$', hello),
        ('^testdb/$', testdb),
)
Add data
To add data, you need to create an object first, and then execute the save function, which is equivalent to INSERT in SQL:
# -*- coding: utf-8 -*-

from django.http import HttpResponse

from TestModel.models import Test

# 数据库操作
def testdb(request):
	test1 = Test(name='w3cschool.cc')
	test1.save()
	return HttpResponse("<p>数据添加成功!</p>")
Visit http://192.168.45.3:8000/testdb/ and you can see the prompt that the data has been added successfully. .
Getting data
Django provides a variety of ways to obtain the contents of the database, as shown in the following code:
# -*- coding: utf-8 -*-

from django.http import HttpResponse

from TestModel.models import Test

# 数据库操作
def testdb(request):
	# 初始化
	response = ""
	response1 = ""


	# 通过objects这个模型管理器的all()获得所有数据行,相当于SQL中的SELECT * FROM
	list = Test.objects.all()

	# filter相当于SQL中的WHERE,可设置条件过滤结果
	response2 = Test.objects.filter(id=1)

	# 获取单个对象
	response3 = Test.objects.get(id=1)

	# 限制返回的数据 相当于 SQL 中的 OFFSET 0 LIMIT 2;
	Test.objects.order_by('name')[0:2]

	#数据排序
	Test.objects.order_by("id")

	# 上面的方法可以连锁使用
	Test.objects.filter(name="w3cschool.cc").order_by("id")

	# 输出所有数据
	for var in list:
		response1 += var.name + " "
	response = response1
	return HttpResponse("<p>" + response + "</p>")
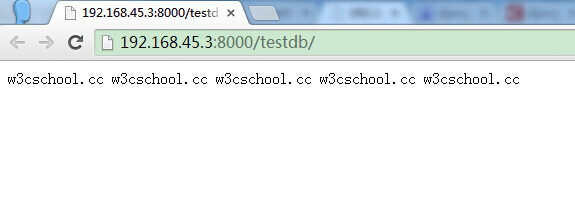
The output result is as shown below:

Update data
To modify data, you can use save() or update():
# -*- coding: utf-8 -*-

from django.http import HttpResponse

from TestModel.models import Test

# 数据库操作
def testdb(request):
	# 修改其中一个id=1的name字段,再save,相当于SQL中的UPDATE
	test1 = Test.objects.get(id=1)
	test1.name = 'w3cschoolphp中文网'
	test1.save()

	# 另外一种方式
	#Test.objects.filter(id=1).update(name='w3cschoolphp中文网')

	# 修改所有的列
	# Test.objects.all().update(name='w3cschoolphp中文网')

	return HttpResponse("<p>修改成功</p>")
Delete data
To delete an object in the database, just call the object's Just delete() method:
# -*- coding: utf-8 -*-

from django.http import HttpResponse

from TestModel.models import Test

# 数据库操作
def testdb(request):
	# 删除id=1的数据
	test1 = Test.objects.get(id=1)
	test1.delete()

	# 另外一种方式
	# Test.objects.filter(id=1).delete()

	# 删除所有数据
	# Test.objects.all().delete()

	return HttpResponse("<p>删除成功</p>")


